
latest
habitat tv

Say goodbye to the morning scramble for keys, coats and sunglasses and hello to this… see this and more videos
blog

Reader roundup: Happy dogs, custom colours and a small Resene fan
We love to share what you have been up to with Resene paints and products!… more
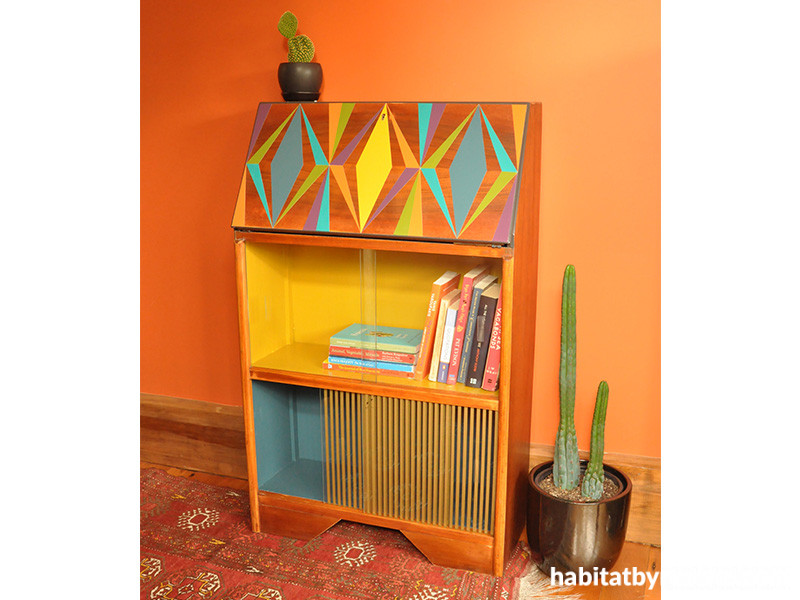
A pre-loved desk gets some new love
01 Aug 2019
As technology grows, the need for pen and paper becomes less and less – leading us to forget about the unique pieces of furniture that accompanied traditional means of communication. With a little inspiration, wallpaper from the Resene Wallpaper Collection and a few favourite Resene testpots, you can turn to a forgotten piece of furniture into a stylish staple, ensuring that it stays a key part of your furniture family for years to come.
You will need:
- Old writing desk
- Sandpaper
- Cloths
- Painters tape
- Resene Quick Dry waterborne primer undercoat
- Your choice of Resene wallpaper – Fleur used Resene Wallpaper Collection 519846
- Resene Lustacryl in colours that complement your wallpaper selection – Fleur used Resene Fast Forward, Resene Influential, Resene Bi Hoki, Resene Yowza, Resene Untamed and Resene RSVP, or you could use Resene testpots for the outside
- Resene Danska Teak Oil
- Paintbrush
- Soft sanding block or very fine finishing sandpaper
- Measuring tape or ruler
- Scissors
- PVA glue
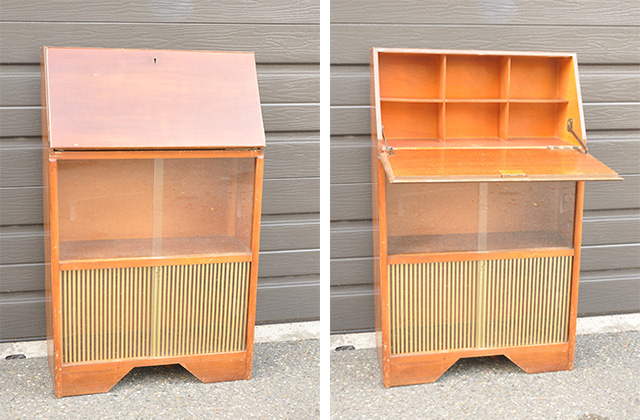
Step 1 Start by sanding off the old varnish from the wooden areas that you want to remain wood. Use 160 grit sandpaper to remove the old varnish, then 180 grit sandpaper to finish the wood to a smooth finish, using finer sandpapers if needed. Paint stripper could be used to remove thick or stubborn varnish, if needed.
Step 2 Lightly sand the areas of wood that are going to be painted to create a surface for the paint to stick to. Dust the sanded areas down with a soft, clean cloth.
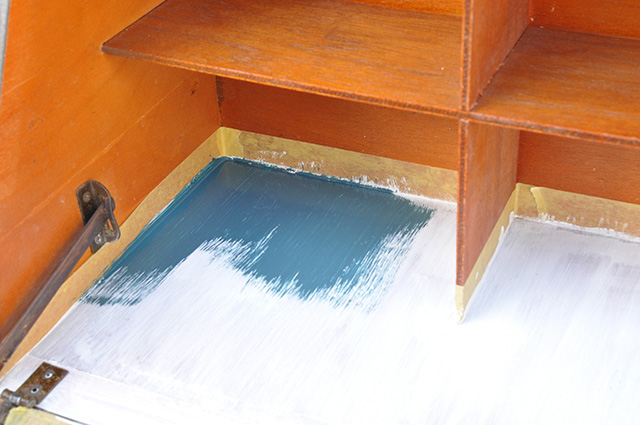
Step 3 Tape off the areas to be painted with painters tape and apply one coat of Resene Quick Dry. Once dry, lightly sand the area with a soft sanding block or very fine sandpaper. Dust down with a clean, dry cloth.
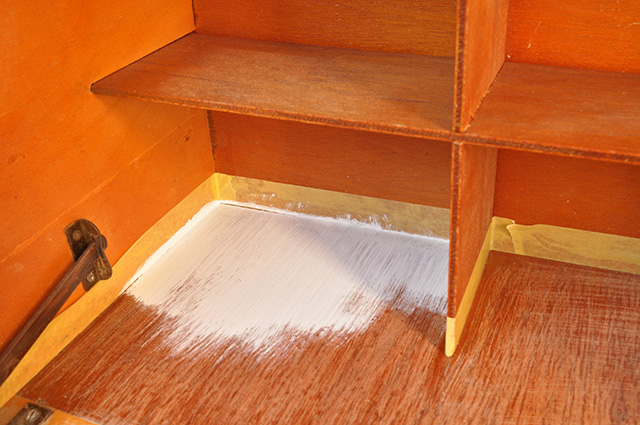
Step 4 Apply two coats of your choice of colour in Resene Lustacryl, allowing the first coat to dry before applying the second coat. Fleur used Resene Fast Forward inside the desk and on the bottom shelf and Resene Influential on the top shelf. Remove the tape as soon as you have finished the second coat and while the paint is still wet.
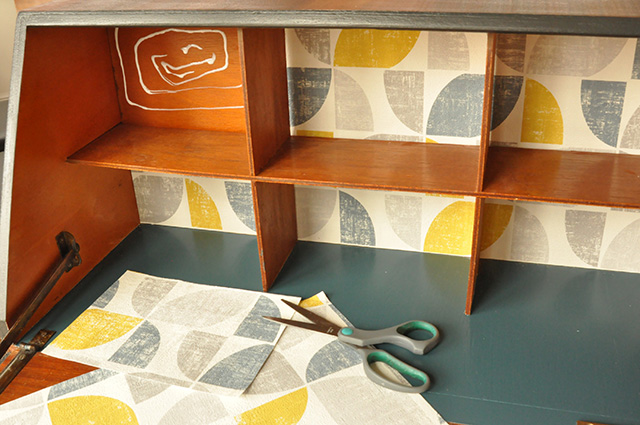
Step 5 Measure the individual cubby holes and cut wallpaper to fit, then glue in place with PVA glue.
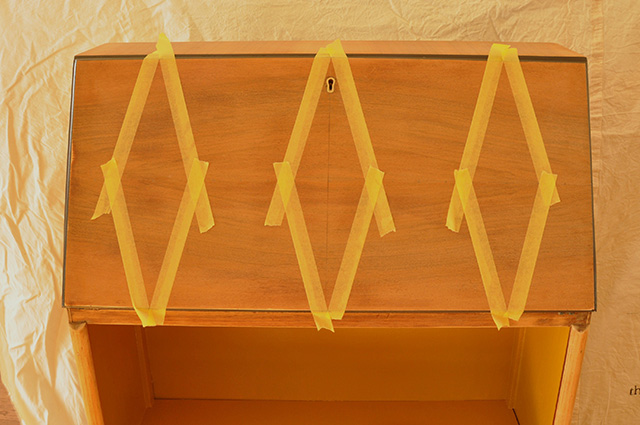
Step 6 For making the pattern on the front of the desk lid, measure carefully and divide the lid up into equally sized diamonds. Use painters tape to make the pattern and be sure to firmly press the tape into place to prevent bleed through of paint under the tape.
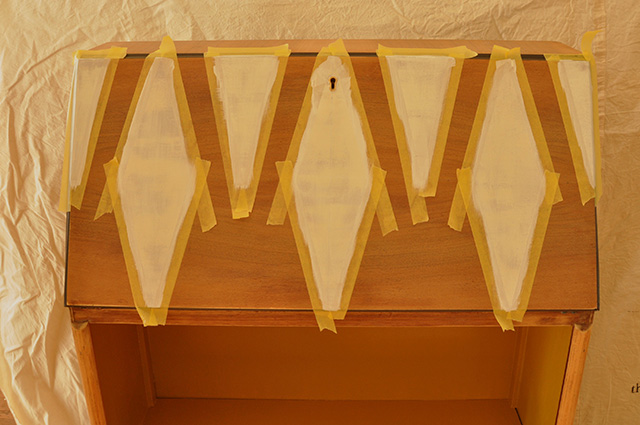
Step 7 Apply one coat of Resene Quick Dry. Once dry, carefully sand the primer with a soft sanding block or very fine finishing sandpaper. Take care not to disturb the tape. Once finished, wipe down with a soft dry cloth.
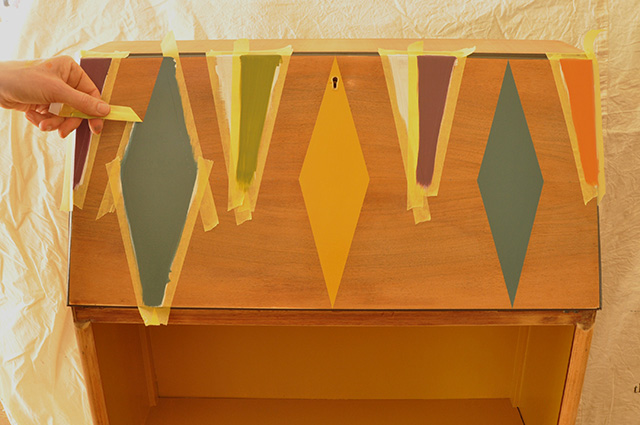
Step 8 Apply two layers of Resene Lustacryl in the colours of your choice, allowing the first coat to dry before applying the second coat. Remove the tape as soon as you have finished the second coat and while the paint is still wet. Once finished, leave overnight for the paint to cure.
Step 9 Using a soft, dry cloth, rub Resene Danska Teak Oil on to the wooden areas and wipe off any excess oil with a separate clean cloth.
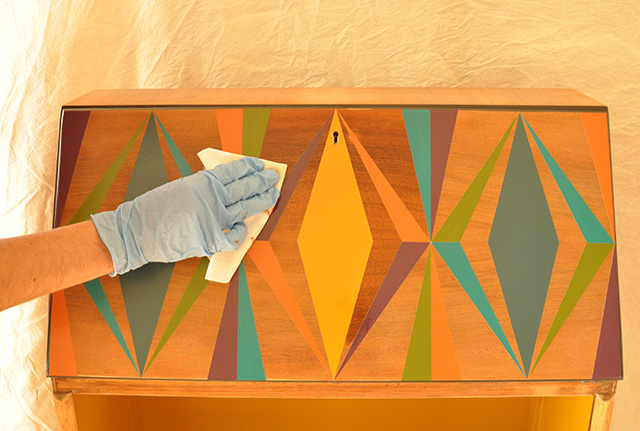

The wall behind this cute furniture upcycle is painted Resene Ayers Rock. The pattern on the furniture was created using Resene Fast Forward, Resene Influential, Resene Bi Hoki, Resene Yowza, Resene Untamed and Resene RSVP. The inside of the top shelf cubby is painted Resene Influential and the bottom cubby is in Resene Fast Forward.
project and images Fleur Thorpe
Published: 01 Aug 2019
more inspiration

Hues on the move: A DIY rainbow mobile
Get ready to add a vibrant touch to your nursery,… more

Show your support this ANZAC Day with this DIY wreath
Anzac Day is a national day of remembrance in New… more

Sunny side up: Bookends for any weather
Brighten up your bookshelf and organise your books at the… more

A roar-some dish: DIY animal plates
Impress your guests with these DIY animal plates! The Resene… more

Glowing zoofari: Make your own animal themed lamp
Here’s a great DIY to do with the kids over… more


 look book