
latest
habitat tv

Say goodbye to the morning scramble for keys, coats and sunglasses and hello to this… see this and more videos
blog

Reader roundup: Happy dogs, custom colours and a small Resene fan
We love to share what you have been up to with Resene paints and products!… more
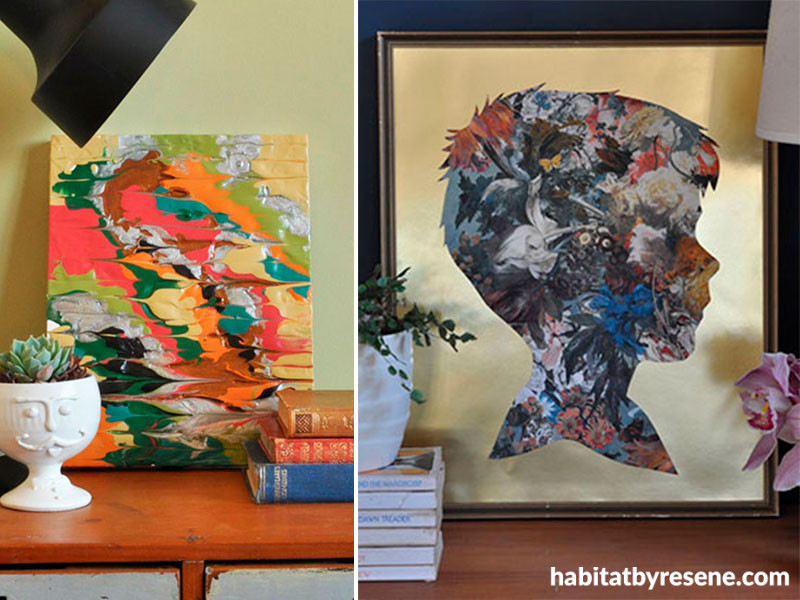
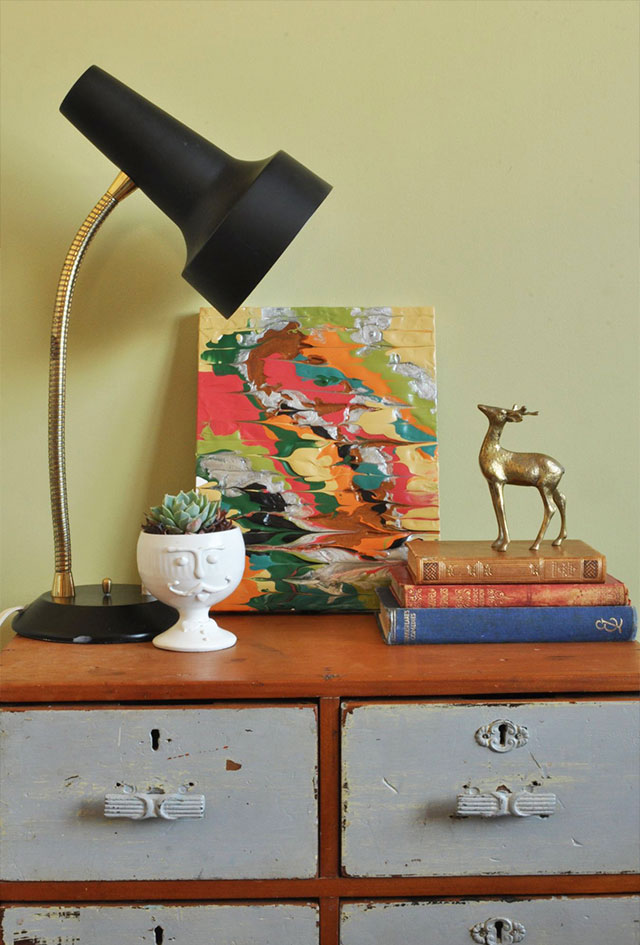
Easy DIY art: Maximum impact
01 Nov 2018
Try these simple techniques to create dramatic retro-style art.
Poured paint art
Simply pour on the paint for a freestyle artwork.
You will need:
- Testpots in Resene Sea Green, Resene Gold Dust metallic, Resene Kaitoke Green, Resene Vibe, Resene Black, Resene Tango, Resene Kombi, Resene Silver Aluminium metallic and Resene Apache
- A piece of MDF board
- Resene Quick Dry primer undercoat
- Paintbrush
- Sandpaper
- 2 cups or tin cans
- Teaspoon
- Skewer or toothpick
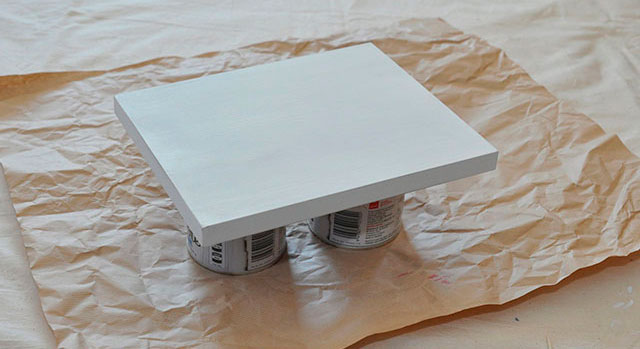
Step 1: Cut your MDF to size. We used 20cm x 25.5cm. Undercoat the MDF with Resene Quick Dry primer undercoat. Once dry, use a fine grit sandpaper to sand the board, particularly on the edges. Stand your MDF board up on a couple of cups or tin cans and use a large piece of paper to catch the drips once you start pouring.
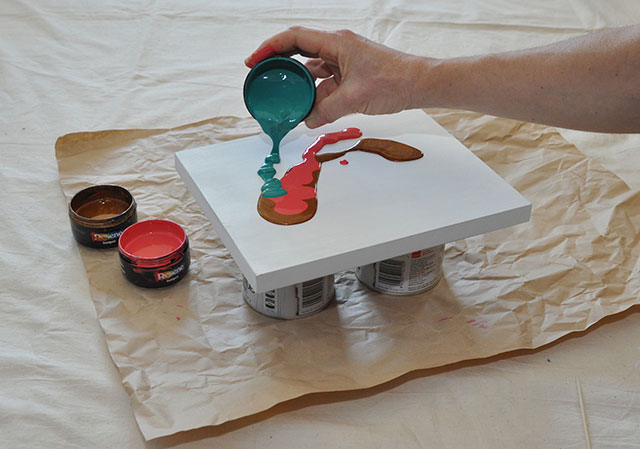
Step 2: One at a time, pour your testpots of paint on to the board. Make swirls and swizzles – have fun experimenting with different colour combinations.
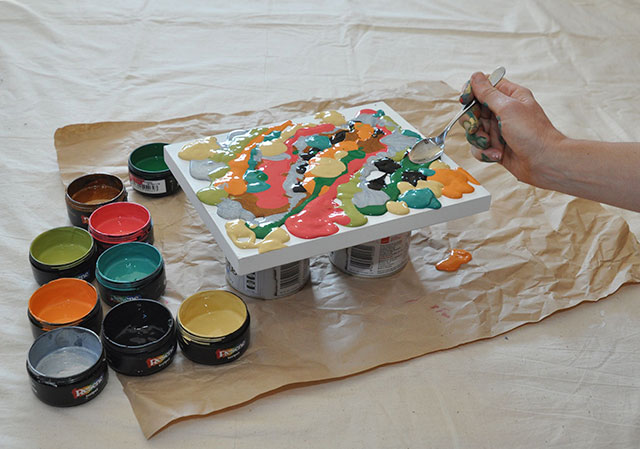
Step 3: Once you’ve finished pouring, use your finger or the back of a teaspoon to spread the paint to the edges and to fill in any gaps. Don’t worry if the paint runs over the edge.
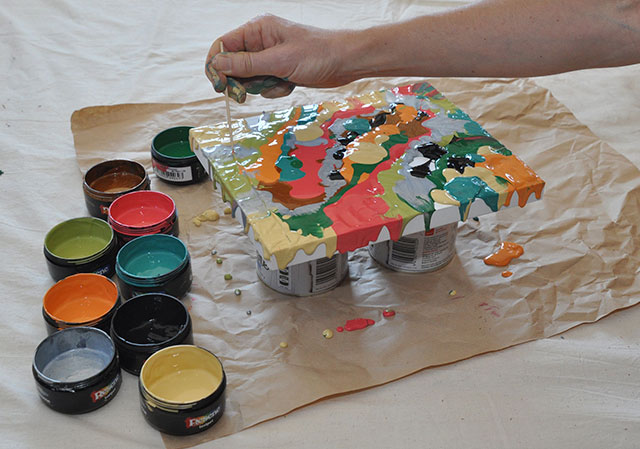
Step 4: Using a skewer or toothpick, make lines through the thick paint. To get the same effect as ours, make lines up and down the board, alternating in direction. You could also have the lines all going the same direction, or cross-hatched, or wobbly.
Step 5: Leave to dry for a couple of days - somewhere small, curious fingers won’t poke it!
Wallpaper silhouette art
Create a unique portrait with your favourite wallpaper print.
You will need:
- A picture frame
- A 1m wallpaper sample. We’ve used Resene Wallpaper Collection design 605655. Wallpaper samples can be purchased at Resene ColorShops.
- Print-out of photo silhouette
- Ballpoint pen
- Scissors
- Clear tape
- Gold (or other coloured) cardboard, or paint your own using a Resene Gold Dust testpot
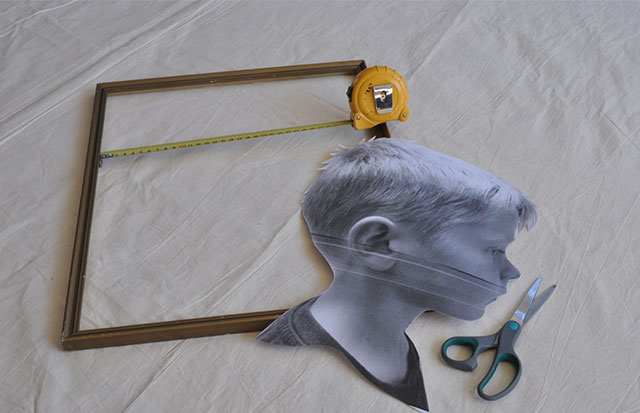
Step 1: Take a profile photo of yourself, or somebody else, or even a pet, standing side-on against a plain wall or background. Disassemble and measure the picture frame (this one is second-hand). Using a computer, re-size your photo so it will fit within your frame and print it. Cut out the silhouette.
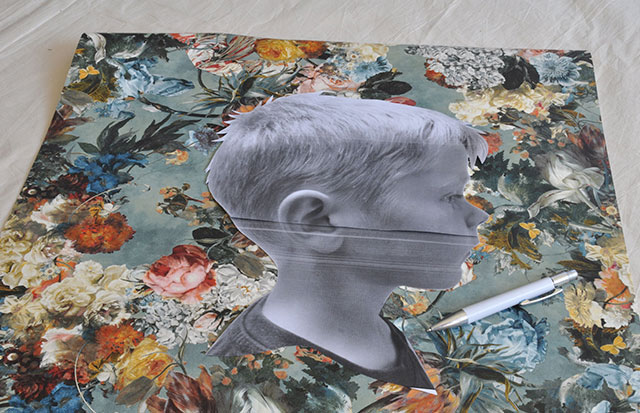
Step 2: Place the photo on to the wallpaper and position it so that the pattern will look good on the silhouette. In this example, we wanted the head to be where the flowers were most concentrated. Using loops of tape, attach the print to the wallpaper then trace around the outside of the print with a ballpoint pen.
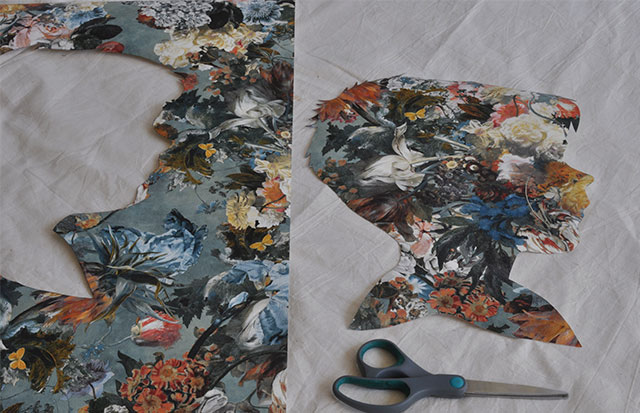
Step 3: Carefully remove the print from the wallpaper and use scissors to cut out the silhouette on the wallpaper following the traced outline.
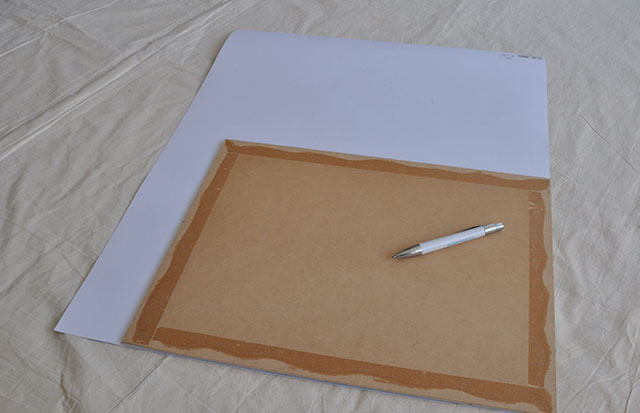
Step 4: Take the backing board from the picture frame and use this to trace around your cardboard – I used gold metallic card, but black or dark navy would also look good. Or you could paint a card your chosen colour using a Resene testpot. Cut this out, and making sure that you position the wallpaper silhouette in the centre of the frame. Attach it to the gold card using either loops of tape or glue.
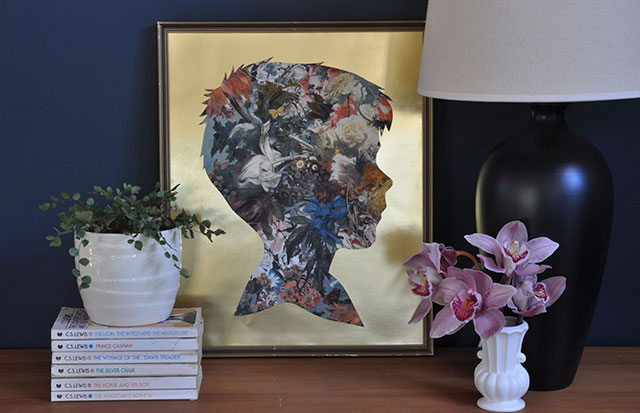
Styling and images by Fleur Thorpe
Published: 01 Nov 2018
more inspiration

Hues on the move: A DIY rainbow mobile
Get ready to add a vibrant touch to your nursery,… more

Show your support this ANZAC Day with this DIY wreath
Anzac Day is a national day of remembrance in New… more

Sunny side up: Bookends for any weather
Brighten up your bookshelf and organise your books at the… more

A roar-some dish: DIY animal plates
Impress your guests with these DIY animal plates! The Resene… more

Glowing zoofari: Make your own animal themed lamp
Here’s a great DIY to do with the kids over… more


 look book