
latest
habitat tv

Say goodbye to the morning scramble for keys, coats and sunglasses and hello to this… see this and more videos
blog

Reader roundup: Happy dogs, custom colours and a small Resene fan
We love to share what you have been up to with Resene paints and products!… more
DIY Painted Coat Hanger Art
11 Jul 2019
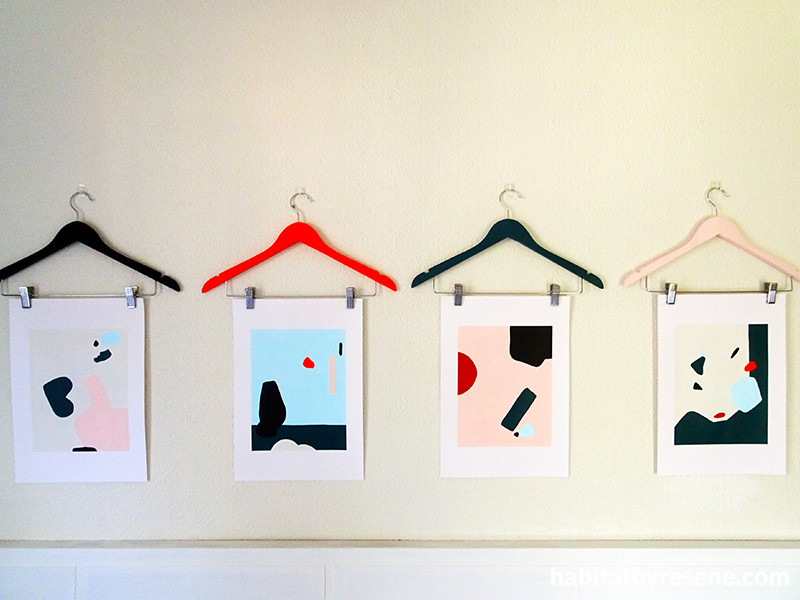
Grab a few of your favourite Resene testpots and create some one-of-a-kind artwork that’s sure to match your décor perfectly – and could not be simpler to hang!
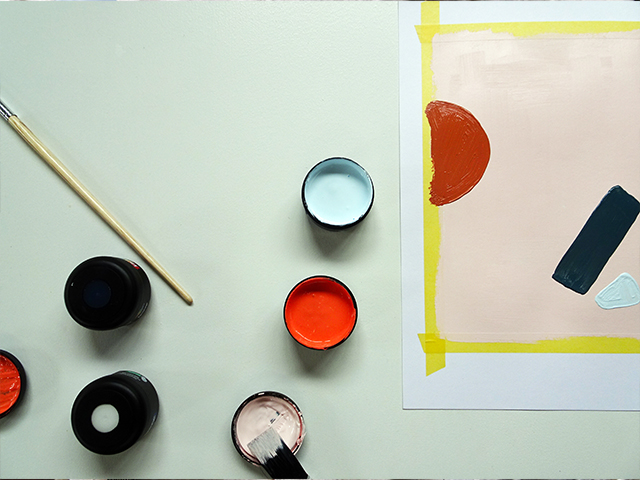
You will need:
- Wooden coat hangers with trouser clips attached
- Testpot brushes
- Sandpaper
- Resene Quick Dry waterborne primer undercoat
- Art paper
- Artist brushes
- Resene testpots in your choice of colours – Sarah used Resene Fast Forward, Resene Cosmos, Resene Indian Ink and Resene Big Bang
- Plus additional Resene testpots for the artworks in your choice of colours – Sarah used Resene Black White, Resene Onahau and Resene Sunbaked
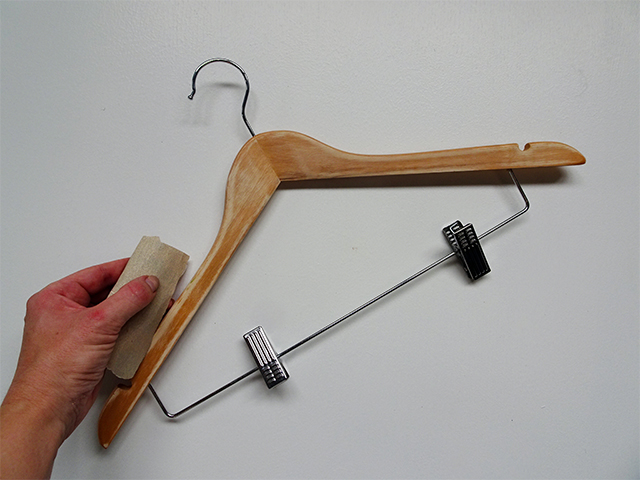
Step 1 Sand the coat hangers lightly with some sandpaper to prepare them for painting. If they are unable to be sanded, you can ready them for painting with a coat of Resene Waterborne Smooth Surface Sealer instead.
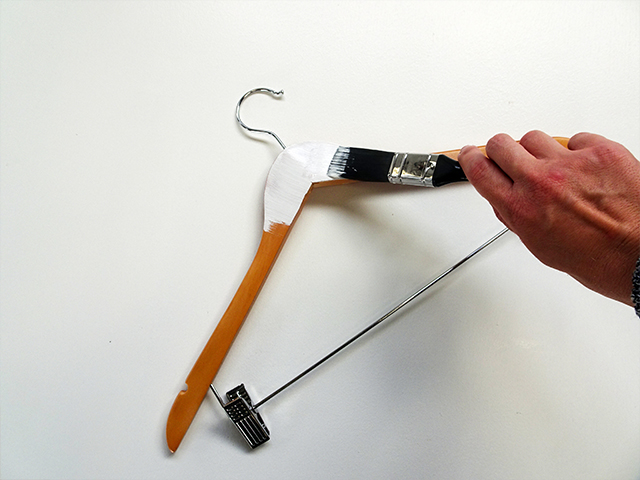
Step 2 Apply one coat of Resene Quick Dry primer undercoat to each coat hanger using a testpot brush. Leave the steel unpainted.
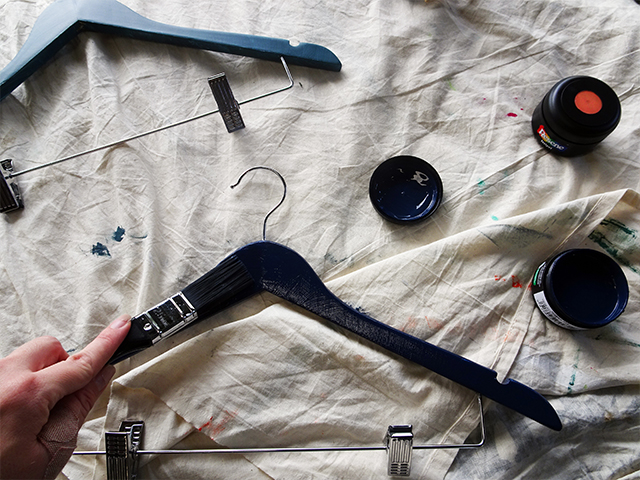
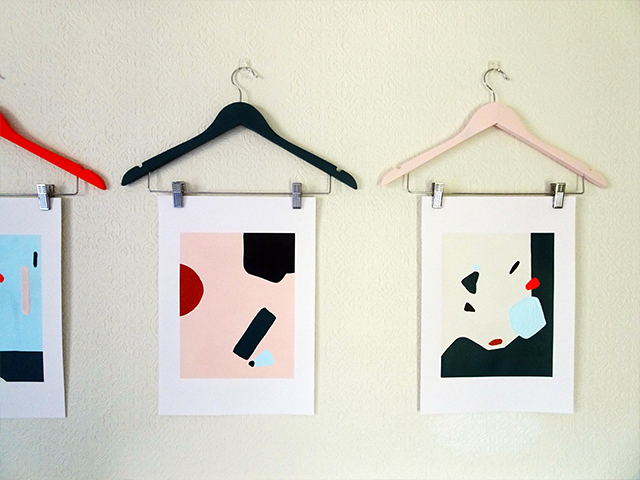
Step 3 Choose your colour scheme, focusing on four main colours, one for each hanger. Sarah chose a bright, bold combination of colours for this abstract art theme. Give each coat hanger two coats of colour using a testpot brush, or until you are happy with the coverage. Sarah used Resene Fast Forward, Resene Cosmos, Resene Indian Ink and Resene Big Bang.
Step 4 While your coat hangers are drying, use the same four colours to paint complementary abstract artworks that will hang from the finished coat hangers. Have fun applying different shapes and painting freehand! To add extra depth, Sarah added a few extra colours into the artworks. In addition to Sarah’s original four paint colours, she added Resene Black White, Resene Onahau and Resene Sunbaked.
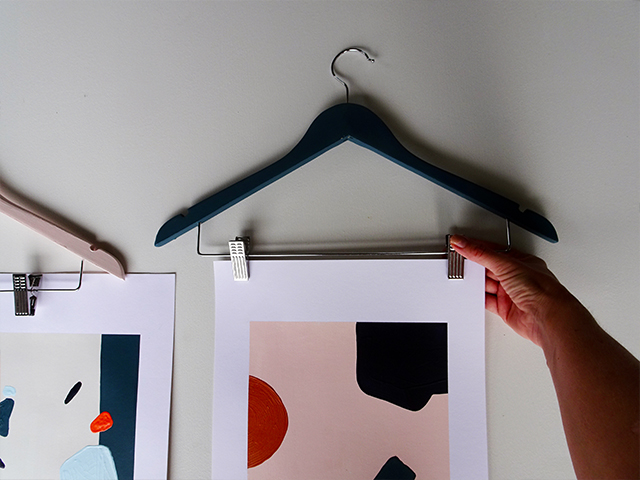
Step 5 Once your abstract paintings are complete, simply clip them to your coat hangers and hang to create an instant gallery wall! The best thing about these coat hangers and paintings is that you can hang them together or separately, swap them around, and change your art out with ease. Try using the coat hangers to hang your kids’ artwork or favourite photos!
Top tip: For a more dazzling effect, use a Resene FX Metallic colour for your topcoats. The metallic finishes will shimmer in the light.
styling and images Sarah Herring
Published: 11 Jul 2019
more inspiration

Hues on the move: A DIY rainbow mobile
Get ready to add a vibrant touch to your nursery,… more

Show your support this ANZAC Day with this DIY wreath
Anzac Day is a national day of remembrance in New… more

Sunny side up: Bookends for any weather
Brighten up your bookshelf and organise your books at the… more

A roar-some dish: DIY animal plates
Impress your guests with these DIY animal plates! The Resene… more

Glowing zoofari: Make your own animal themed lamp
Here’s a great DIY to do with the kids over… more


 look book