
latest
habitat tv

Say goodbye to the morning scramble for keys, coats and sunglasses and hello to this… see this and more videos
blog

Reader roundup: Happy dogs, custom colours and a small Resene fan
We love to share what you have been up to with Resene paints and products!… more
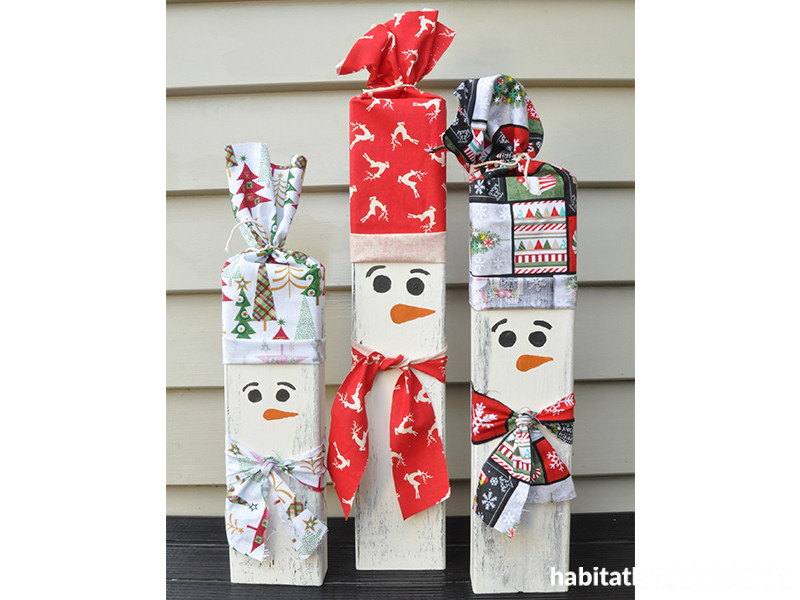
DIY Christmas snowmen
05 Dec 2019
You don’t need snow this Christmas to build your own snowmen. Frosty up your front walkway with this quick and easy DIY project made with lengths of wood, Resene paint and fun festive fabrics.
You will need:
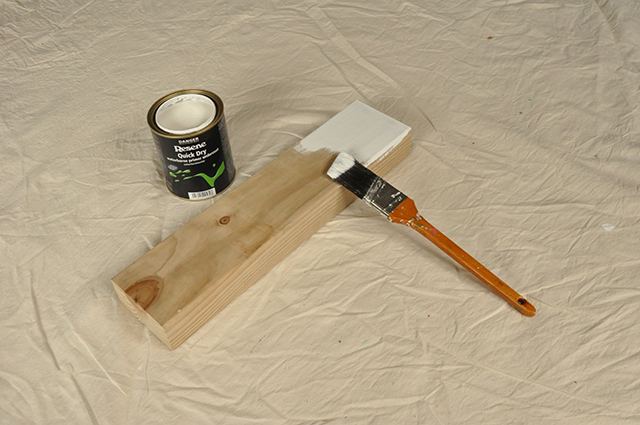
- 3 lengths of 4x2 (ours were 30cm, 38cm and 46cm long)
- Resene Quick Dry
- Paintbrush
- 180 grit sandpaper
- Fabric in festival colours/patterns
- Small artist’s paintbrush
- Hot glue gun
- String
- Resene testpots in your choice of colours; we chose Resene Cararra, Resene Blackjack and Resene Bi Hoki
Step 1 Cut a length of 4x2 into 3 lengths – ours are 30cm, 38cm and 46cm long. Paint each length with Resene Quick Dry to prep the surface.
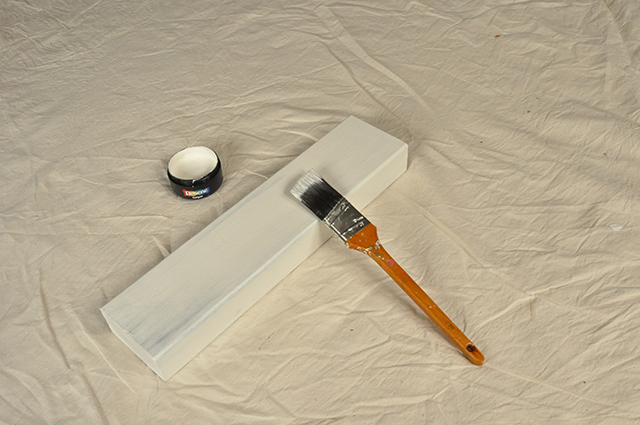
Step 2 Once dry, paint the bottom and edges with Resene Blackjack. Allow to dry.

Step 3 Paint the wood again with Resene Carrara. One coat of paint will do and don’t worry if you don’t get total coverage of the Resene Blackjack – letting some of it show through is part of the look. Allow to dry.
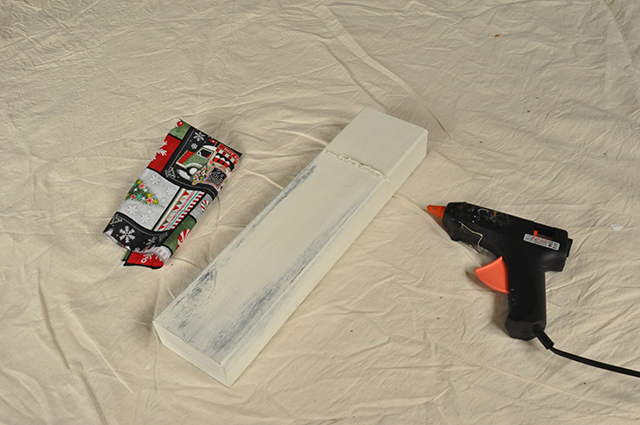
Step 4 Using 180 grit sandpaper, sand off some of the white paint (Resene Carrara) to expose more of the black paint (Resene Blackjack) underneath. Wipe down the surface with a dry cloth.
Step 5 Using a hot glue gun, run a bead of glue about quarter of the way down from the top and stick the fabric to the glue. Turn the wood over and wrap the fabric around it and glue it into place. Tie the top of the hat with a short length of string to cinch it.
Step 6 With a small craft brush, paint on the face. Fleur used Resene Blackjack for the eyes and Resene Bi Hoki for the carrot nose.
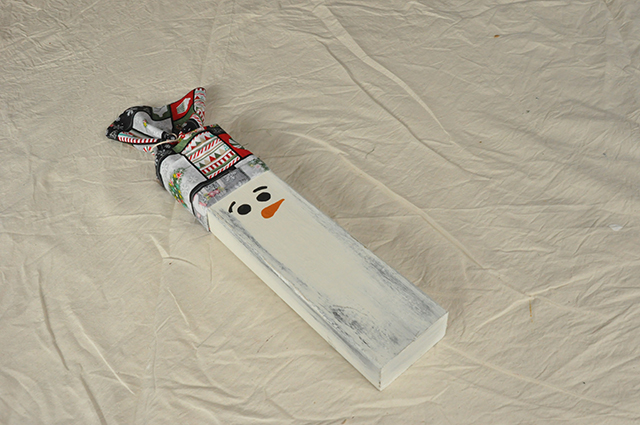
Step 7 Finish by cutting a thin strip of fabric and tie it as a scarf, using a small dab of hot glue to keep it in place.
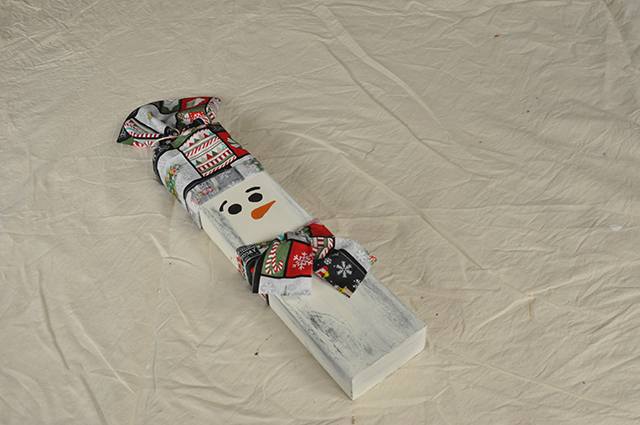
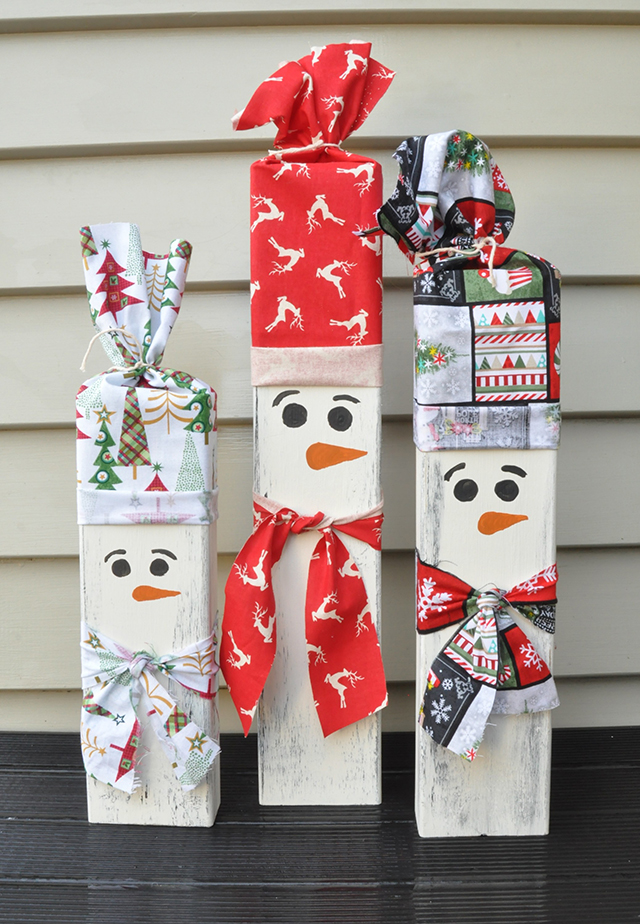
Finished snowmen in Resene Carrara, Resene Blackjack and Resene Bi Hoki. Wall in Resene Triple Ash.
project and images Fleur Thorpe
Published: 05 Dec 2019
more inspiration

Hues on the move: A DIY rainbow mobile
Get ready to add a vibrant touch to your nursery,… more

Show your support this ANZAC Day with this DIY wreath
Anzac Day is a national day of remembrance in New… more

Sunny side up: Bookends for any weather
Brighten up your bookshelf and organise your books at the… more

A roar-some dish: DIY animal plates
Impress your guests with these DIY animal plates! The Resene… more

Glowing zoofari: Make your own animal themed lamp
Here’s a great DIY to do with the kids over… more


 look book