
latest
habitat tv

Say goodbye to the morning scramble for keys, coats and sunglasses and hello to this… see this and more videos
blog

Reader roundup: Public murals and powder blues
A Morningside mural, an exterior refresh, and striped walls. Let these projects be your inspiration… more
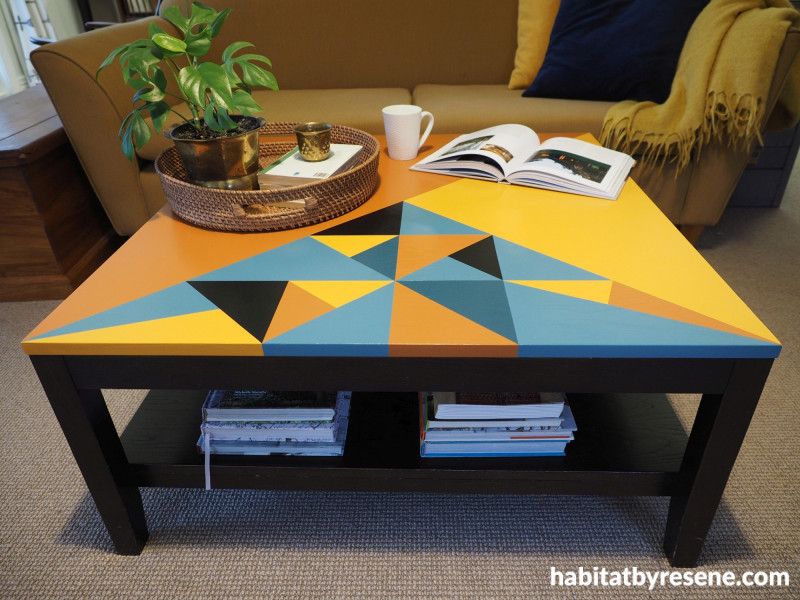
Upcycling project: Create a colourful geometric coffee table
14 Oct 2021
With the weather outside becoming more cheerful, why not brighten up your interiors as well? This geometric coffee table combines a charming collection of Resene colours with clever design to create a centrepiece for your lounge – that’ll look great with your latest copy of habitat (check your letterbox, it’s arriving soon).
You will need:
- Coffee table
- Medium and fine grit sandpaper
- Resene Quick Dry
- Small foam roller and tray
- Your choice of Resene paints (We recommend Resene Lustacryl) – Fleur used Resene Alert Tan, Resene Pirate Gold, Resene Bismark, Resene Fast Forward and Resene Black
- Green painters’ tape
- Measuring tape
- Pencil
- Ruler/long straight edge

Step 1: Start by giving the top of the coffee table a sand with medium grit sandpaper. You don’t have to remove all of the old surface or varnish, but rough it up enough to create a key for the paint to hold on to.

Step 2: Apply painters’ tape around the edge of the tabletop to protect it. Use a small foam roller to apply one coat of Resene Quick Dry primer. Once this has dried, sand the primer with very fine finishing sandpaper. Wipe away any dust with a soft dry cloth.

Step 3: Use a long ruler or straight edge and a pencil to draw a line diagonally between two opposite corners. Put painters’ tape along this pencil line and press the tape down firmly to prevent any bleed through of paint. Use the foam roller to apply two coats of your choice of colour, Fleur used Resene Alert Tan, allowing for the first coat to dry before applying the second coat. Remove the tape as soon as you have finished the final coat of paint.

Step 4: Next, measure the distance between the two diagonal corners and mark the half way point. From this mark, draw a line to the corner. Use tape to mask off this quarter of the table and proceed to paint as above, this time using a different colour – Fleur used Resene Pirate Gold.
Top tip: It’s a good idea to leave the paint as long as possible to dry before putting tape on it to paint the next adjacent area, as you don’t want the tape to pull off your new paint when you remove the tape. Fleur left her paint to dry for a couple of hours, but you could leave it overnight, before doing the next section.

Step 5: With the remaining unpainted quarter of the table, use a ruler to divide the quarter in half vertically and into three even sections horizontally.

Step 6: Draw in random triangles, making some big and some small.

Step 7: Use the same method for taping as you did with the first two bigger triangles, making sure to rub the tape down firmly before painting it. Fleur used a larger-sized artist paintbrush for painting these smaller triangles. She made a random pattern with more Resene Alert Tan and Resene Pirate Gold, adding Resene Bismark, Resene Fast Forward and Resene Black into the design.
Project and images Fleur Thorpe
Published: 14 Oct 2021

