
latest
habitat tv

Say goodbye to the morning scramble for keys, coats and sunglasses and hello to this… see this and more videos
blog

Re-living the 1980s through art
Clint C is an artist whose work instantly sparks recognition and joy. Based in Hamilton,… more
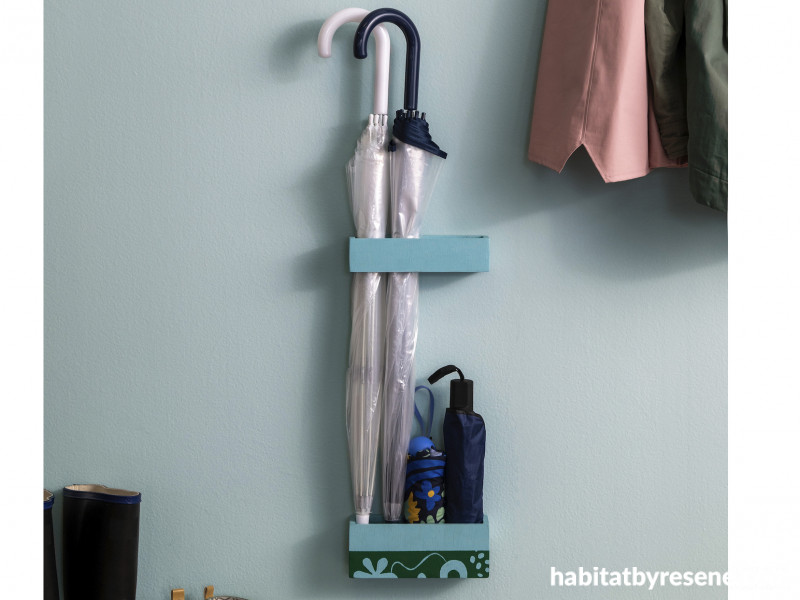
Make an entrance with a DIY umbrella holder
07 Mar 2024
As we embrace the indoors through autumn and winter, it’s the perfect time to look at how we can downsize, reorganise and declutter.
Entryways are a really good, practical place to start. They’re small areas, with high foot traffic, often taken for granted, so you can get great results for less effort. They’re also usually the first impression visitors have of your home interior,
Think about what you can purge and what really needs to be in the space. If floor space is minimal, get creative with the walls. This DIY organiser is designed to store your essential entryway items and takes up little space.
View the video below or follow the steps!
You will need:
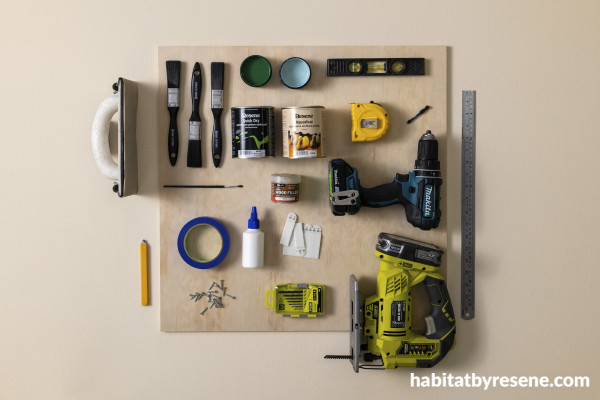
- 1 piece of 600mmx600mm plywood, 9mm thick which is 600mmx600mm, and 9mm thick.
- Jigsaw
- Power drill
- Drilling kit
- Sander or sandpaper in wood block, in medium and fine
- Wood glue
- Resene testpot brushes
- Resene Quick Dry Waterborne Primer Undercoat
- Testpot in Resene Kumutoto
- Testpot in Resene Kaitoke Green
- Painter’s tape
- Resene Aquaclear
- 20mm wood screws
- Filler Eezee Wood Patch Pine
- Putty knife (optional)
- Picture hanging strips
- Measuring tape, pencil, ruler and level
Cutting plan:
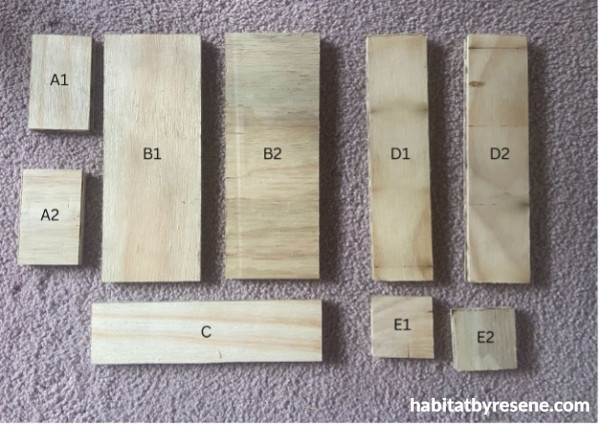
Step 1: Use the jigsaw to cut the plywood into the different elements as in the cutting plan above.
A1 + A2 = 50mm X 80mm
B1 + B2 = 80mm x 210mm
C = 50mm x 188mm
D1 + D2 = 50mm x 210mm
E1 + E2 = 50mm x 50mm
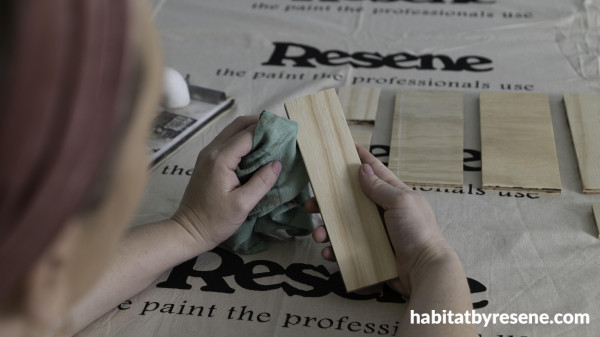
Step 2: Sand all the pieces wipe off sanding dust with a damp cloth.
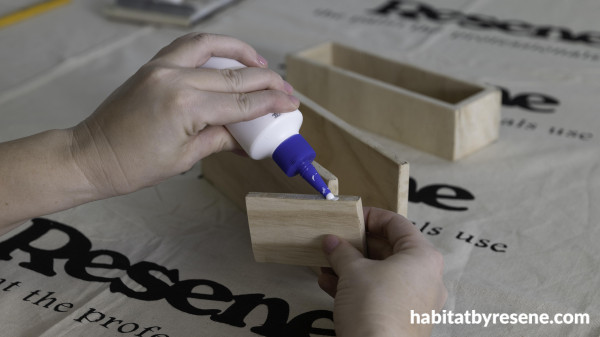
Step 3: Glue pieces together to create a box for the bottom (using pieces A1, A2, B1, B2 and C) and a smaller holder (using pieces D1, D2, E1 and E2) for the top.
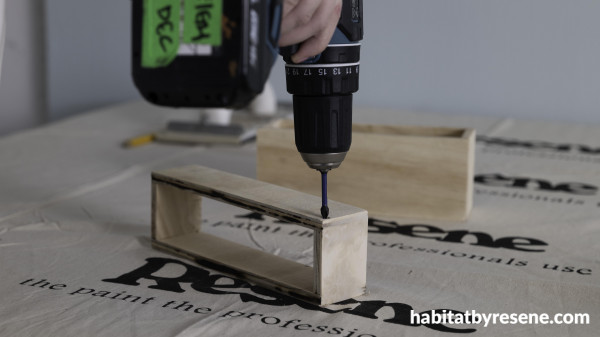
Step 4: Once dry, drill pilot holes and screw the pieces together to secure them properly.
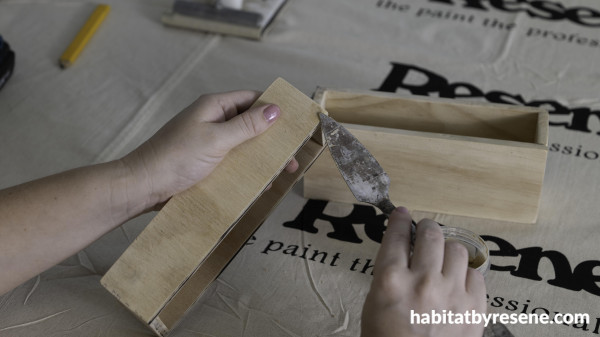
Step 5: Fill screw holes with Eezee Wood Patch Pine. Either with a putty knife or your fingers. Leave to dry.
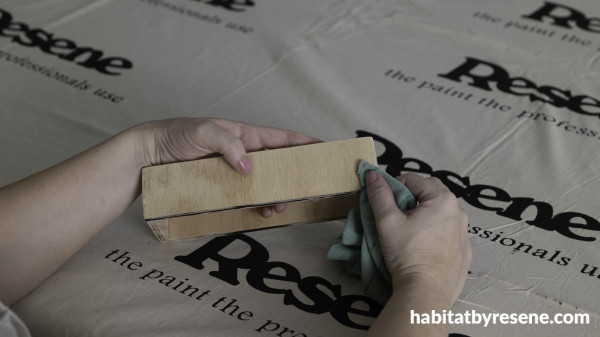
Step 6: Give the boxes a final sand and wipe with a damp cloth.
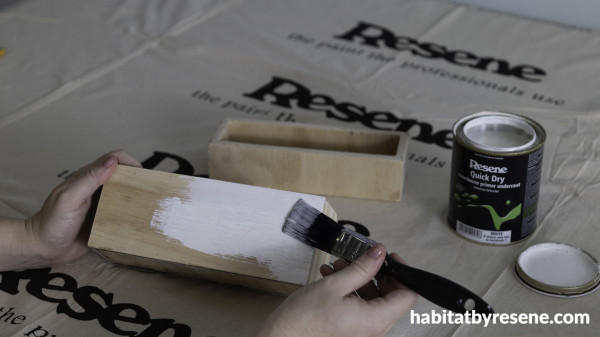
Step 7: Paint the boxes in two layers of Resene Quick Dry Primer, drying completely between layers. This will protect the plywood from getting warped from water on umbrellas.

Step 8: Paint the top and bottom holders in Resene Kumutoto.
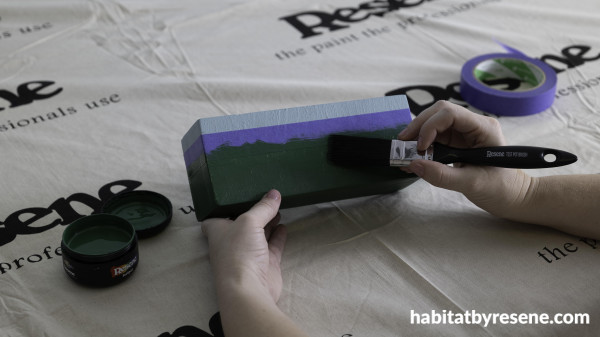
Step 9: Once dry, use masking tape to create a straight line around the bottom box, 30mm up from the bottom. Apply 2 coats to the bottom half in Resene Kaitoke Green. Remove the tape and leave to dry. If you’re feeling arty, paint a pattern on the bottom in Resene Kumutoto as seen in the image (optional). Finish with a coat of Resene Aquaclear over whole holder.
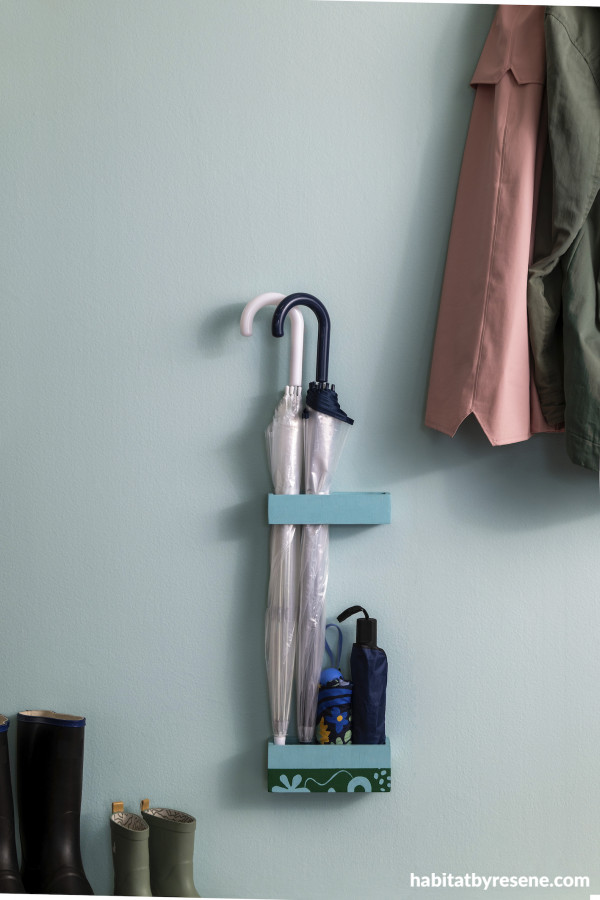
Step 11: Once dry, apply the hanging picture strips and hang. Use a level to make sure they line up. We hung the umbrella holder 230mm from the floor and 680mm between the bottom and top holders.
Check out the step by step video here:
project: Leigh Stockton
images: Patrick Roberts
Published: 07 Mar 2024

