
latest
habitat tv

Say goodbye to the morning scramble for keys, coats and sunglasses and hello to this… see this and more videos
blog

Re-living the 1980s through art
Clint C is an artist whose work instantly sparks recognition and joy. Based in Hamilton,… more
Two fun upcycling DIYs: Give new life to these household items
19 Aug 2025
We all have those slightly boring household items that just end up laying around. Whether you use them, like a tired rubbish bin, or not, like plumbing pipe offcuts, there is always a way to give them a new life – instead of creating more waste. All you need is your favourite Resene testpots and a little creativity and these once unexciting items can shine once again!
Bin there, done that
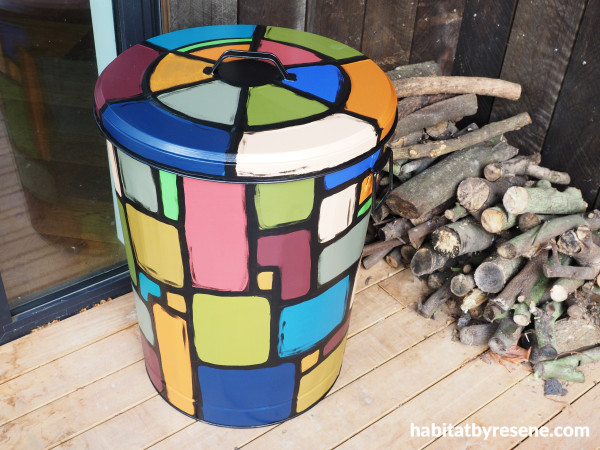
Often overlooked is the handy old rubbish bin. We might not see it as a fun item because, well, we use it for rubbish. But when using something every day, it deserves to look vibrant and alive. The best part about this is you can paint whatever patterns and colours you like, you could even turn your bin into a fun character.
You will need:
- 75 litre galvanised metal rubbish tin
- Sandpaper
- Paintbrush
- Resene Galvo-Prime
- Resene Aquaclear in a satin finish
- Resene testpots in your chosen colours. Fleur used Resene Teal Blue, Resene Horses Neck, Resene Cab Sav, Resene FX Metallic Gold Dust, Resene Apache, Resene Saratoga, Resene Cinnamon, Resene Chelsea Gem, Resene Alamo, Resene Retro, Resene Bilbao, Resene Merlot, Resene Planter, Resene Deep Koamaru, Resene Blue Night, Resene Raptor and Resene Black
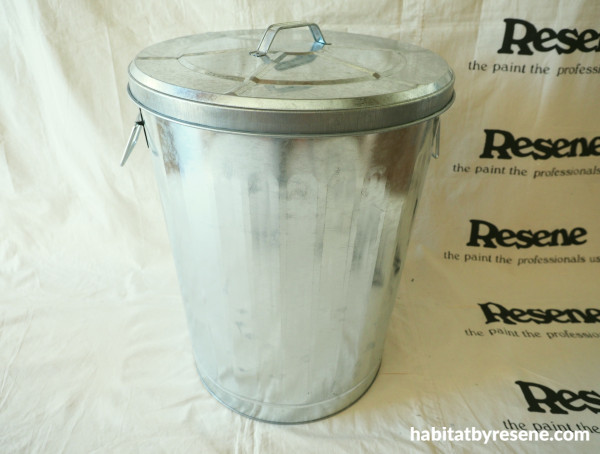
Step 1: Start by sanding the rubbish bin with a medium grit sandpaper. Wipe away any dust and then prime with one coat of Resene Galvo-Prime.
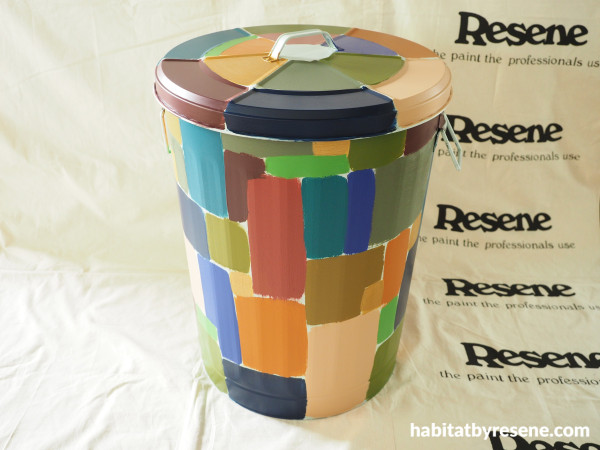
Step 2: Once the primer is dry, paint on different sized squares and rectangles on to the rubbish bin in your chosen colours, a bit like a patchwork quilt. Do two coats. Fleur used Resene Teal Blue, Resene Horses Neck, Resene Cab Sav, Resene Gold Dust with a base coat of Resene Apache, Resene Saratoga, Resene Cinnamon, Resene Chelsea, Resene Alamo, Resene Retro, Resene Bilbao, Resene Merlot, Resene Planter, Resene Deep Koamaru, Resene Blue Night and Resene Raptor. For the bin lid, you could opt for triangles like Fleur, following the shape of the lid, or continue in your own pattern.
Step 3: Once all the paint is dry, use a small brush to outline each square in your chosen Resene colour. Fleur Used Resene Black for this, making smudgy, messy lines, but you could do crisper lines if you prefer. Paint the handles on the bin and lid with another of your chosen colours. Once all the paint is dry, seal the bin and lid with two coats of Resene Aquaclear in a satin finish.
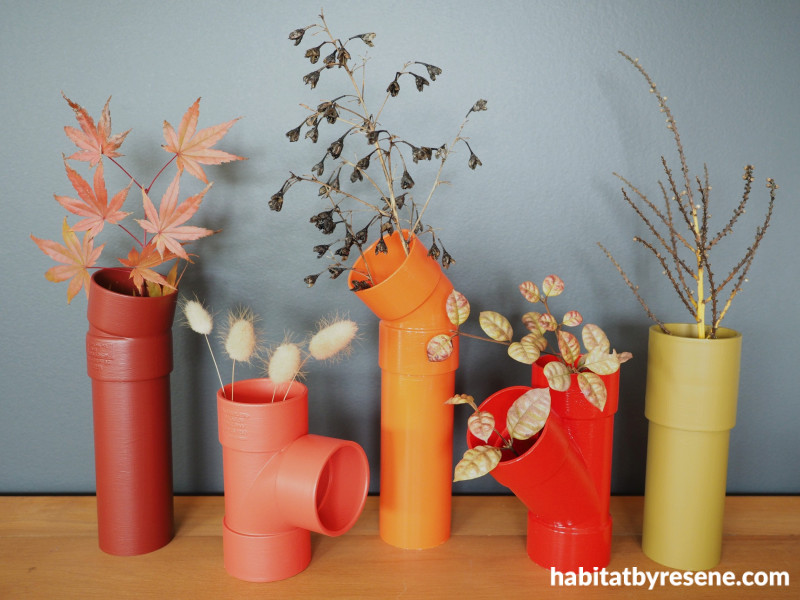
Pipe dreams
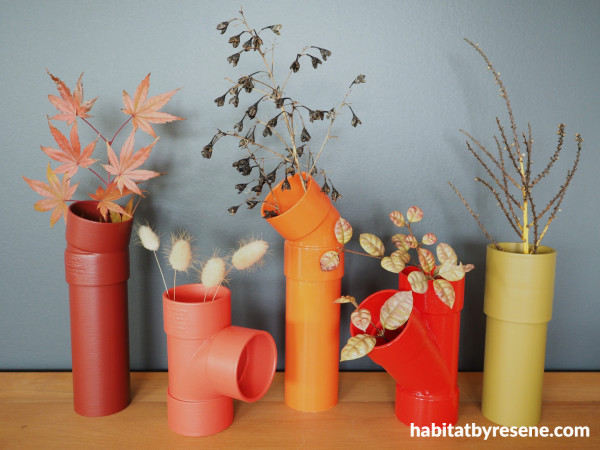
Turn old plumbing pipe offcuts into fun colourful vases with this quick and easy project. These autumnal colours look lovely with dried flowers, but you can use any of your favourite bright, or neutral, Resene testpots for these. If you love this idea but don’t have any offcuts at home, head to your local hardware shop to purchase a few.
You will need:
- Assortment of plumbing PVC pipes and fittings
- Sandpaper
- Cloth or rag
- Resene Sureseal
- Paintbrush
- Resene Clearcoat UVS
- Resene testpot paints in your favourite colours. Fleur used Resene Lonestar, Resene Del Toro, Resene Daredevil, Resene Bullseye and Resene Horses Neck
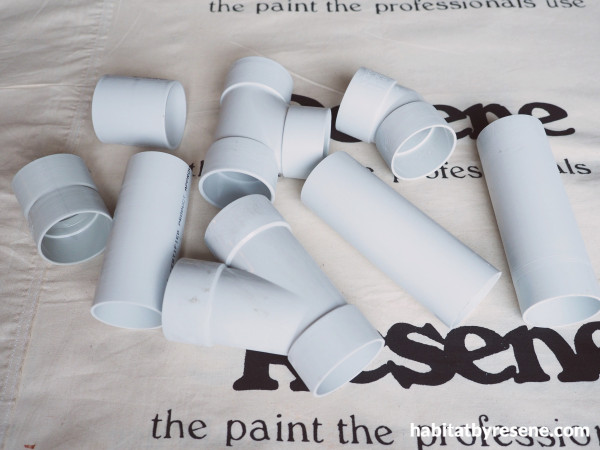
Step 1: For this project you will need a variety of plumbing fittings and short lengths of PVC pipe that are the same diameter as the fittings. PVC pipe can be cut to length with a normal hand saw.
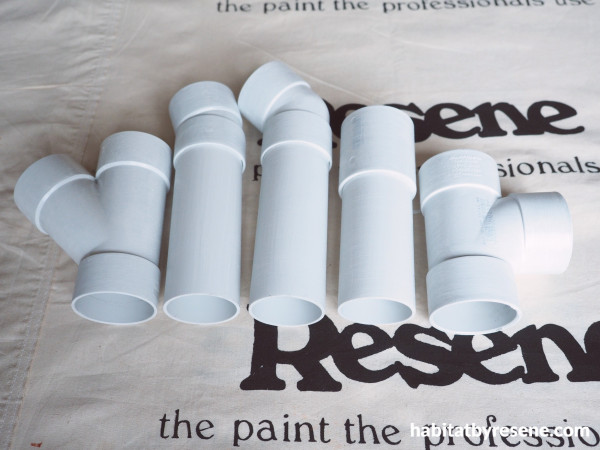
Step 2: Give the fittings and pipes a sand with a medium grit sandpaper and then wipe away any dust with a cloth. Fit the short lengths of pipe into your fittings and then prime them with one coat of Resene Sureseal.
Step 3: Once dry, paint them with two coats of your chosen paint colours. Fleur used Resene Lonestar, Resene Del Toro, Resene Daredevil, Resene Bullseye and Resene Horses Neck. Once the paint is dry, as a further option, you can alter the sheen level by painting on an optional coat of Resene Clearcoat UVS.
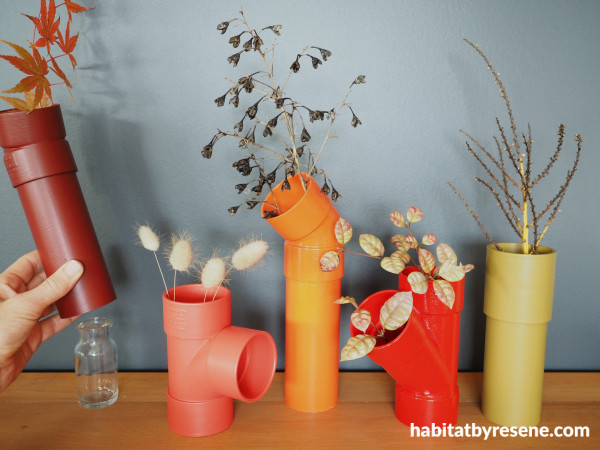
Step 4:These vases are not watertight, which makes them great for dried flowers, but if you want to display real flowers or foliage that need water, you can put a small glass jar or bottle underneath.
Wall painted in Resene Element.
project and images Fleur Thorpe
Published: 19 Aug 2025

