
latest
habitat tv

Say goodbye to the morning scramble for keys, coats and sunglasses and hello to this… see this and more videos
blog

Reader roundup: Public murals and powder blues
A Morningside mural, an exterior refresh, and striped walls. Let these projects be your inspiration… more
Two fun and easy DIY gift ideas for Father’s Day
04 Sep 2025
Stuck on what to get Dad this Father’s Day? Here are a couple of easy, creative and personal DIY projects that he is sure to love! You can use our projects as a base or idea for how you want to create yours, but feel free to use any paint or stain colour to make it personal to the Dad or father figure in your life.
This DIY BBQ tool board is great for all the grill master Dads!
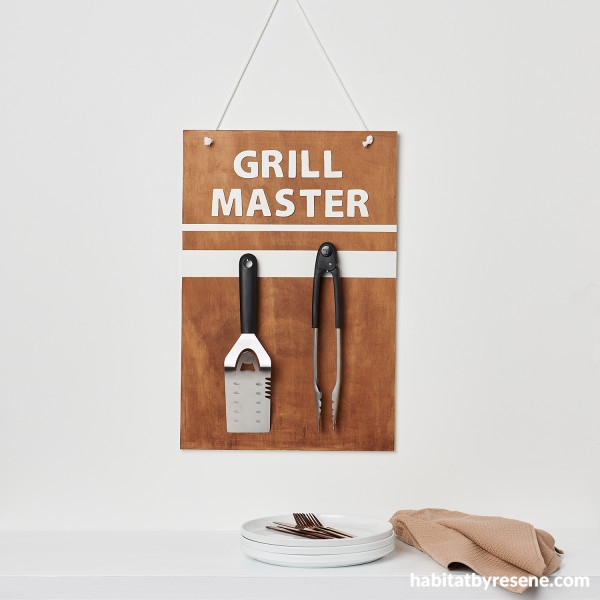
If Dad is a whiz on the BBQ why not whip him up this stylish Grill Master BBQ tool board. You can personalise it however you like, and it means Dad will always have a place to hang his important cooking tools!
You will need:
- 1x piece of ply which is 12mm thick, 40cm wide and 60cm in length
- Rope
- Nails
- Painters tape
- Wooden letters
- Clear craft glue
- Paintbrush
- Cloth for staining
- Drill for drilling holes for rope
- Resene testpot in a colour of your choice. We used Resene Rice Cake.
- Resene wood stain in a colour of your choice. We used Resene Woodsman Nutmeg.
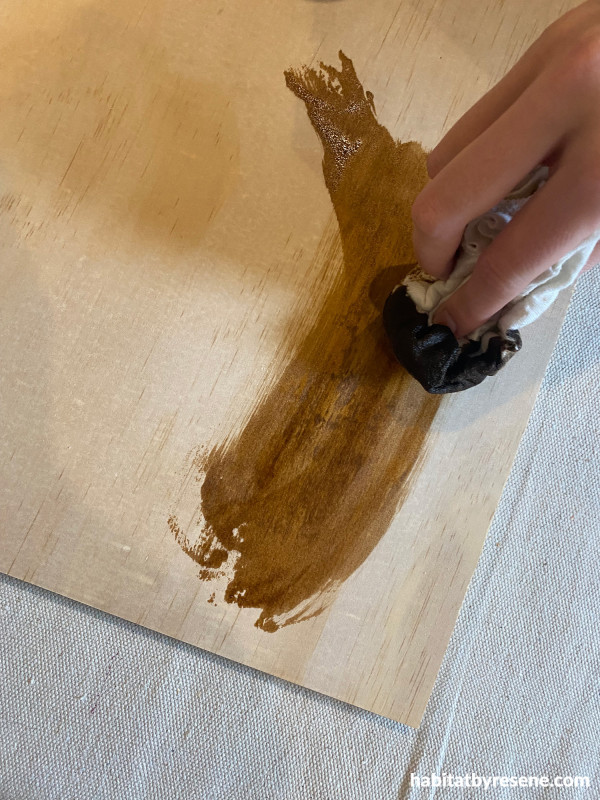
Step 1:Stain your piece of ply with a cloth in your chosen shade. We used Resene Woodsman Nutmeg and applied two coats.
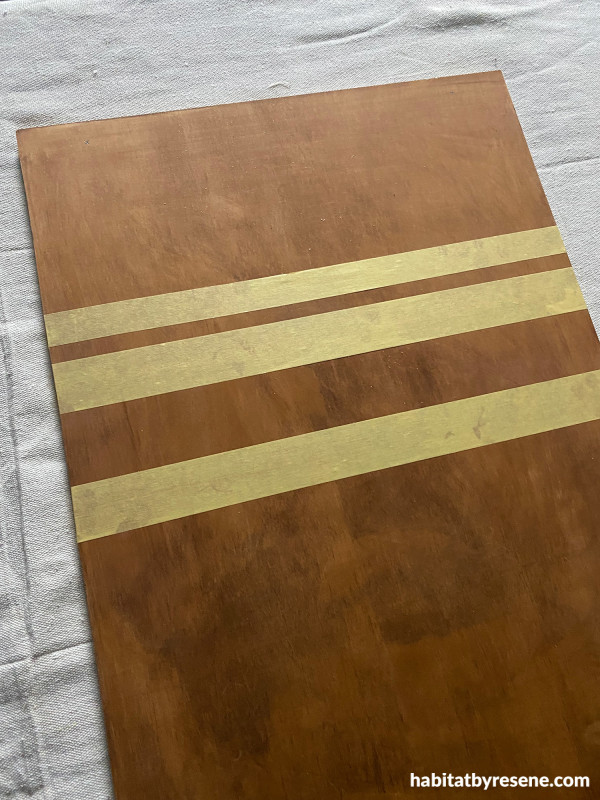
Step 2:Mask off where you want your painted stripes and apply the painters masking tape. Use our image as a guide or do your own striped design or pattern of choice.
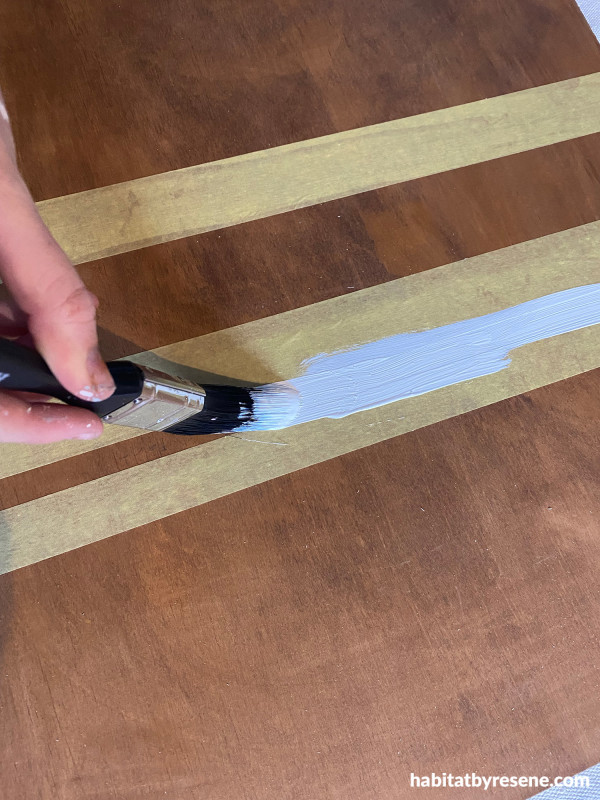
Step 3: Paint the stripes in your chosen Resene testpot colour. We used Resene Rice Cake and applied two coats. Remove the painter’s tape.
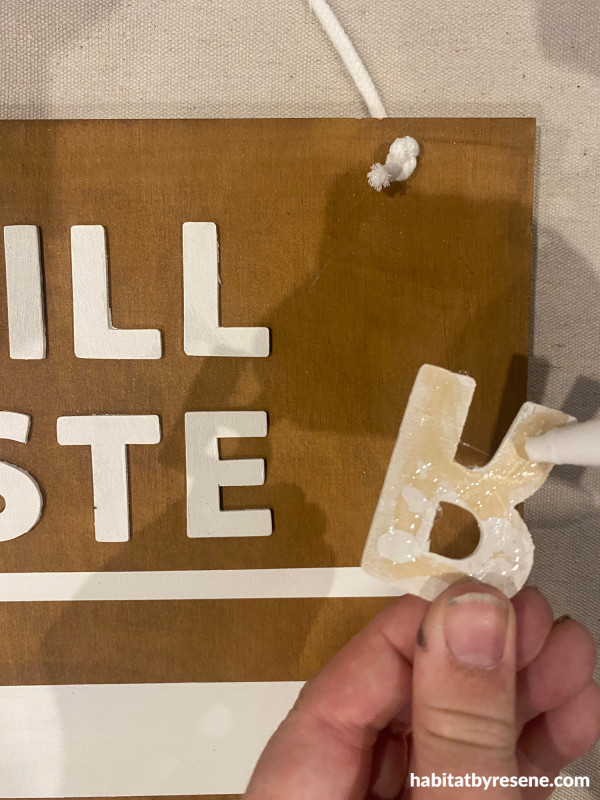
Step 4:Paint your wooden letters in your chosen Resene colour. We used Resene Rice Cake for our letters to match the stripes. Once dry, glue your letters onto the board.
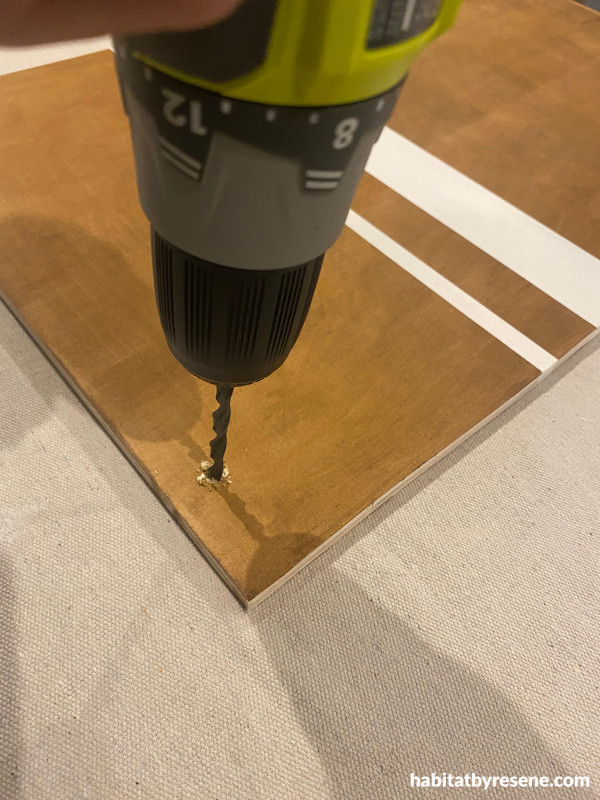
Step 5:Drill holes for the rope.
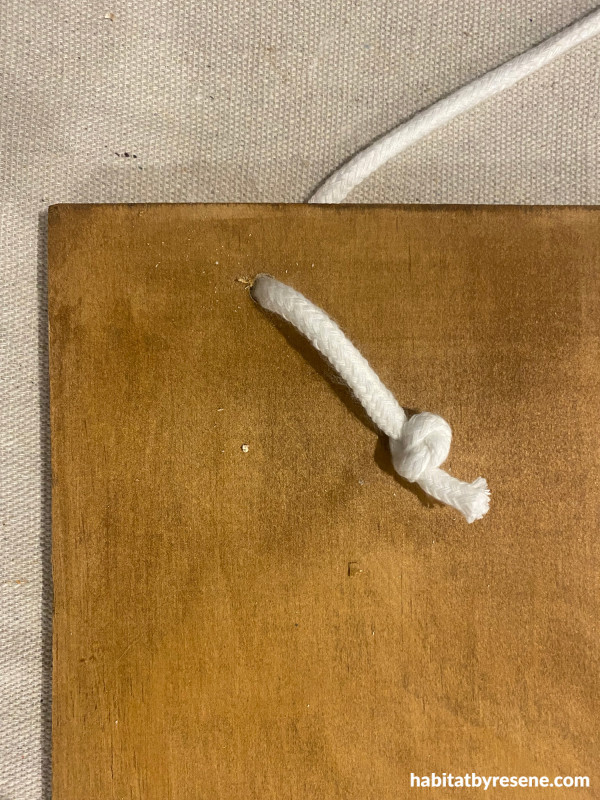
Step 6:Thread your rope through the holes and tie at front.
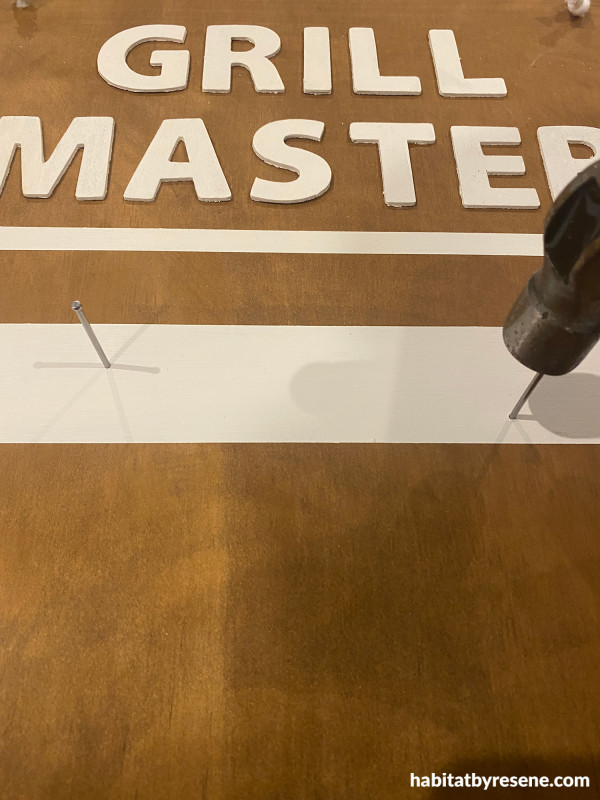
Step 7:Hammer some nails into the board for your BBQ tools to hang. Take note of how many tools might go on the board so you can space them out evenly.
Step 8:Hang in the kitchen or outside in the BBQ area – wherever Dad works his grill magic!
Wall painted in Resene Eighth Pearl Lusta, table in Resene White. Tongs and spatula from Mitre 10.
Note: If using in the kitchen, use a Resene Colorwood (interior) wood stain.
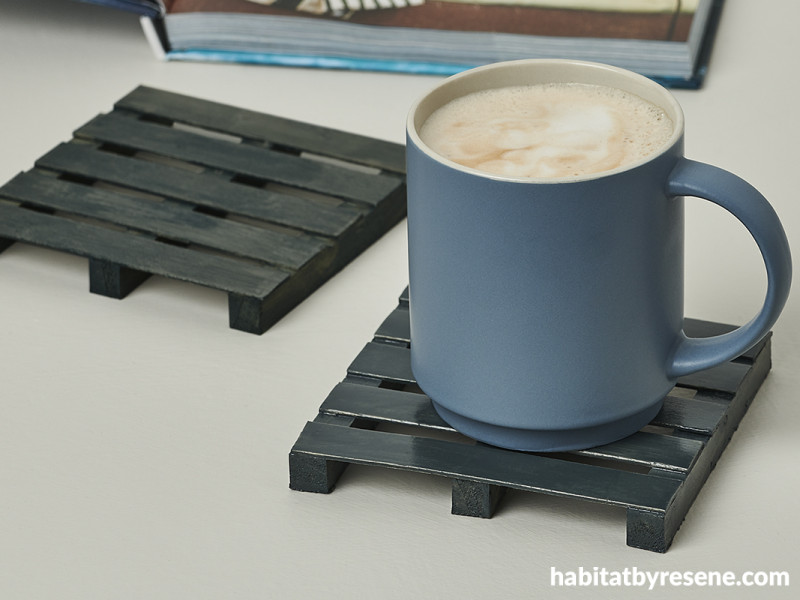
Serve Dad’s favourite beverage with these DIY pallet coasters
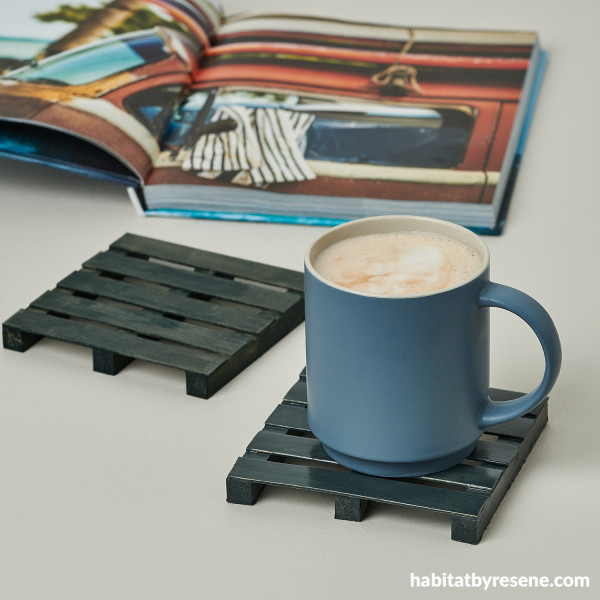
These simple pallet coasters are great for dad’s morning coffee and you can make them in a matter of hours. Choose a more natural look with a Resene Colorwood stain like ours, or choose Resene testpots in Dad’s favourite colours. You could even paint a fun pattern or character on them if you’re feeling artsy!
You will need:
- 3 pieces of square dowel which are 1.5cm thick and 12cm in length
- 5x 2cm wide popsicle sticks
- Glue
- Scissors
- Testpot brush for staining or a cloth
- Resene Colorwood stain in a shade of your choice. We used Resene Colorwood Rising Tide
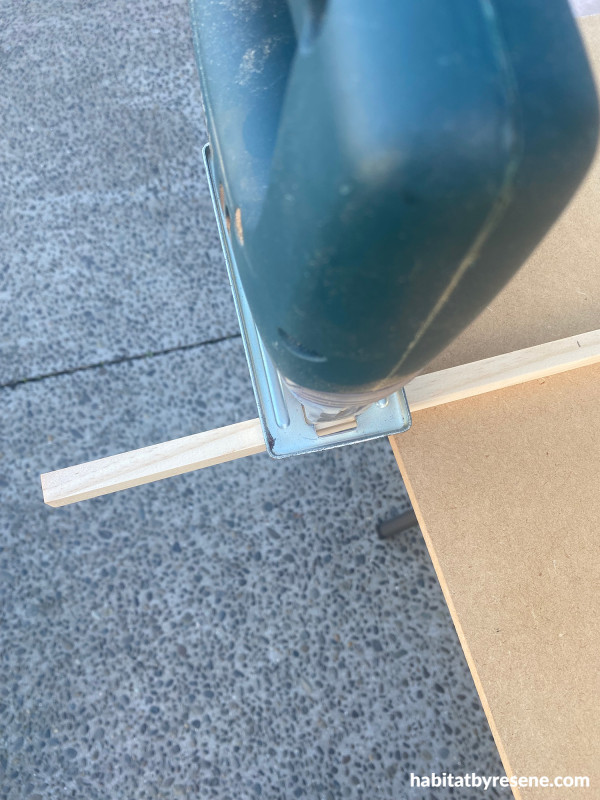
Step 1:Cut your dowel to 12cm lengths.

Step 2:Measure 12cm in length on your popsicle sticks in pencil. Be sure to measure in the middle so you are just cutting off the ends.
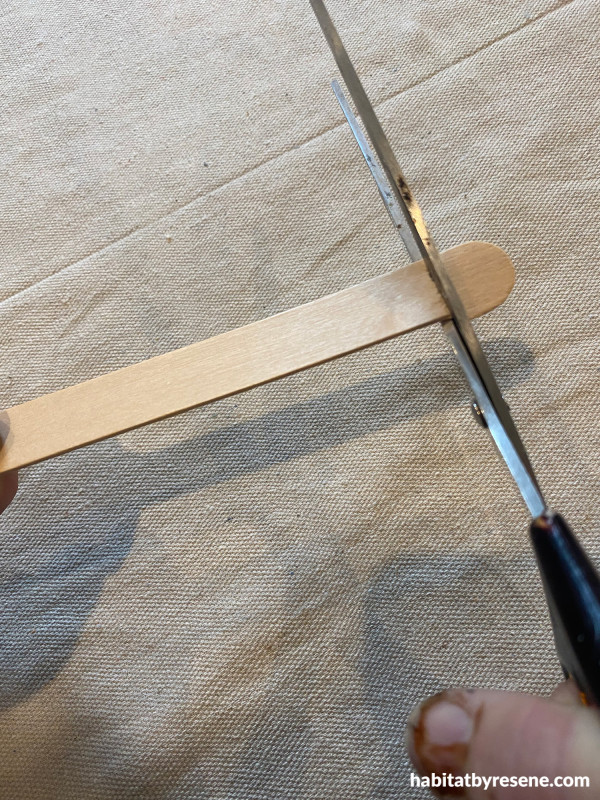
Step 3:Cut the ends of the popsicle sticks with scissors.
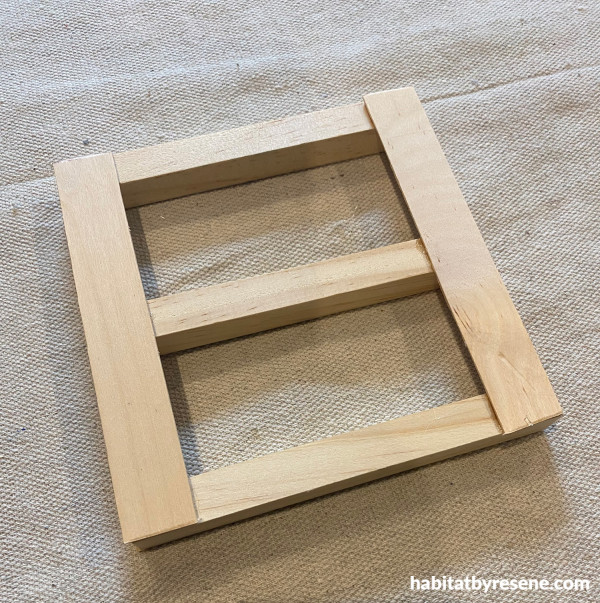
Step 4:Lay your three pieces of dowel on a table and place the five popsicle sticks on top to assemble your pallet.
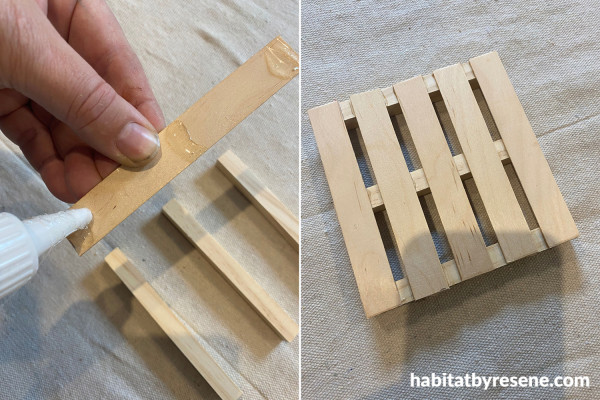
Step 5:Glue the popsicle sticks to the dowel using a clear craft glue.
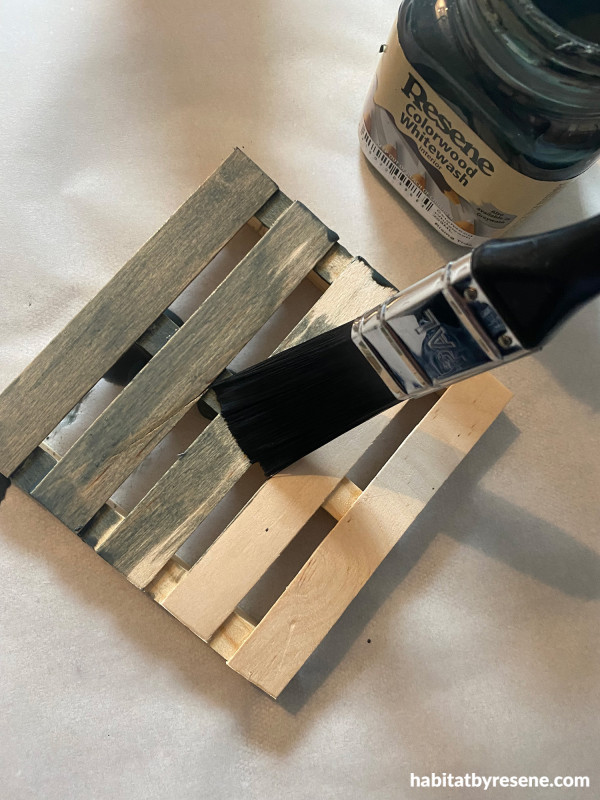
Step 6: Stain or paint your pallet coaster in your chosen colour. We stained ours in Resene Colorwood Rising Tide. We gave one coaster one coat and the second coaster two coats for some variation. This is really your preference – one coat shows the wood colour through more.
Step 7:Serve dad his favourite beverage on his new pallet coasters.
Coffee table painted in Resene Quarter Drought. Coffee mug from Freedom.
projects Vanessa Nouwens
images Bryce Carleton
Published: 04 Sep 2025

