
latest
habitat tv

Say goodbye to the morning scramble for keys, coats and sunglasses and hello to this… see this and more videos
blog

Re-living the 1980s through art
Clint C is an artist whose work instantly sparks recognition and joy. Based in Hamilton,… more

Two easy and extra festive Christmas DIY crafts
17 Dec 2025
With only a few days to go until the Christmas, you’re likely to be busy finishing your gift shopping and preparing for entertaining guests. And if you feel like your home just needs that finishing festive touch, then these two DIY draft projects will take no time at all. They are also great ones for keeping the kids busy while you’re sorting out the house!
Merry stickmas
You will need:
- Thick sticks or branches
- Sand paper
- Paintbrush
- Resene testpot paints in your chosen Christmas colours. Fleur used Resene Romantic, Red Berry, Mocha, Paprika, Del Toro, Raging Bull, Rice Cake, Glamour Puss and Black
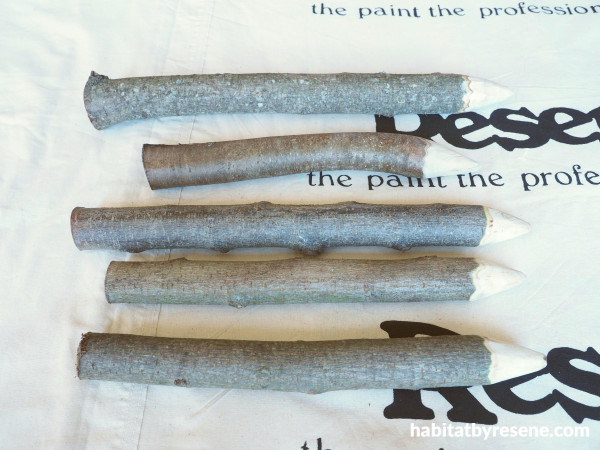
Step 1: Start by cutting some branches into short lengths. Fleur’s are about 22cm long. Sand one end down to form a point, and wipe away any dust.
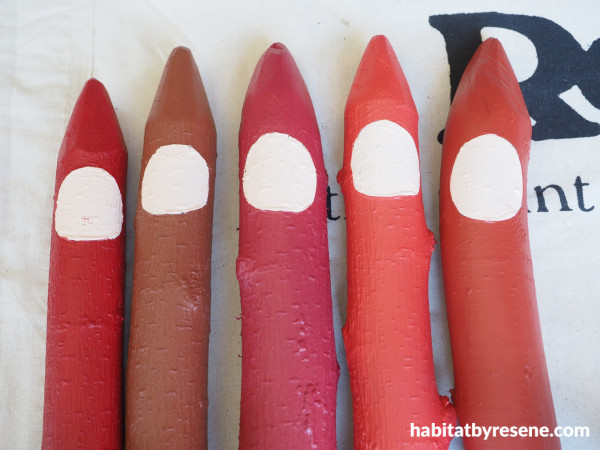
Step 2: Paint a circle for the face using Resene Romantic, and then paint the rest of the branch in your chosen red colour. Fleur used (left to right) Resene Red Berry, Mocha, Paprika, Del Toro and Raging Bull.
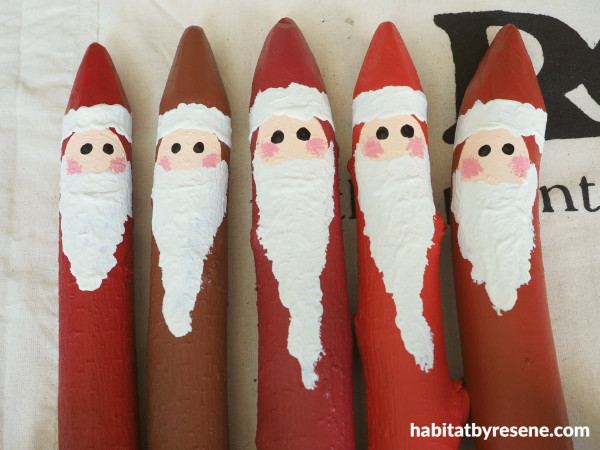
Step 3: Use Resene Rice Cake to paint on a fluffy trim around the hat and for the beard. Dab on Glamour Puss for the cheeks and use the end of a paint brush to dot on the eyes with Black.
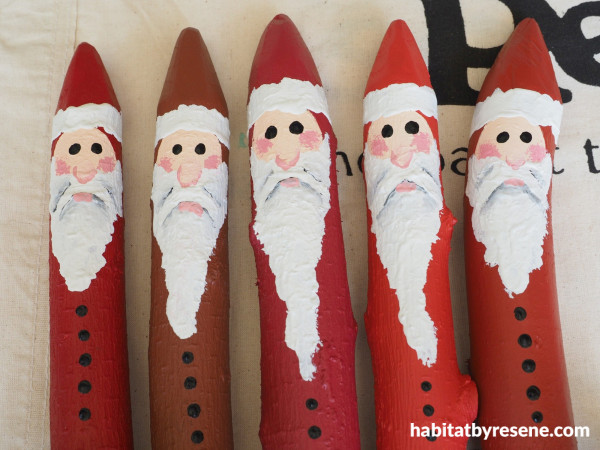
Step 4: Finish the face with some more details, such as Resene Glamour Puss and Romantic for the nose, Black mixed with some Rice Cake to form the shadows around the moustache, and Glamour Puss for the lip. Dot on some buttons below the beard with Black.
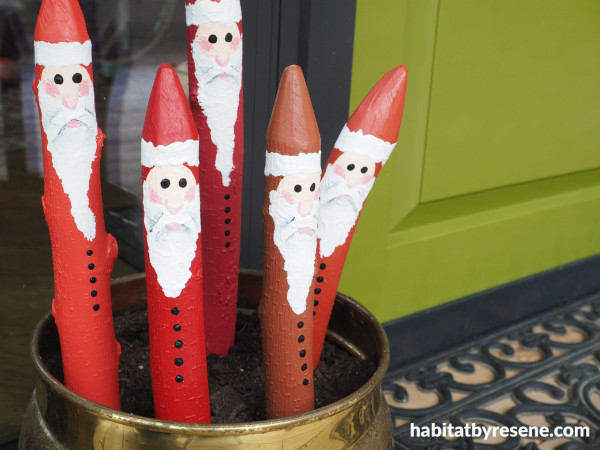
Step 5: Fill a pot, bucket or bowl with soil or sand and push your Santa sticks into it. You could play around with adding foliage or Christmas tree baubles to cover the soil too.
Door painted in Resene Planter.
Pining for Christmas
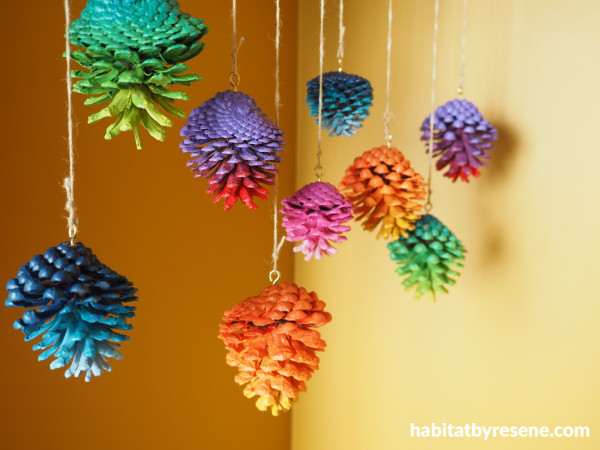
You will need:
- Pinecones
- Paintbrush
- Electric drill
- Brass cup hooks
- String
- Resene testpots in your chosen paint colours. See the steps below for Fleurs colours.
Note: if you’re out collecting pinecones and you find some that are tightly shut, leave them on the windowsill in the sun for a few days to dry out and open up. Tap the pinecones on a hard surface to make the seeds fall out.

Step 1: Paint the pinecones with a graduated colour scheme. Start with one colour at the top of the pinecone and work your way to the base with two or three other colours. Don’t wash out your paint brush between colours, as the mixing of the two colours makes for a better gradient. You can make your pinecones as colourful as you like in any of your chosen shades. Here are the colours Fleur used:
Orange pinecone:Resene Pirate Gold, Chilean Fire, Daredevil and Fire.
Blue pinecone: Resene Blue Moon, Maestro and Blue Night.
Green pinecone: Resene Citron, Bilbao and Maestro.
Pink pinecone: Resene Glamour Puss, Irresistible and Sassy.
Purple pinecone: Resene Bullseye and Kingfisher Daisy.
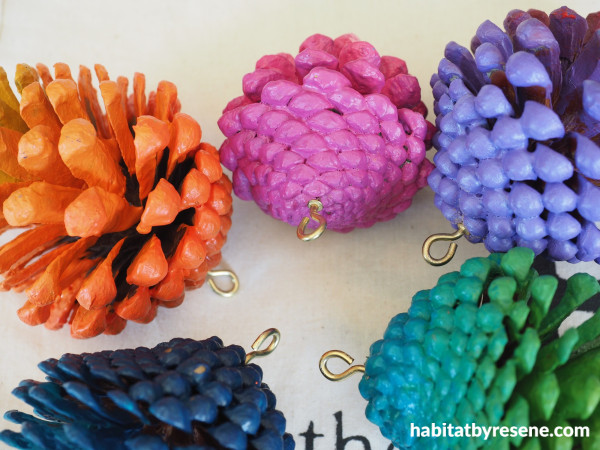
Step 2: Once all the paint is dry, use an electric drill to drill a hole into the woody base of the pinecone. Twist a brass cup hook into the hole.
Step 3: Use some string to hang the pinecones up. Place them around your home or on your Christmas Tree.
Wall painted in Resene Afghan Tan.
project and images Fleur Thorpe
Published: 17 Dec 2025

