
latest
habitat tv

Say goodbye to the morning scramble for keys, coats and sunglasses and hello to this… see this and more videos
blog

Re-living the 1980s through art
Clint C is an artist whose work instantly sparks recognition and joy. Based in Hamilton,… more
Turn an unwanted cabinet into a magical kid’s oven
19 Apr 2018
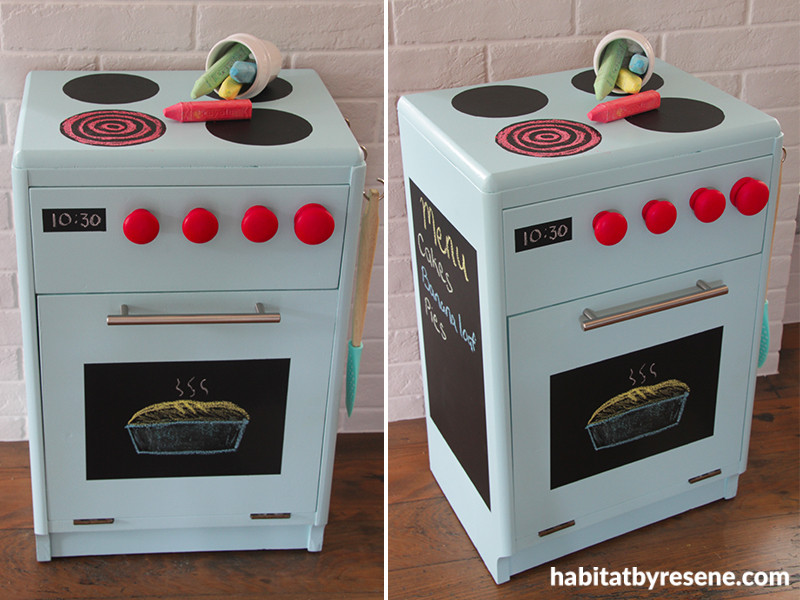
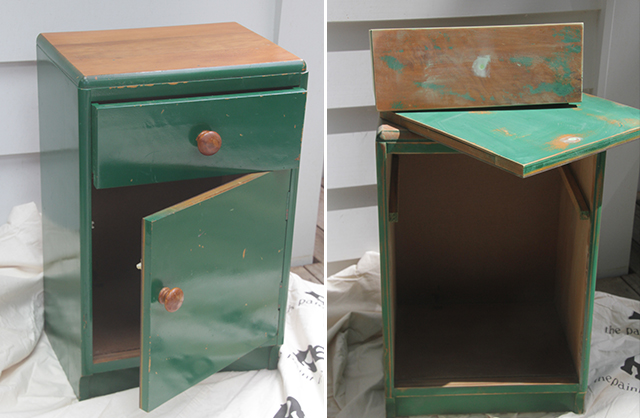
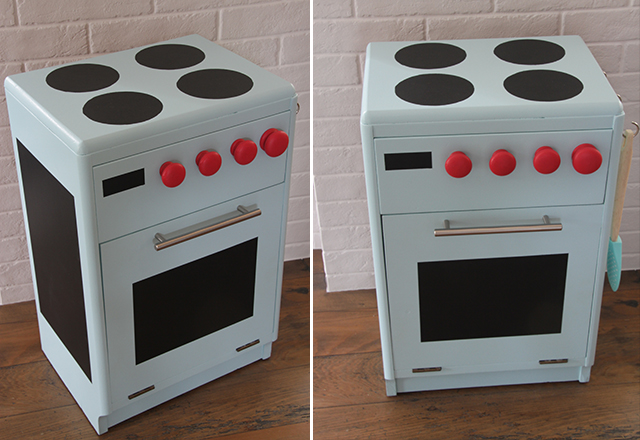
Give new life to this tired old bedside cabinet by converting it into a fun play oven. The kids will have endless hours of fun ‘cooking’ meals for their family and friends.
Sarah Eberhardt shows us how.
You will need:
- Wooden bedside cabinet
- Resene Lustacryl tinted to Resene Morning Glory (500ml)
- Resene Blackboard Paint
- Resene testpot in Resene Candy Floss
- Resene Quick Dry primer sealer undercoat (500ml)
- Masking tape
- Sandpaper
- Large and small paintbrush
- Mini roller
- PAL contract filler
- Long metal handle (approximately 200mm long for the oven door)
- 3 cup hooks
- 4 round wooden drawer handles
- Magnetic catch
- Screwdriver and drill
Step one. Remove the handles of the drawer and door. Then, remove the door, hinges and catch.
Step two. Sand the cabinet, drawer and door inside and out. And fill any holes with contract filler – leave to dry and sand.
Step three. Paint the cabinet and drawer inside and out with a coat of Resene Quick primer sealer undercoat and leave to dry.
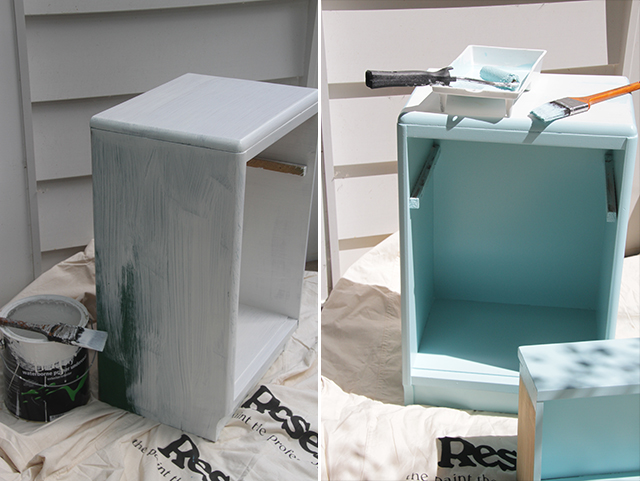
Step four. Paint the cabinet and drawer inside and out with two coats of Resene Lustacryl tinted to Resene Morning Glory, leaving to dry between coats.
Step five. With a pencil, draw four circles (approximately 120mm in diameter) for elements on the top of the bedside cabinet (Sarah drew around a CD).
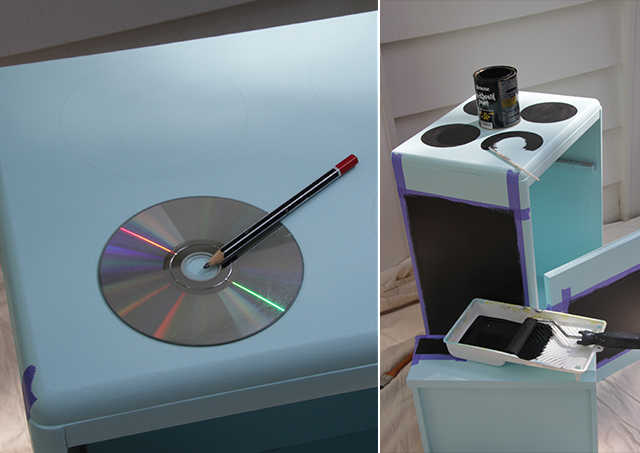
Step six. Use a small paint brush to carefully paint around the edges with Resene Blackboard Paint and a larger paint brush to fill in the circles.
Step seven. To create the blackboards, mask off a rectangle on the front and side of the cabinet with painter’s tape.
- For the oven, on the front of the door, mask an area 250x180mm.
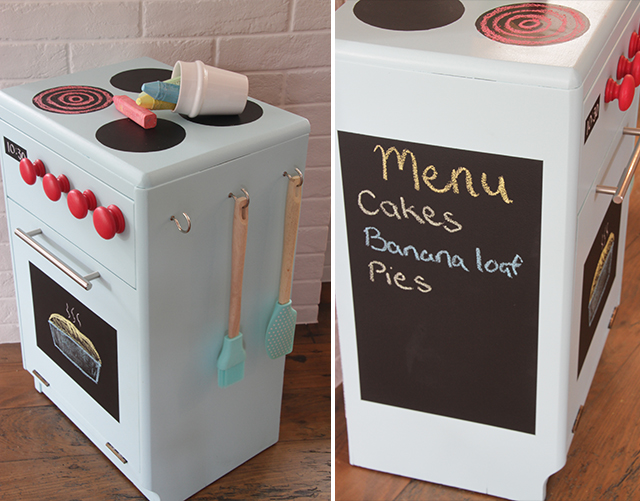
- For the menu on one of the sides of the bedside cabinet, mask an area 400x200mm.
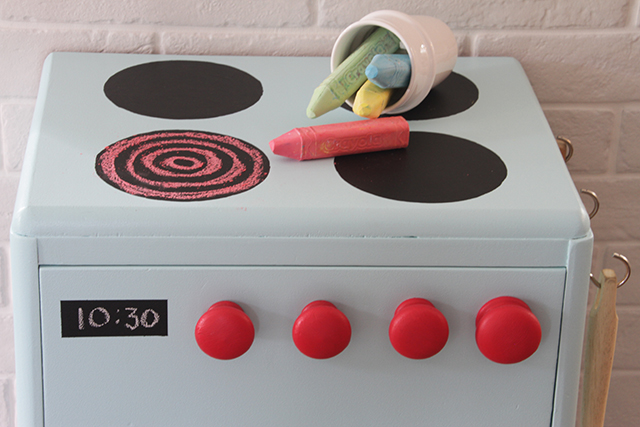
- For the clock on the top right of the drawer, mask an area 70x35mm.
Step eight. Paint each masked area with two coats of Resene Blackboard Paint, using a mini roller or brush. Leave to dry.
Step nine. Reattach the door with the hinges at the bottom of the bedside cabinet rather than the side. Attach a magnetic catch at the top of one of the sides of the oven so the door will stay closed.
Step ten. Paint the round drawer handles in Resene Candy Floss and attach across the face of the drawer with screws – these will be the knobs to ‘turn’ the oven elements on and off.
Step eleven. Drill small pilot holes and screw on the long metal handle rail to the front of the oven door.
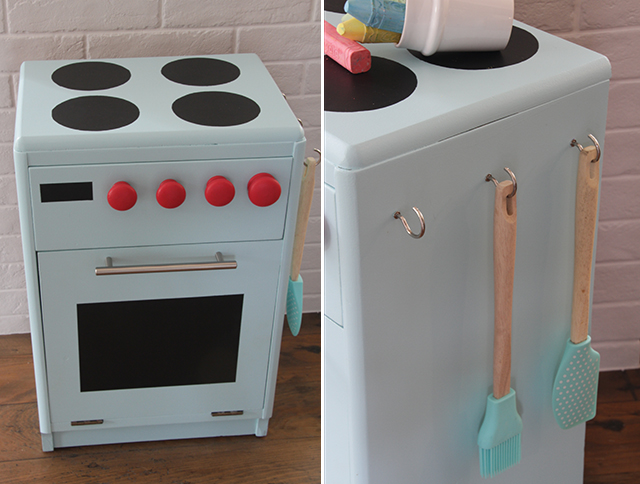
Step twelve. Drill small pilot holes and screw in the cup hooks on one side of the bedside cabinet – here you can hang cooking utensils.
Step thirteen. To finish, use red chalk to make elements appear ‘hot’. Also use coloured or white chalk to draw cakes baking in the oven on the oven door, write a menu on the blackboard on the side of the oven and create a digital clock on the rectangle on the drawer front.
Tips and tricks
- You can add a shelf inside the oven by attaching timber runners to each side and use a cooling rack as the oven rack.
- The drawer can be used to store play food and utensils.
- You can use old scratched CDs or DVDs as your elements – paint with Resene Blackboard Paint and glue it to the top of the bedside cabinet.
- If you have two bedside cabinets, you could create a kitchen sink in the top of one bedside cabinet – use a jig saw to cut out a hole and drop in a lipped stainless-steel mixing bowl or dog food bowl. Finish by screwing on an old tap.
This DIY is brought to you by Upcycling for Good, a collaboration between Resene and The Salvation Army family stores. The project asks keen DIYers to upcycle second-hand items using Resene paint – look out for this regular feature on Habitat by Resene.
Published: 19 Apr 2018

