
latest
habitat tv

Say goodbye to the morning scramble for keys, coats and sunglasses and hello to this… see this and more videos
blog

Re-living the 1980s through art
Clint C is an artist whose work instantly sparks recognition and joy. Based in Hamilton,… more

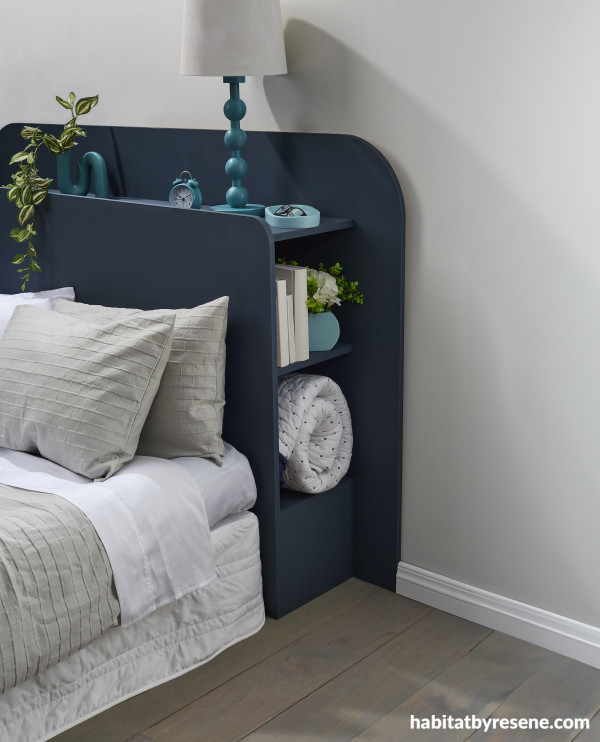
Make a DIY bedhead with shelves
27 Aug 2025
Give your bedroom a smart and stylish upgrade with a DIY bedhead that does more than just look good. This clever design features built-in shelving or cubbies, perfect for storing books, blankets or bedtime essentials - freeing up your bedside table for a lamp, morning coffee or the things you really want close at hand. Painted in the bold and beautiful shade of Resene Coast, this custom bedhead transforms into a striking focal point, combining practicality with modern bedroom style.
You will need:
- MDF back headboard panel: 1830mm (w) x 1200 (h) x 18mm
- MDF front headboard panel: 1530mm (w) x 1050mm (h) x 18mm
- MDF wide shelves x 2: 1530mm (w) x 300mm x 18mm
- MDF square shelves x 4: 300mm (w) x 300mm (h) x 18mm
- Compass
- Jigsaw
- Drill and twist drills
- PVA glue
- Wood screws Resene Quick Dry waterborne primer UnderCoat
- Resene paint – we used Resene Coast
- Screwdriver
- Try square
Step 1: Measure and cut MDF panels, using measurements above.
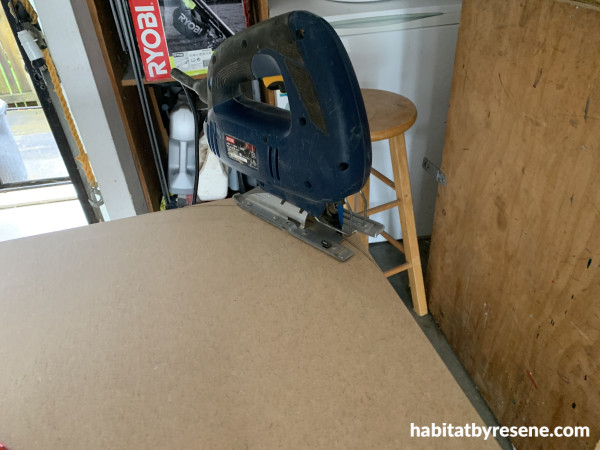
Step 2: Mark and round-off the top outer edges of the front and back panels with a compass. Cut with a jigsaw.
Step 3: Sand the edges. Clean off any sanding dust.
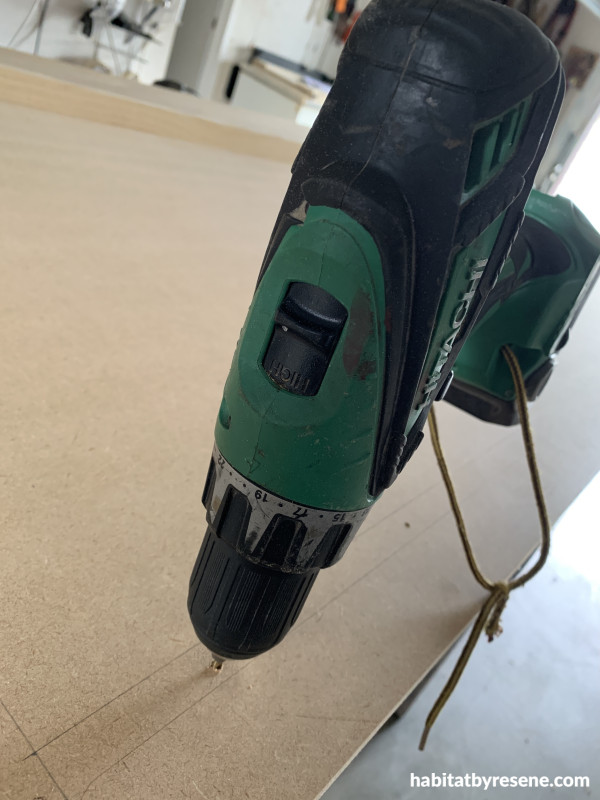
Step 4: On the front headboard panel, mark off the top horizontal shelf fixing spot 50mm from the top edge, centred. Drill and countersink guide holes.
Step 5: Mark off horizontal shelf fixing spot on the back headboard panel, with the fixing spot for the horizontal shelf 350mm from the top edge, centered. Drill and countersink guide holes.
Step 6: Mark out the horizontal placement for the lower shelf, which we marked 310mm below the top shelf. Drill guide holes.
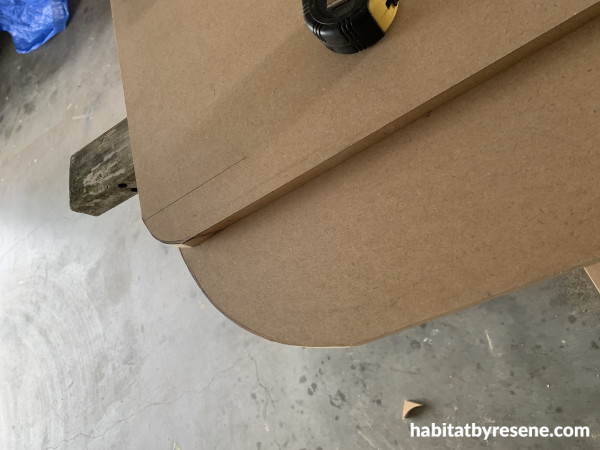
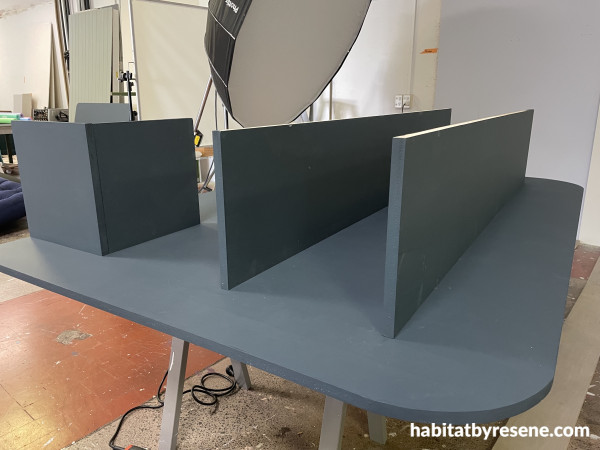
Step 7: On each lower-side of the headboard, use the two 300mm x 300mm square MDF panels to create a ‘half box’ on each outer-lower edge. This will support the base of the headboard and provide a cubbie to keep a rolled-up duvet or pillow in place snuggly. (See main image). Mark out placement and drill guide holes through the front headboard panel and back headboard panel.
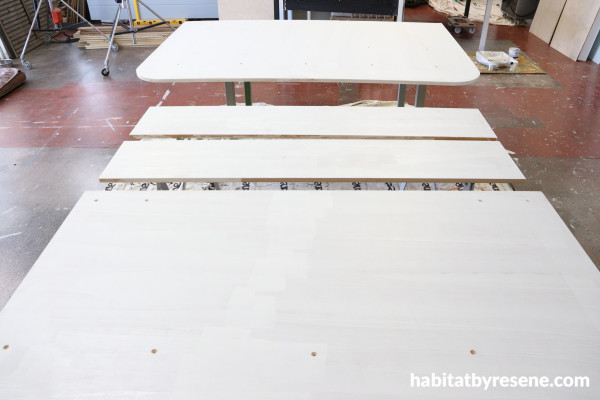
Step 8: Once guide holes are in place on all panels, apply one coat of Resene Quickdry waterborne primer undercoat. Allow to dry.
Step 9: Apply two coats of Resene Coast, allowing for drying time in between coats.
Step 10: Attach the shelfing into place with screws and PVA glue. (Note: We propped up the back panel on a table and screwed from underneath, then sat the front panel on top and secured into place.)
Step 11: Tidy up visible screw holes on the front headboard panel.
Step 12: Secure the headboard to your wall and fill the shelves and cubby spaces with your bedside essentials.
Above: Bedhead painted in Resene Coast, wall in Resene Half House White, skirting in Resene Eighth Black White, floorboards in Resene Colorwood Bleached Riverstone, s-vase, clock and lamp in Resene Ming, tray and lower vase in Resene Kumutoto and books in Resene Quarter White Pointer.
project Ivan Moses
main image Bryce Carleton
stylist Megan Harrison-Turner
Published: 27 Aug 2025

