
latest
habitat tv

Say goodbye to the morning scramble for keys, coats and sunglasses and hello to this… see this and more videos
blog

Re-living the 1980s through art
Clint C is an artist whose work instantly sparks recognition and joy. Based in Hamilton,… more
School holiday DIY projects for all ages!
02 Jul 2025
We’re back with two more DIY projects to keep the kids busy these holidays – army art for the little ones, and a vertical chess board to challenge those teen minds! Take the kids along to your local Resene ColorShop to pick up your supplies and try these out! Whatever you end up making with Resene, we’d love to see the finished result – send us an email at [email protected].
Check you out!
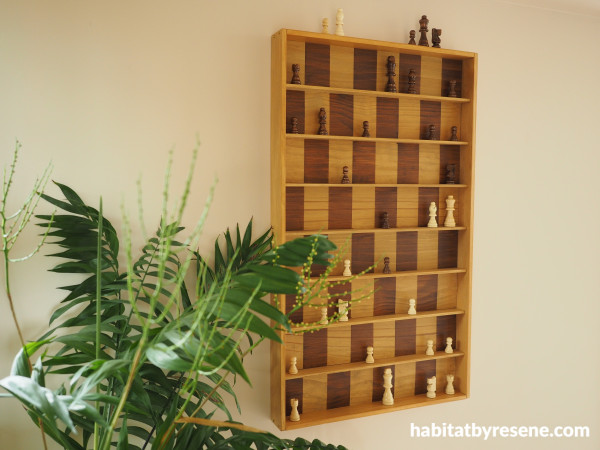
This is one for the slighter older kids who are looking for a challenge. This fresh approach to chess flips it into a fun vertical mode! This elegant wooden box frame stained in Resene Colorwood elevates the classic strategy game to an interactive work of art. For a quintessential black and white checkerboard look paint your vertical board in Resene Nero and Resene Alabaster.
You will need:
- 4x untreated pine boards, 90mm wide x 10mm thick x 900mm long for the back board
- 4x untreated pine boards, 40mm wide x 10mm thick x 900mm long for the shelves
- 3 x untreated pine boards, 60mm wide x 10mm thick x 900mm long for the frame
- Saw
- Sandpaper
- Painter’s tape
- Paintbrush
- Wood glue
- Table saw
- Resene Colorwood wood stains in your chosen shades. Fleur used Resene Natural and Resene Teak
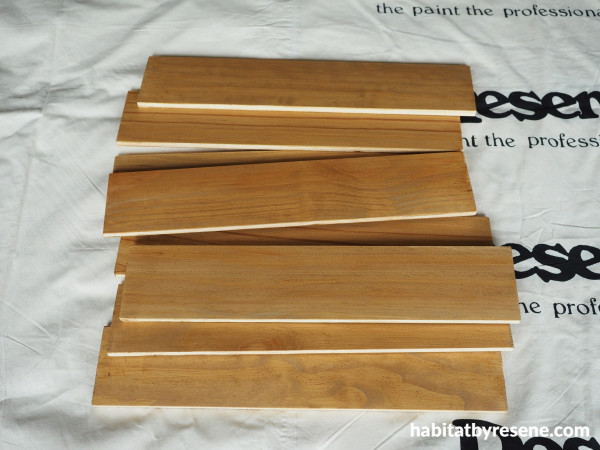
Step 1: Start by cutting the four 90mm wide boards into two 44cm lengths so that you have eight boards in total. Sand any rough edges smooth and then stain these boards with two coats of Resene Colorwood wood stain in your choice of colour. Fleur used Resene Natural.
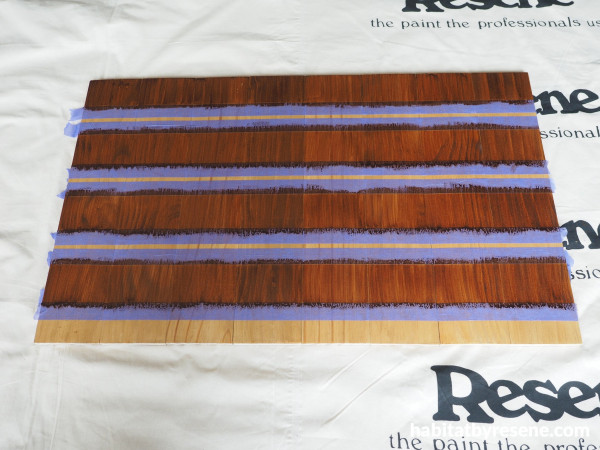
Step 2:Use painters tape to tape off alternate stripes that are each 5.5cm wide, which will give you eight stripes. Remember to rub the tape down firmly. Stain the alternate stripes with one coat of Resene Colorwood wood stain in your second stain colour. Fleur used Resene Teak.
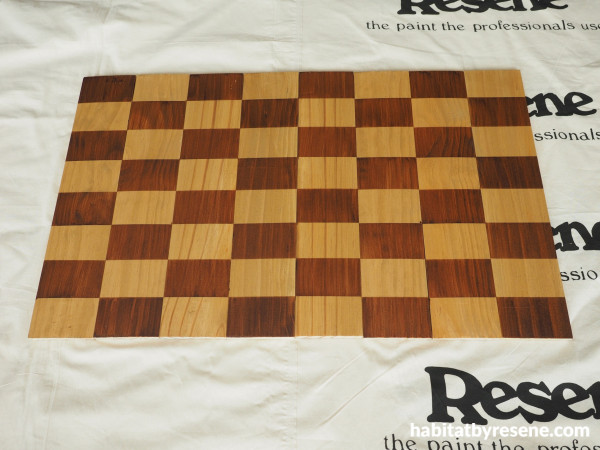
Step 3: Remove the tape then flip every second board over so that it makes a checkerboard pattern.
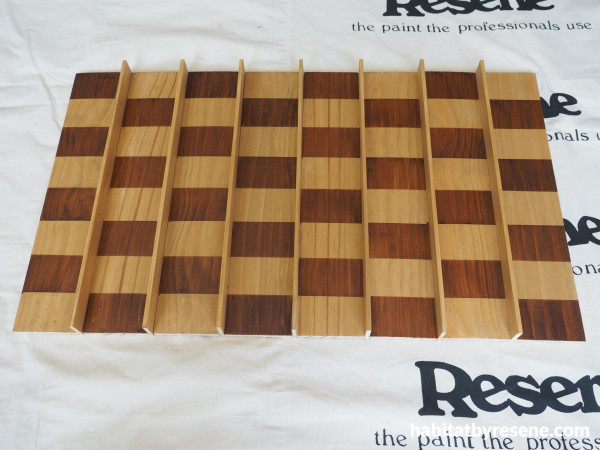
Step 4:Make seven shelves by cutting the 40mm wide boards to length (44cm long). We made our shelves a little thinner using a table saw so that they are 5-6mm thick. Stain these with Resene Colorwood wood stain in your lighter colour. Fleur used Resene Natural.
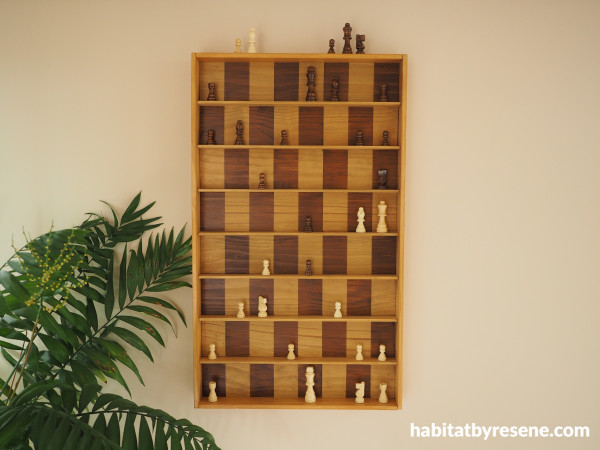
Step 5: Use wood glue to glue the shelves between each of the chessboard boards. Cut the 60mm wide boards to make a frame. Stain these with more Resene Colorwood stain and once dry, attach these with wood glue and screws to the chessboard. Screw two picture hanging D-Rings to the back of the chessboard and use two screws screwed into the wall to hang the chess board. This will stop it from swivelling when touched.
Wall painted in Resene Just Right.
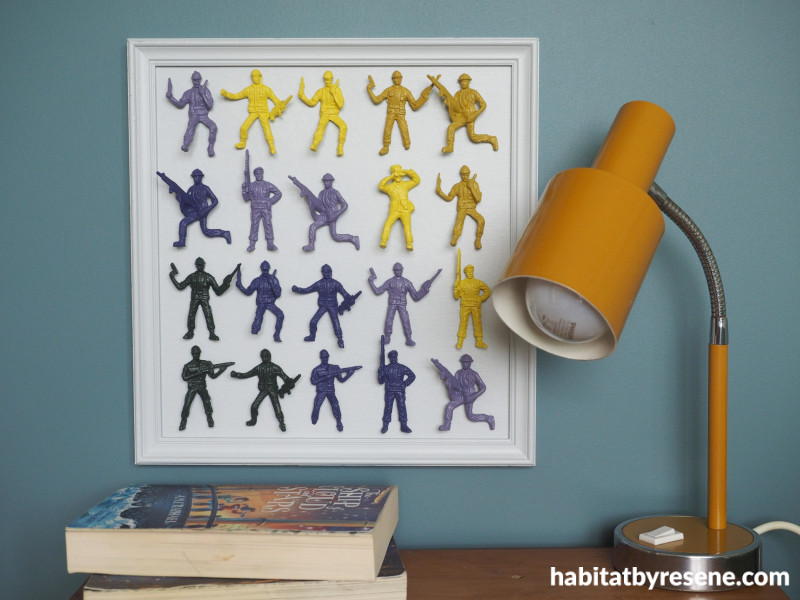
At ease, crafty soldier!

If your child has far too many little army figurines, or maybe they just don’t play with them that much anymore, then making them into a cool DIY army art is a great way to add some character to their bedroom. They don’t have to be army figures either, they could be insects or animals – anything that gives these little plastic toys a second lease at life!
You will need:
- Army figures, or other themed figures of your choice
- Frame
- Paintbrush
- Resene Quick Dry
- Hot glue gun
- Resene testpot paints in your children’s favourite colours. Fleur used Resene Lemon Ginger, Resene Funk, Resene Covert, Resene Jacarta, Resene Gordons Green and Resene Surrender
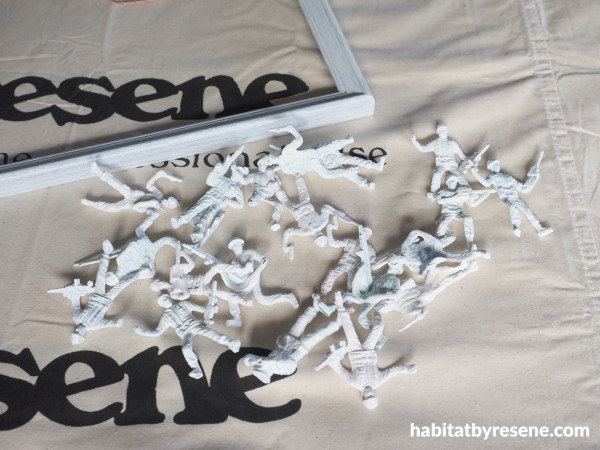
Step 1:Start by priming the army figures with Resene Quick Dry. While you have the primer out, prime the picture frame as well.
Tip: Most army figures have a base that helps them stand up so you might want to cut this off using a craft knife so that the figures sit flatter on the frame backboard.
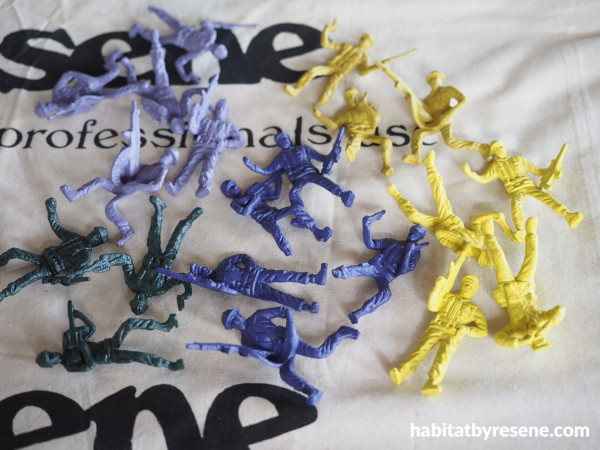
Step 2:Apply two coats of your chosen paint to each figure. Fleur used Resene Lemon Ginger, Resene Funk, Resene Covert, Resene Jacarta and Resene Gordons Green.
Step 3: While the paint is drying on the figures, paint the frame and back board with two coats of your chosen colour. Fleur went with a neutral shade of Resene Surrender which made her army figures pop. Once all the paint is dry, assemble the figures into a diagonal graduated colour scheme and use a hot glue gun to glue them in place on to the frame backboard.
Wall painted in Resene Artemis.
project and images Fleur Thorpe
Published: 02 Jul 2025

