
latest
habitat tv

Say goodbye to the morning scramble for keys, coats and sunglasses and hello to this… see this and more videos
blog

Brick Bay unveils its poetic new folly for 2026
The winner of the 2026 Brick Bay Folly competition has been unveiled. Within the Wings… more
Purr-fect DIY ideas for World Animal Day
30 Sep 2021
Here in New Zealand and Australia we love our pets – in fact we have some of the highest pet ownership statistics in the world. There’s no better time to celebrate our furry friends than World Animal Day, which is coming up on 4 October. Here’s a few paw-some ideas with Resene paint to get you in a creative mood.
Like owner, like pet 
Create a chirpy space using a colour palette inspired by your pet. Wall in Resene Quarter Bokara Grey with floor and sideboard in Resene Eighth Bokara Grey. Tall vase in Resene Despacito and basket in Resene FX Rose Gold metallic. Project by Vanessa Nouwens. Image by Melanie Jenkins.

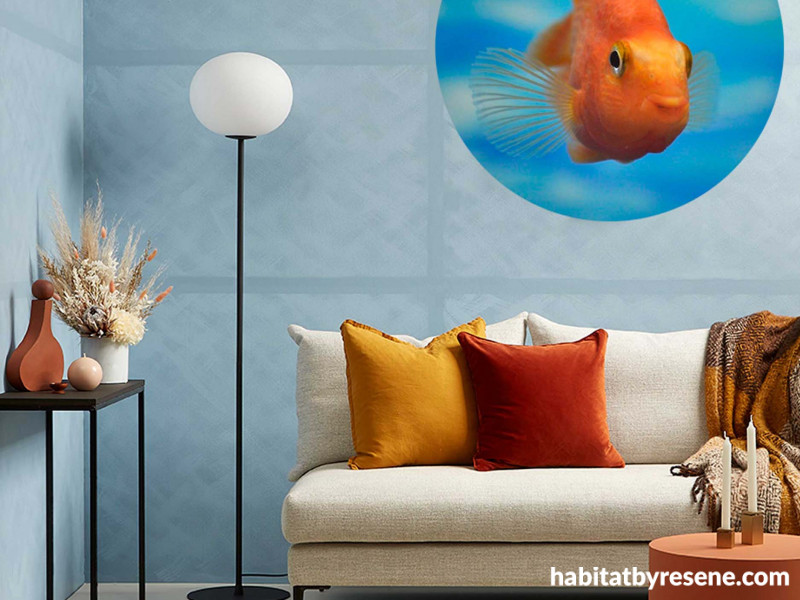
This so-fish-ticated spaces features a wall in Resene Nepal with Resene FX Paint Effects medium coloured with Resene Frozen, floor in Resene Blanc, coffee table in Resene Tuscany and console table in Resene Bokara Grey. Sofa from Wolf & Co, rug from Good Thing, cushions from Adairs, ceramics from Formantics, artwork by Maiko Nagao, candlesticks from Power Surge, lamp from Lighting Plus. Project by Melle van Sambeek. Image by Bryce Carleton.
Mixing and matching is a great way to create a unique space brimming with personality. We’re always painting our walls to colour co-ordinate with our décor or bright pieces of artwork, so why not go one step further and match your walls to your pets? There’s lots of things to love about our pets that we can incorporate into a room to create a stylish vibe. Draw colour inspiration from their fur, feathers or scales, whether it be the fiery orange hues that catch the light as your goldfish swims or the pop of bright colour in your cockateel’s face. Try capturing their personality in the room, with cheeky bright pillows or adventurous rattan décor. Ultimately, a space that celebrates your pet should embody the essence of their presence and bring you the same joy that your pet does.
How about a paw-trait?
A colourful DIY painting of your pet is sure to brighten up any space. Table in Resene Frozen with yellow Resene Spring Fever on the chair at the front, Resene Anise on the back chair and white chair painted in Resene Bubble White with accents of Resene Rapture. The bench seat is in Resene Pattens Blue, jug vase in Resene Blue Chalk, tall vase in Resene Frozen, small plant pot in Resene Rapture and pendant lamp in Resene Nero. Walls in Resene Double Alabaster and flooring in Resene Colorwood Mid Greywash. Plants from Give Plants, cushions from Castle and Things, Dalmatian artwork by Jessie Breakwell. Project by Annick Larkin. Image by Bryce Carleton.
Celebrate your pet with a portrait painted in bright Resene colours. Many people avoid painting – especially human or pet portraits – because they’re afraid their work won’t look realistic enough. Throw the rule book out the window and give a stylised portrait of your pet a try instead – it’ll look as equally amazing hung up in your living or dining area and will have an extra touch of sentimentality. Bold Resene colours are the perfect way to make a pop art piece, or go one step further and create an abstract work of art that captures your pet’s personality, rather than their likeness. Got more than one pet? Learn how to create a cohesive gallery wall for your paintings here: Picture perfect: How to create a gallery wall for any type of artwork | Habitat by Resene
It’s a catastro-tree!
Cool cats only; this stylish tree is painted in Resene Half Gravel, Resene Atmosphere and Resene Black Haze.
This easy-to-make cat tree will be your cat’s new favourite hide out. It’ll not only provide hours of entertainment for your cat, but will be a stylish addition to your interior design. Use contemporary colours such as greys or blues, or try an ombre effect by painting each box a slighter lighter shade of the same hue.
Learn how to make this stylish DIY here: Make your cat the perfect climber | Habitat by Resene
Or learn how to make a retractable cat perch here: DIY cat perch | Habitat by Resene
In the doghouse
Part doghouse, part creative nook, this cute corner features an outline in Resene Half Athens Grey on the Resene Coast wall. Kennel door in Resene Armadillo and floor in Resene Half Chicago. Stencilled paws in Resene Alamo and Resene Half Athens Grey, dog bed in Resene Half Athens Grey and coat pegs in Resene Alabaster, Resene Alamo and Resene Nero. Project by Greer Clayton. Image by Bryce Carleton.
Make your pampered pet their own special space to curl up that will coordinate with your décor. Indoor pet spaces are becoming increasingly popular, as our furry friends become part of our families. We built ours on castors to make relocating it quick and simple. Here’s how you can create your own:
You will need:
- 1200mm x 900mm sheet of structural plywood
- Square dressed plywood trims
- 5 x 50mm rolling castors with brakes
- Wood glue
- Wood filler and spackling knife
- Paint brush
- High quality painter’s masking tape (if you are decorating your dog bed in multiple colours)
- Resene Quick Dry primer
- Resene Lustacryl in your choice of colours – we used Resene Coast and Resene Half Athens Grey
- Resene Aquaclear
- Jig saw or similar
- Power sander and sandpaper
Note: We designed our dog bed frame to fit a fun leopard print cushion we found at our local pet supply store. You may wish to measure your cushion and adjust the sizes of your frame accordingly. Or, if you have a sewing machine, you may choose to make a cushion to fit the measurements we’ve provided instead.
Step 1: Cut the sheet to the size of the width and length of the bed to create the base.
Step 2: Using the width measurement, cut two battens for the sides.
Step 3: Use the length measurement plus the diameter of both the side battens to measure the front and back of the bed, and cut.
Step 4: Take the front piece and outline the cut out. Use a jig saw to cut it out and sander to smooth and perfect the shape.
Step 5: Sand the edges and wipe down all the pieces, including the base. Use your chosen Resene colours to paint the pieces, and leave to dry.
Step 6: Apply wood glue to the width side of the base, and then drill in the width pieces to each side. Repeat for the front and back pieces.
Step 7: Use wood glue to cover the screws and any holes, and once dry sand back. Do a final paint coat over the filled holes.
Step 8: Leave to dry overnight, and then apply Resene Aquaclear to the whole bed.
Step 9: Once dry, turn the bed over and screw in castors (make sure they have brakes, so the bed doesn’t roll when your dog jumps in). Fix four in each corner, plus one in the middle.
Published: 30 Sep 2021

