
latest
habitat tv

Say goodbye to the morning scramble for keys, coats and sunglasses and hello to this… see this and more videos
blog

Reader roundup: See what our readers have been up to!
Refurbished vintage furniture, charming exteriors and magnet walls for kids. These projects are sure to… more
Playing up plywood
05 Mar 2020
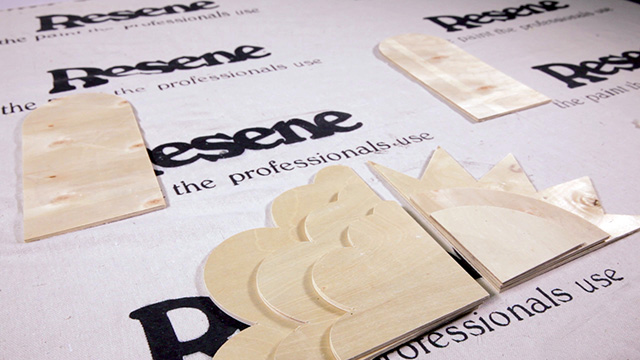
Kids have a special superpower. When they see a simple shape, they don’t just see a square, circle, rectangle or triangle – they see a robot, flower, spaceship or tree, and all they need is a bit of paint to uncover its true form. A helpful adult can make a few simple cuts using a jig saw, scroll saw or similar tool to create basic shapes out of plywood and sand down any sharp edges. Just wipe away the sawdust, then the real fun can begin!
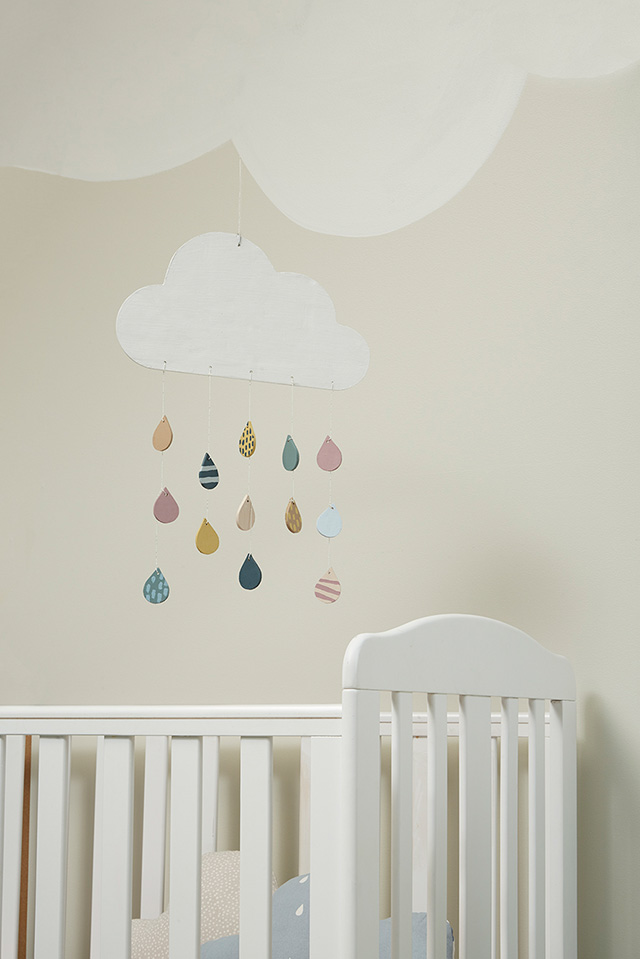
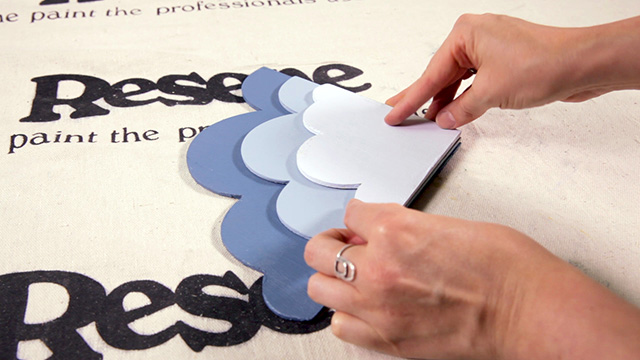
DIY Cloud Mobile
A popular nursery accessory of the 1950s, we think it’s high time for mobiles to make a comeback.
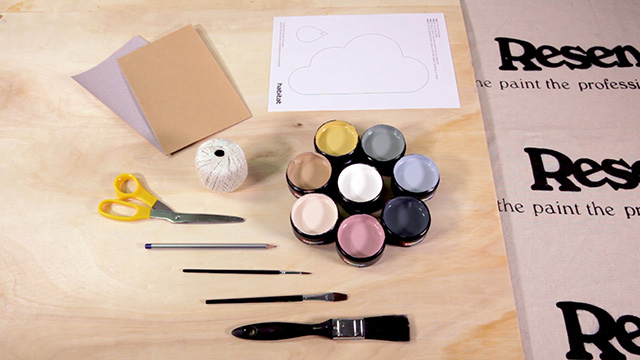
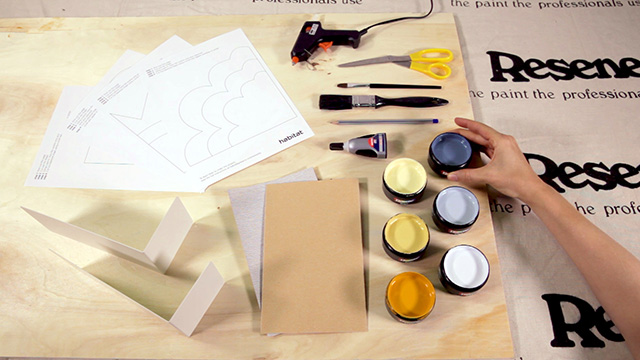
You will need:
- Plywood sheet approx. 5mm thick
- Mobile templates (download below)
- Scissors
- Pencil
- Scroll saw, jigsaw or similar
- Sandpaper
- Electric drill
- Resene testpot brush
- Small artist paint brushes
- String, twine or ribbon
- Resene testpots in your choice of colours – we used Resene Eighth Thorndon Cream, Resene Thor, Resene Laser, Resene Sandal, Resene Just Right, Resene Vintage, Resene Undercurrent and Resene Quarter Frozen
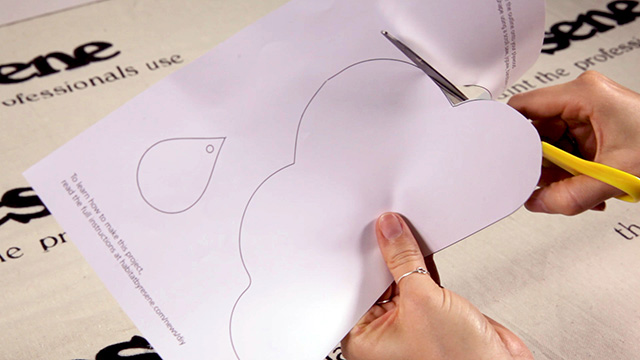
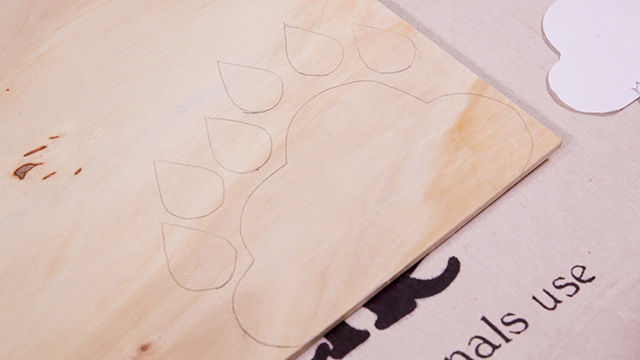
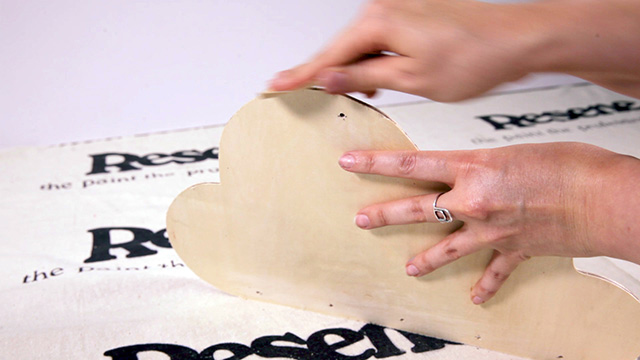
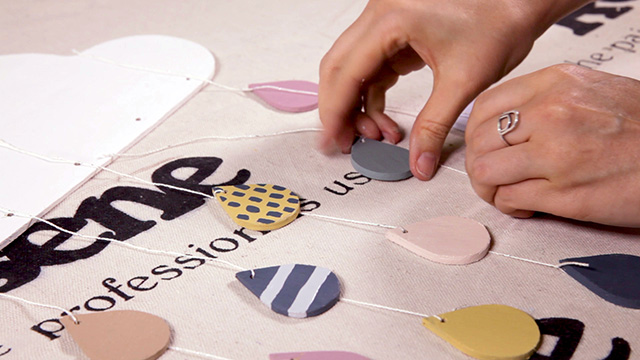
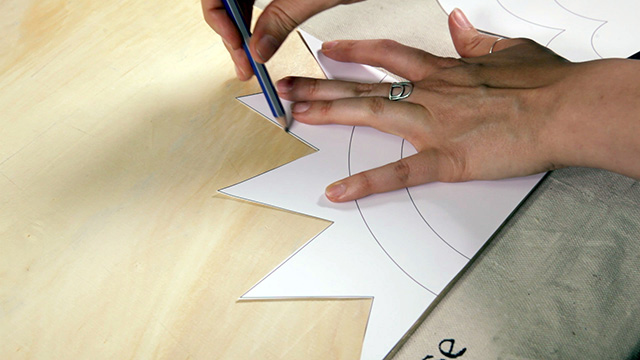
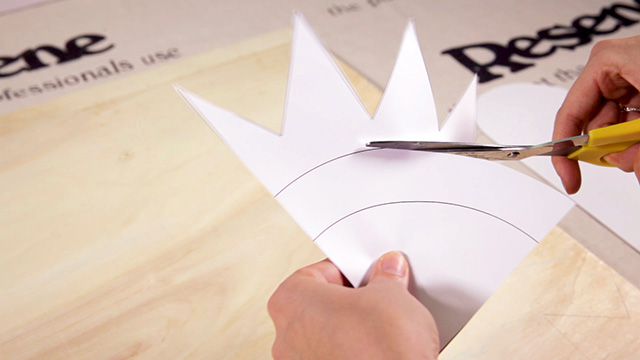
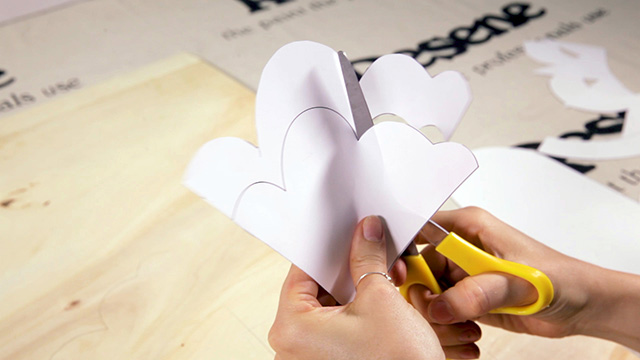
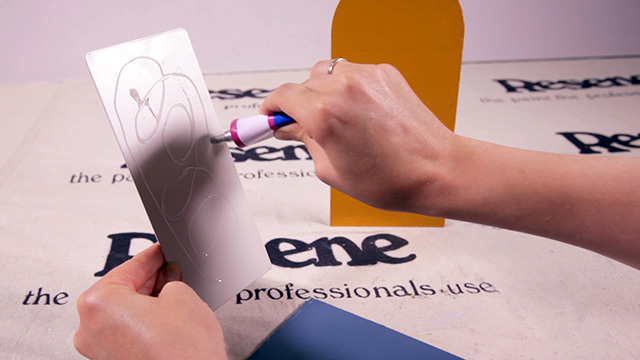
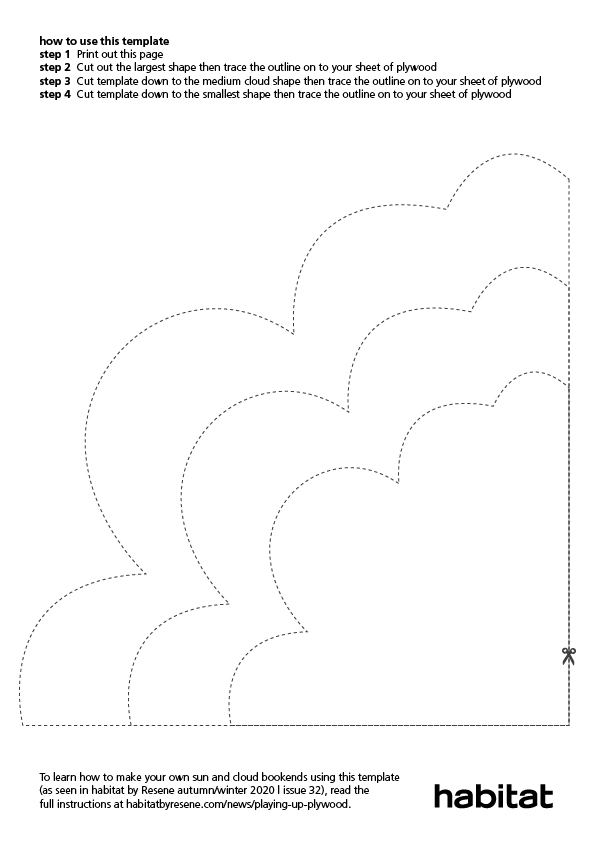
Step 1 Print out the mobile template and cut out the shapes. For a bigger cloud, print your template at a larger size and tape the sheets together before cutting them out. We printed our cloud at 200% and kept our raindrops at their original size for the mobile in our final image.
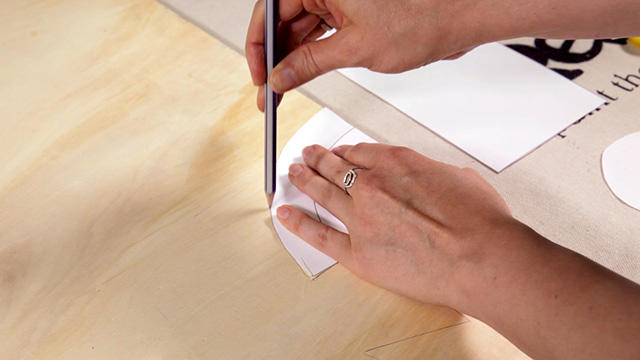
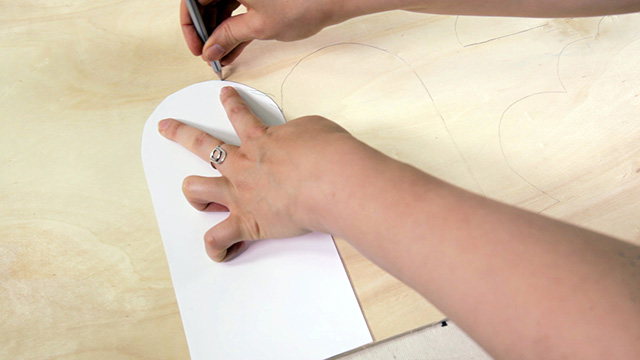
Step 2 Trace your cloud and raindrop shapes on to your sheet of plywood with a pencil. We traced 13 raindrops, but you can make as many or as few as you’d like. Cut out your shapes using a scroll saw, jigsaw or similar.
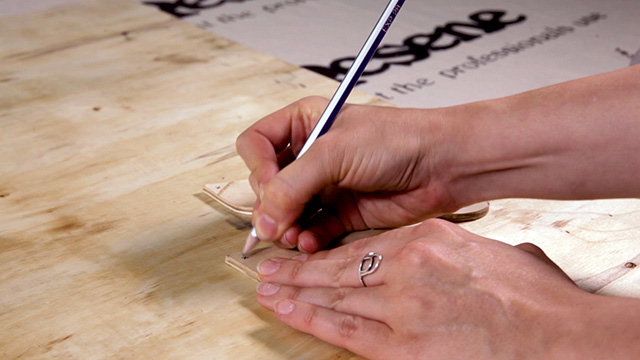
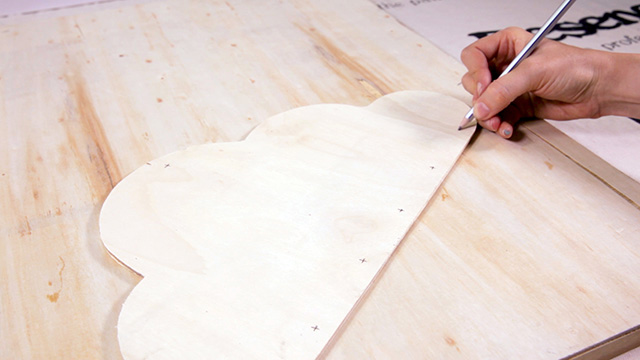
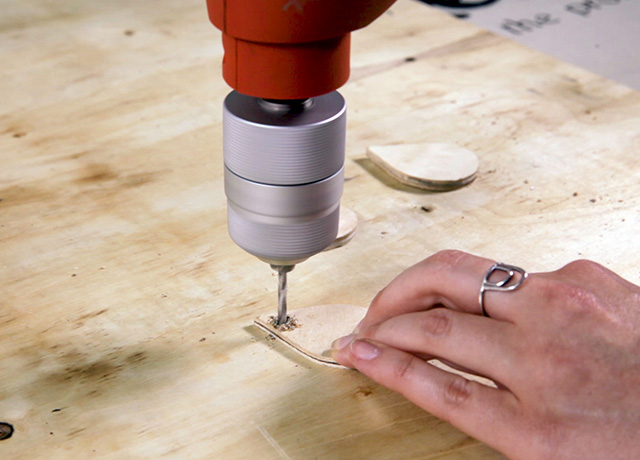
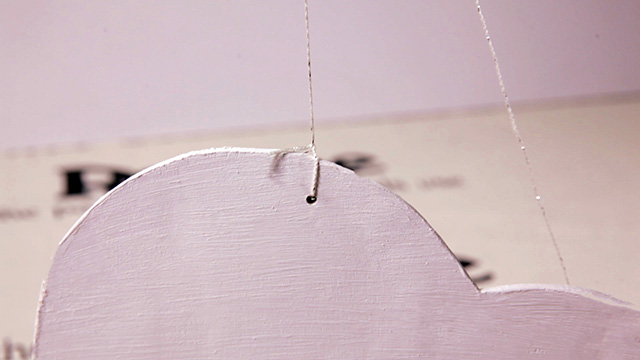
Step 3 Using a power drill, make holes in the tops of each of your raindrops, the top of your cloud and a line of holes across the bottom of your cloud – we made five holes along the bottom. It helps to draw an 'x' in pencil to mark where you will be placing your holes before you start drilling.
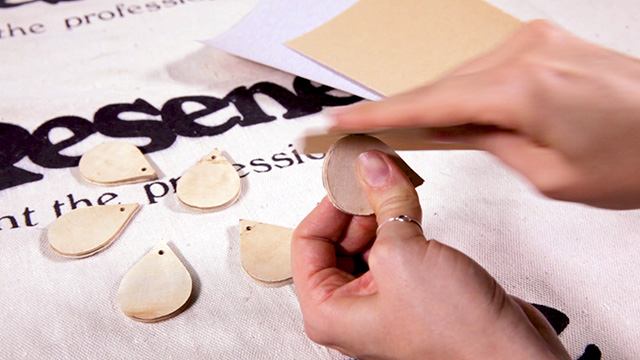
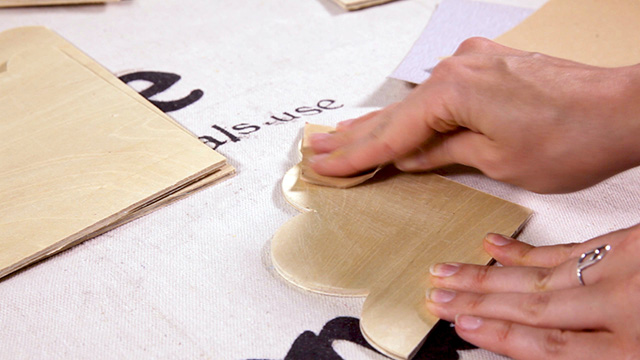
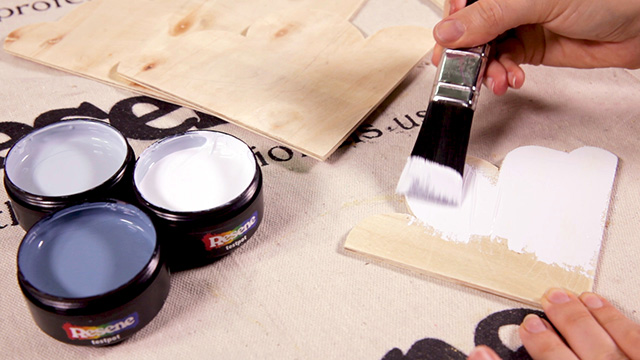
Step 4 Sand down the edges of your shapes to remove any rough edges or splinters. We started with 60 grit then used 120 grit to finish them. Wipe down your shapes with a clean, dry cloth to remove any dust before moving on.

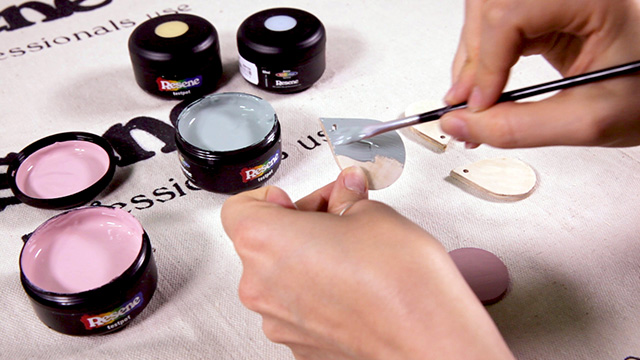
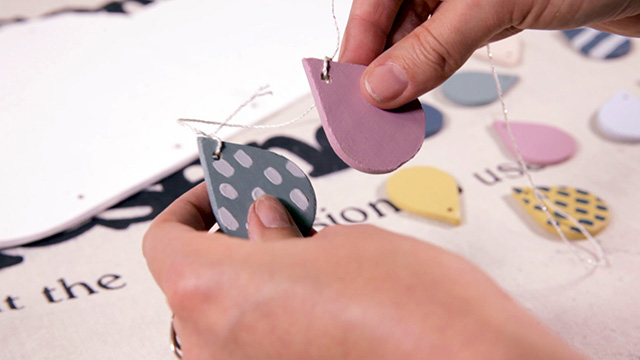
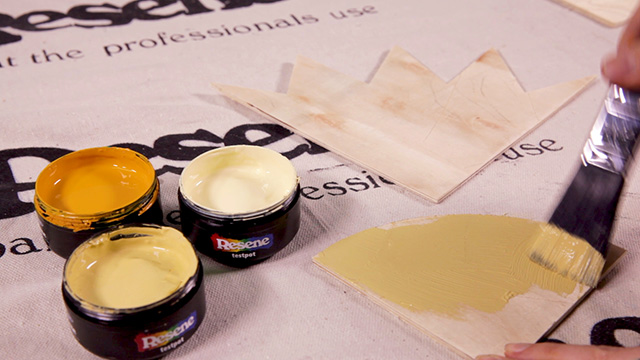
Step 5 Paint your cloud and raindrops using Resene testpots in colours of your choice – we used Resene Eighth Thorndon Cream for our cloud and Resene Vintage, Resene Just Right, Resene Quarter Frozen, Resene Thor, Resene Safehaven, Resene Laser and Resene Sandal for our raindrops. For best results, use two coats and allow your paint to dry fully between coats. To speed up the drying process, you can use a hair dryer.

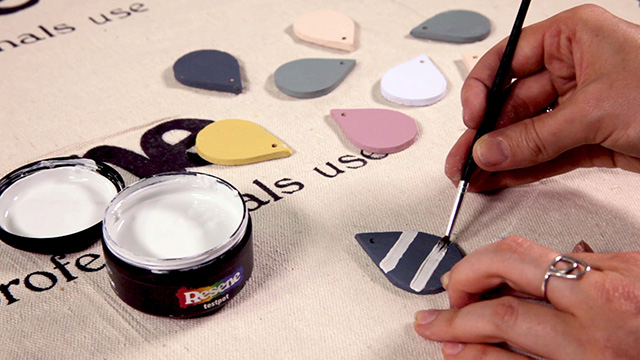
Step 6 Paint patterns on some of your raindrops, if you wish. We painted some with stripes and some with ticks. Allow your raindrops to dry completely.
Step 7 Using string, twine, thread, wool or ribbon, thread through the holes of your raindrops, knotting them on at even intervals, before knotting the end to one of the holes in the bottom of the cloud. We tied two strings with three raindrops each and two with two raindrops each.
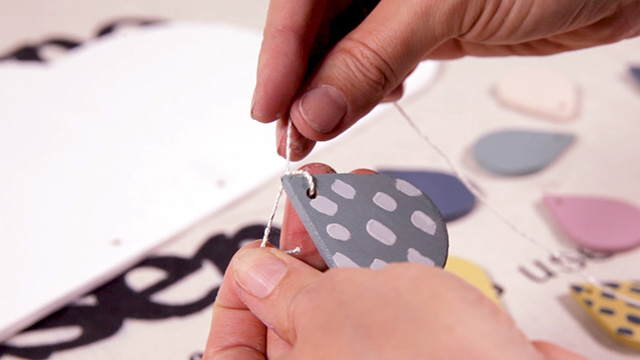
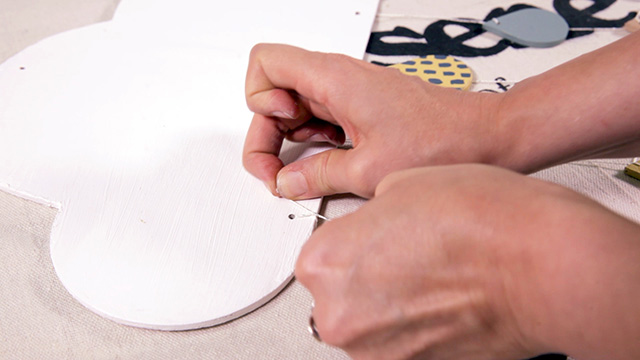
Step 8 Thread a long length of string through the top hole in your cloud, knotting it securely. Hang your mobile from your ceiling using the appropriate hardware and high enough that it will be safely out of reach of little hands.
In our nursery, we painted our wall in Resene Thorndon Cream with clouds in Resene Eighth Thorndon Cream to match the cloud theme. The cloud mobile is painted Resene Eighth Thorndon Cream and the raindrops are in Resene Thor, Resene Laser, Resene Sandal,Resene Just Right, Resene Vintage, Resene Undercurrent and Resene Quarter Frozen.
To print out the below template, right click on the template and select 'save image as'. Save the image to your computer and then print it out on to A4-sized paper once at 100% scale (its current size) and again scaled to 200%.

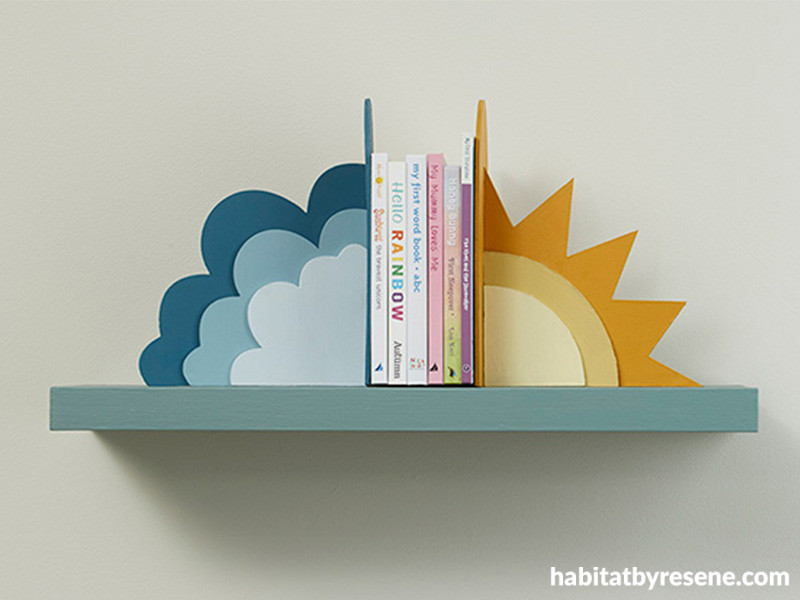
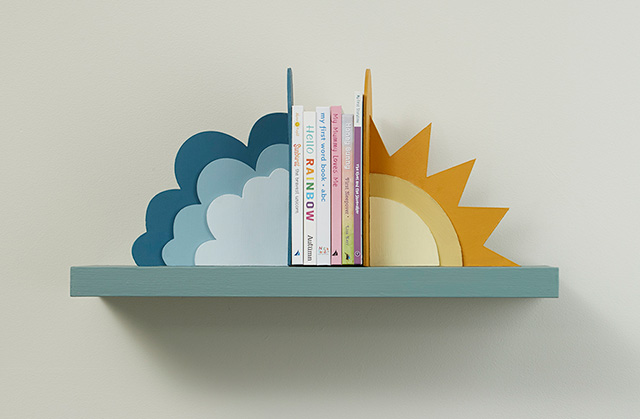
DIY sun and cloud bookends
Rain or shine, you and your kids will never get tired of looking at these cheerful bookends.
You will need:
- Plywood sheet approx. 5mm thick
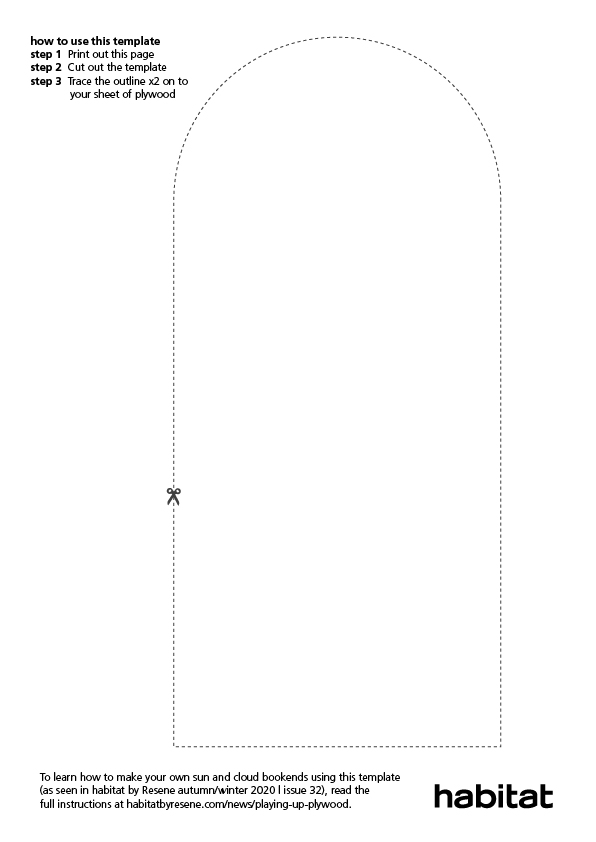
- Bookend templates (download below)
- Scissors
- Pencil
- Scroll saw, jigsaw or similar
- Sandpaper
- Metal bookends
- Quick bond glue suitable for wood and metal
- Hot glue gun and hot glue sticks
- Resene testpots in colours of your choice – we used Resene Quarter Frozen, Resene Bali Hai, Resene Undercurrent, Resene Mellow Yellow, Resene Laser and Resene Pirate Gold
- Resene testpot brush
- Small artist paint brushes
- High quality painter’s masking tape
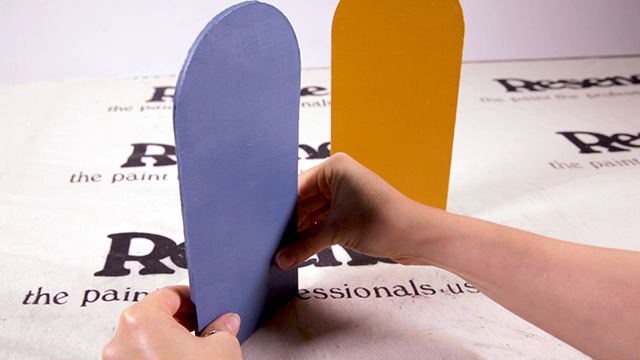
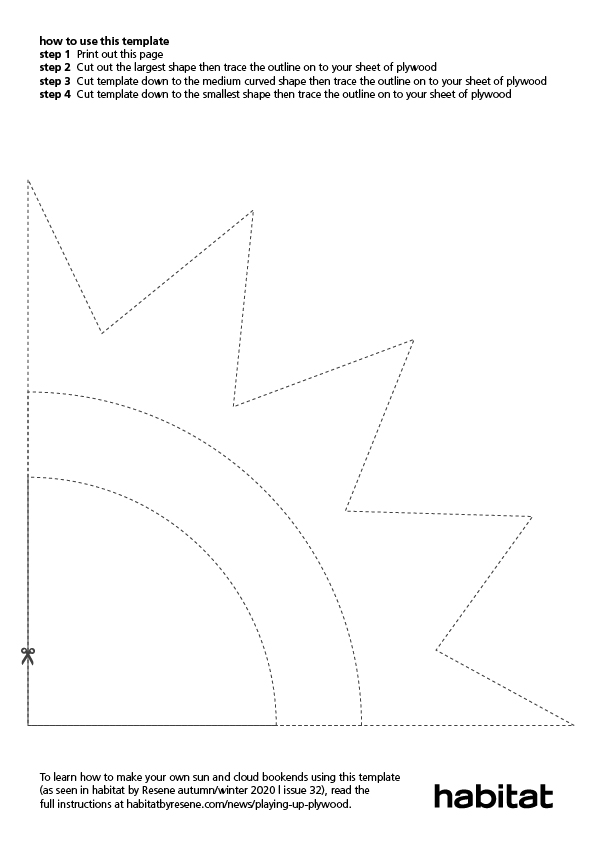
Step 1 Cut out the bookend templates (download below) using scissors then trace the shapes onto plywood with a pencil. To conserve paper, cut out the largest sun/cloud shape first, trace it on to the plywood, then cut into the template around the medium shape, trace it, then do the same with the smallest shape.

Step 2 Using a scroll saw, jigsaw or similar, cut out the shapes and sand down any sharp edges. Wipe away sawdust with a clean, dry cloth.
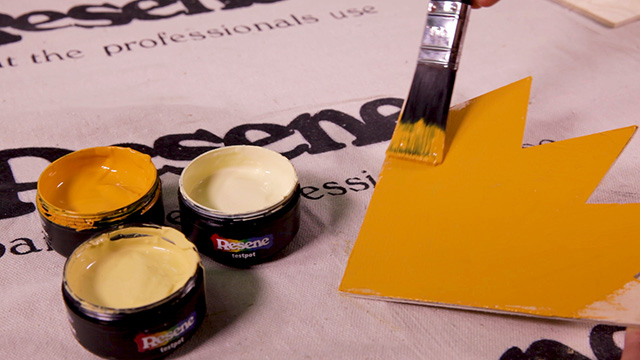
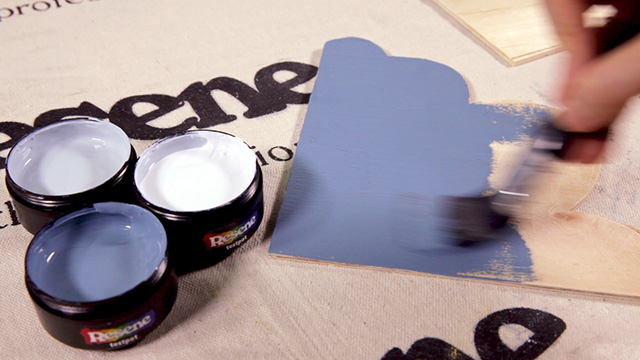
Step 3 Paint plywood shapes using Resene testpots in colours of your choice. We used Resene Quarter Frozen, Resene Bali Hai and Resene Undercurrent for the clouds, Resene Mellow Yellow, Resene Laser and Resene Pirate Gold for the sun and Resene Undercurrent and Resene Pirate Gold for the arches. For best results, apply paint in two coats and allow adequate drying time in between. If desired, you can use a hair dryer to help speed up the drying process.
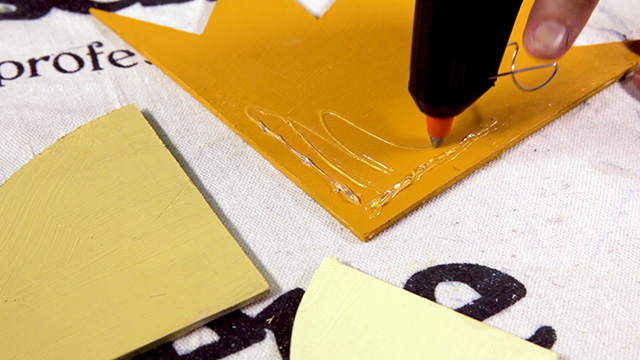
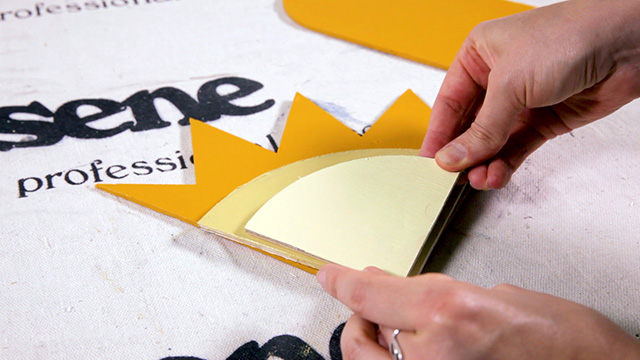
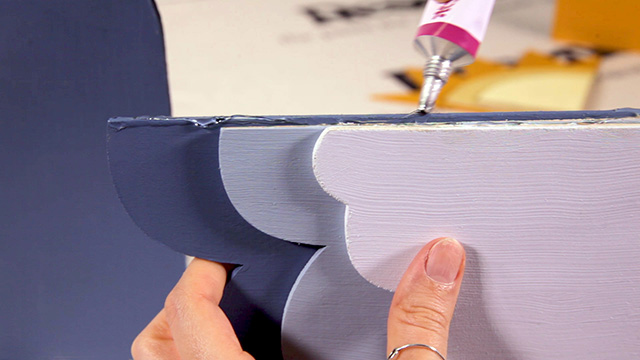
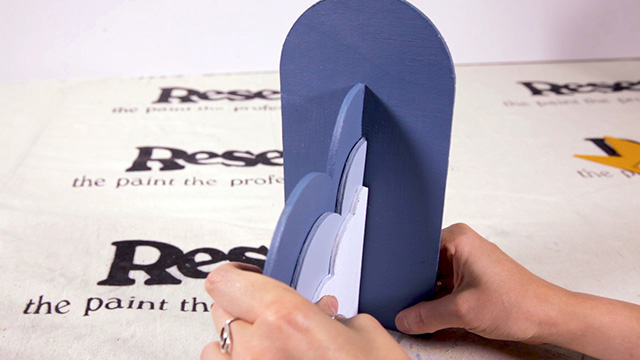
Step 4 Use a hot glue gun to glue the medium cloud on top of the largest cloud, aligning the corners, then glue the smallest cloud on top of the medium cloud. Do the same with the sun, working from largest to smallest.
Step 5 Using quick bond glue, stick each of the arches on to the vertical side of the metal bookends.
Step 6 Using hot glue or quick bond glue, apply glue to the vertical edge of the stacked clouds and stick it to the centre of the arch painted in Resene Undercurrent. Do the same for the sun, adhering it to the centre of the arch that is painted in Resene Pirate Gold. Allow your bookends to dry overnight to ensure the glue has set completely before using them.
Wall in Resene Thorndon Cream, shelf in Resene Thor, cloud bookend in Resene Undercurrent, Resene Bali Hai and Resene Quarter Frozen and sun bookend in Resene Mellow Yellow, Resene Laser and Resene Pirate Gold.
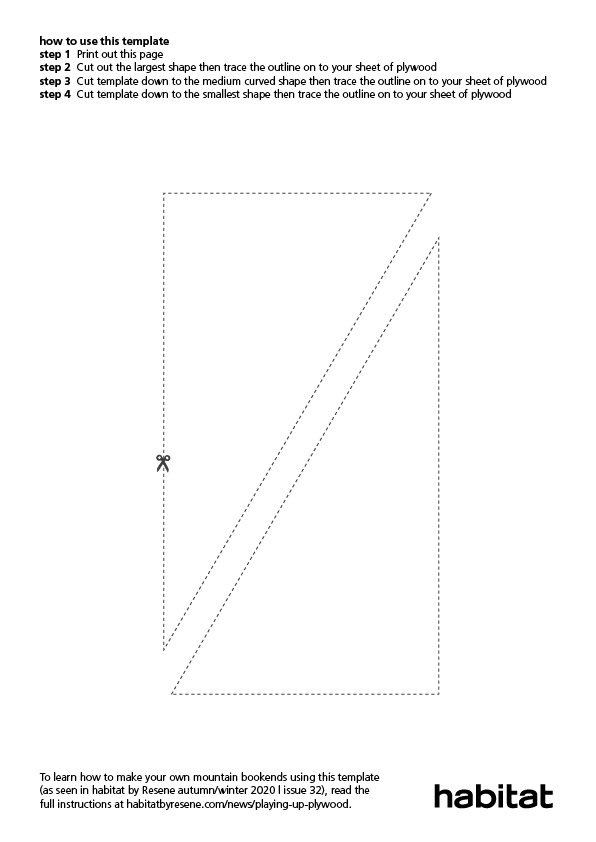
To print out the below templates, right click on each template and select 'save image as'. Save the image to your computer and then print them out on to A4-sized paper.
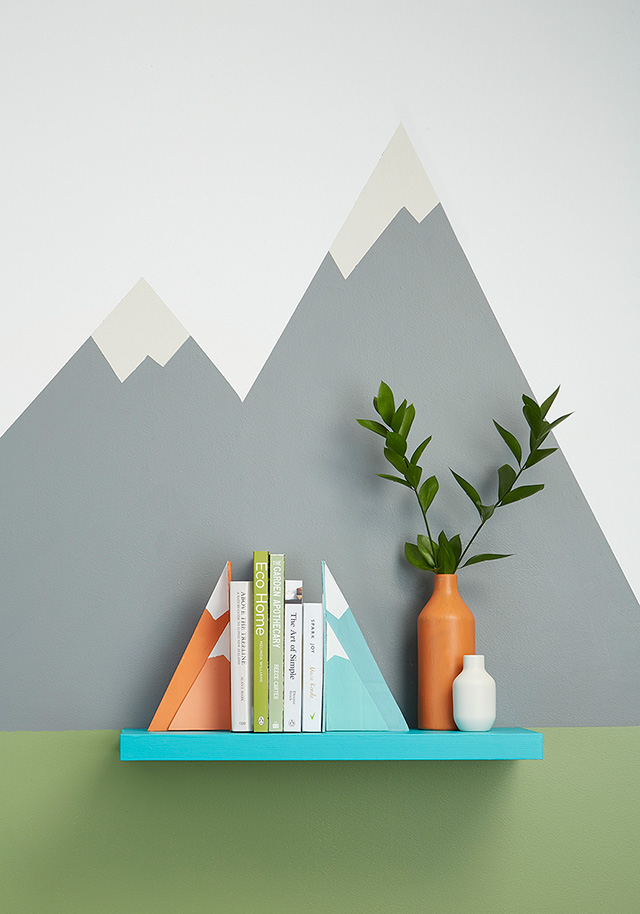
DIY mountain bookends
These mountain-shaped bookends are one cute way to keep your children’s books in line.
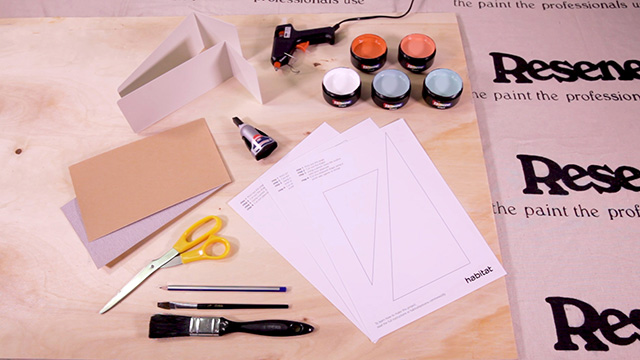
You will need:
- Plywood sheet approx. 5mm thick
- Mountain bookend templates (download below)
- Scissors
- Pencil
- Scroll saw, jigsaw or similar
- Sandpaper
- Metal bookends
- Quick bond glue suitable for wood and metal
- Hot glue gun and hot glue sticks
- Resene testpots in colours of your choice – we used Resene Gulf Stream, Resene Paradise and Resene Sebedee, Resene Japonica and Resene Alabaster
- Resene testpot brush
- Small artist paint brushes
- High quality painter’s masking tape
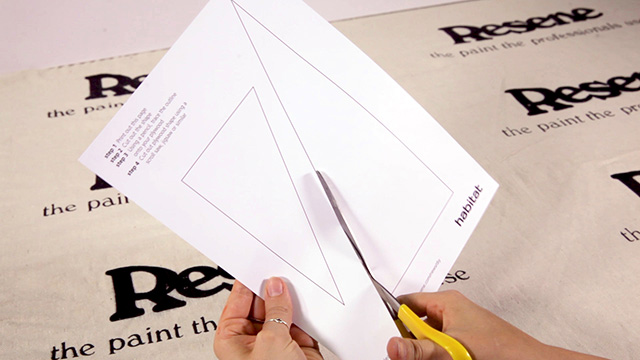
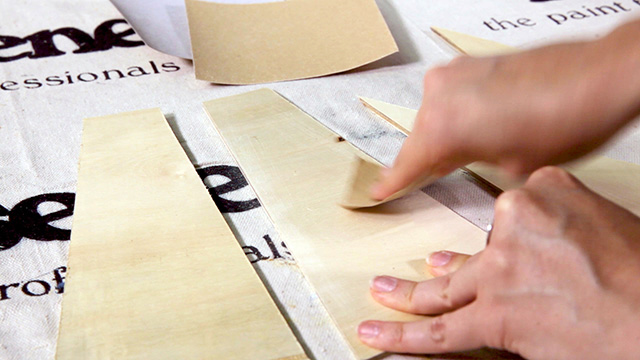
Step 1 Cut out the bookend templates (download below) using scissors then trace them on to your plywood using a pencil.
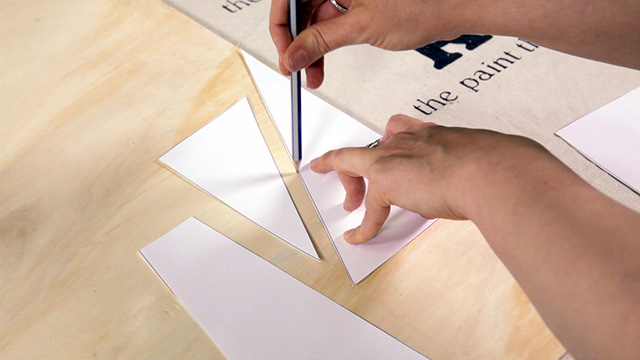
Step 2 Using a scroll saw or jigsaw, cut out shapes and sand down any sharp edges. Wipe away sawdust with a clean, dry cloth.
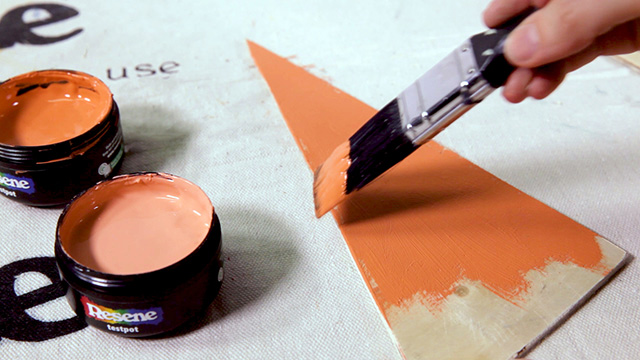
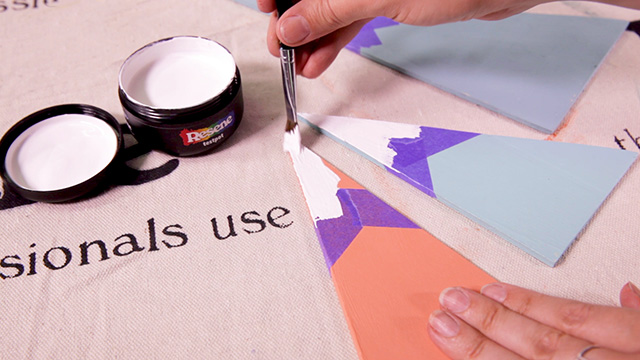
Step 3 Paint main mountain colours on to each of the large triangles and squares. We used Resene Paradise to paint one large isosceles triangle and one large right triangle and Resene Sebedee for the other large isosceles and large right triangles. For best results, do two coats and allow adequate drying time in between. If desired, you can use a hair dryer to help speed up the drying process.
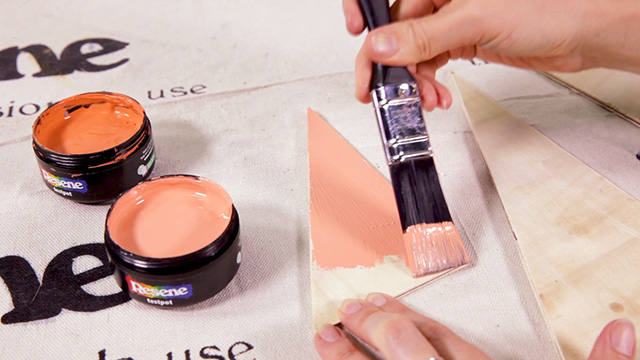
Step 4 While your main coloured pieces are drying, paint your smaller right triangles. We used two coats of Resene Japonica for one and two coats of Resene Gulf Stream for the other.

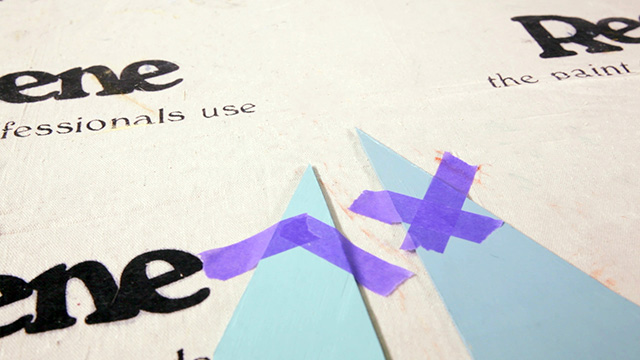
Step 5 Once all your triangles are dry, mask off the tips of the tips of the mountains and paint on the snow caps. We used two coats of Resene Alabaster.
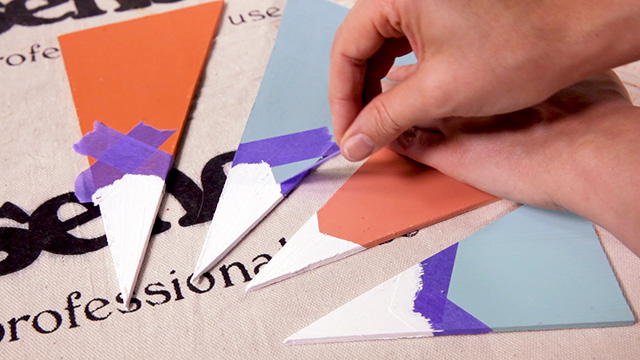
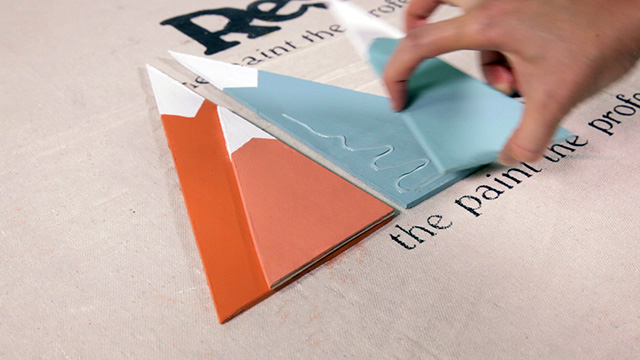
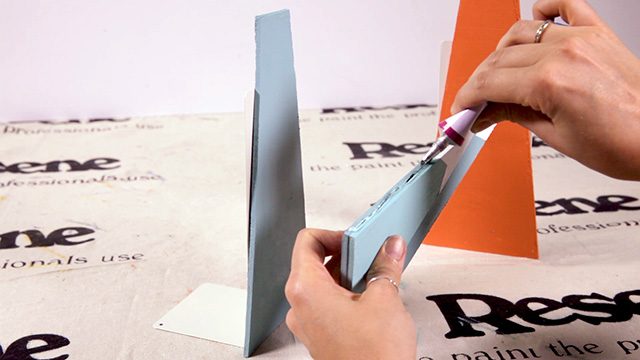
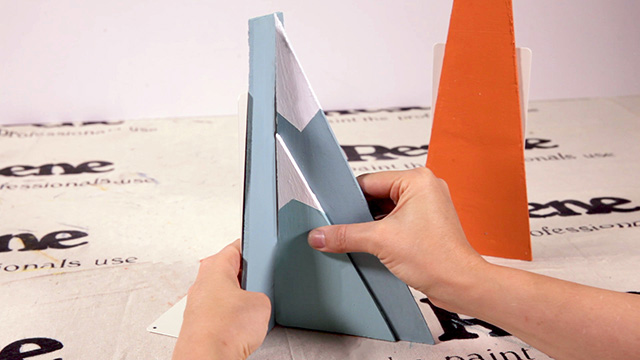
Step 6 Glue your smaller mountains on top of your larger mountains, aligning the corners, using hot glue.
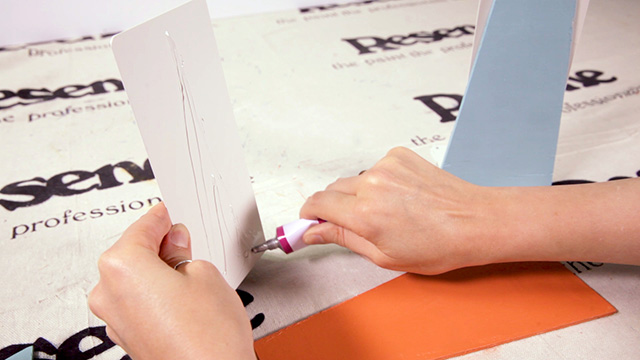
Step 7 Using quick bond glue, attach your isosceles triangles to the backs of your metal bookends. Allow the glue to bond before moving on.

Step 8 Using quick bond glue or hot glue, apply a bead of glue to the vertical edge of your Resene Paradise mountain and adhere it to the centre of the Resene Paradise isosceles triangle. Do the same with the Resene Sebedee mountain, adhering it to the Resene Sebedee isosceles triangle. Let your bookends dry overnight before using them to make sure the glue sets completely.
No hue is out of reach when it comes to colouring these cute mountain bookends. Wall in Resene Saltpan (sky), Resene Trojan (mountains), Resene Bubble White (snow caps) and Resene Highland (grass), shelf in Resene Java, tall vase in Resene Sebedee, small vase in Resene Bubble White and DIY mountain bookends in Resene Sebedee, Resene Japonica, Resene Gulf Steam, Resene Paradise and Resene Alabaster.
To print out the below templates, right click on each template and select 'save image as'. Save the image to your computer and then print them out on to A4-sized paper.


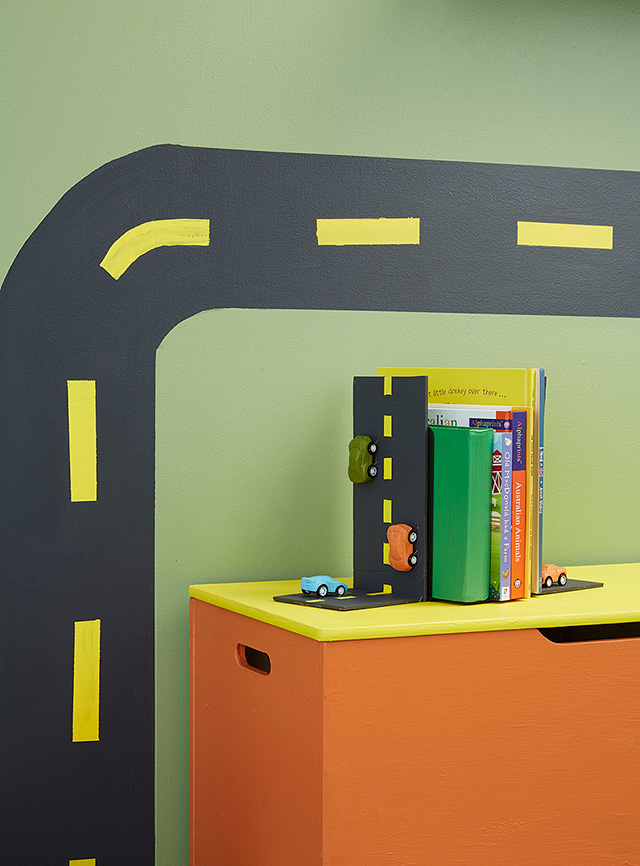
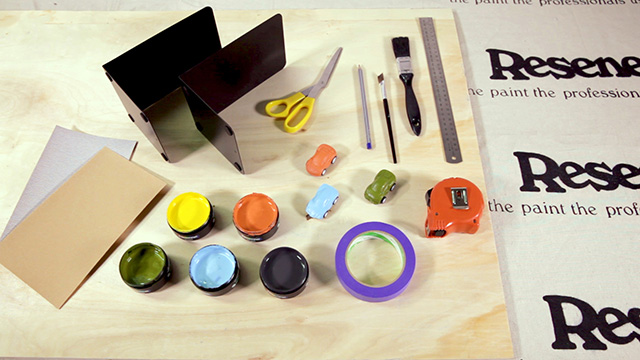
DIY motorway bookends
With just a couple of plywood squares and rectangles, toy cars and Resene testpots, you can put a pair of boring bookends on the highway to fun.
You will need:
- Plywood sheet approx. 5mm thick
- Ruler
- Pencil
- Table saw, circular saw, jigsaw or similar
- Sandpaper
- Metal bookends
- Quick bond glue suitable for wood and metal
- Hot glue gun and hot glue sticks or small nails and hammer
- Resene testpots in colours of your choice – we used Resene Shark, Resene Broom, Resene Sebeedee, Resene Untamed and Resene Mystery
- Resene testpot brush
- Small artist paint brushes
- High quality painter’s masking tape (approx. 1”/2.5cm wide)
- Small wooden or die cast toy vehicles
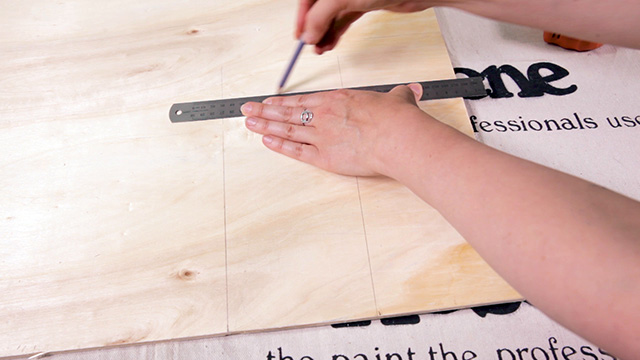
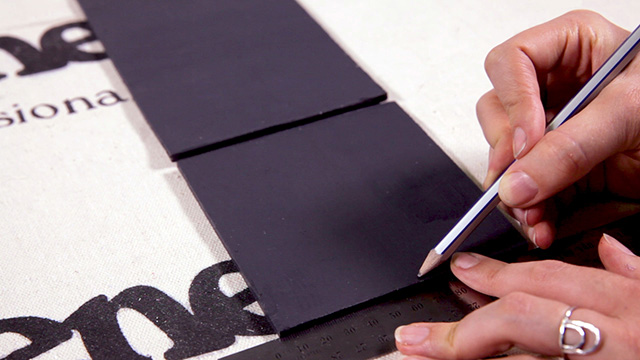
Step 1 Using a ruler, measure the upright face of your blank metal bookend to determine their width and height. Then, using your ruler and pencil, draw two rectangles and two squares on to your plywood. Our bookend measured 135mm wide and 200mm high, and we wanted our roadway to extend past the top and sides of our metal bookends, so our plywood rectangles measured 250mm x 140mm and our squares were 140mm x 140mm.
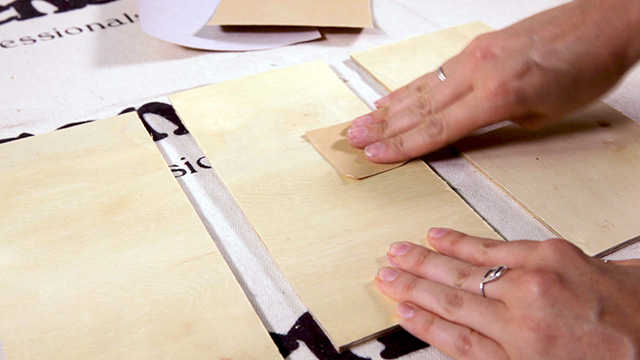
Step 2 Using a table saw, circular saw, jigsaw or similar cut out you rectangle and square shapes and sand down any sharp edges. Wipe away sawdust with a clean, dry cloth.
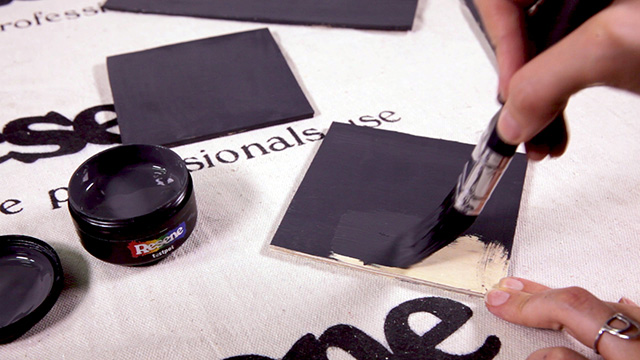
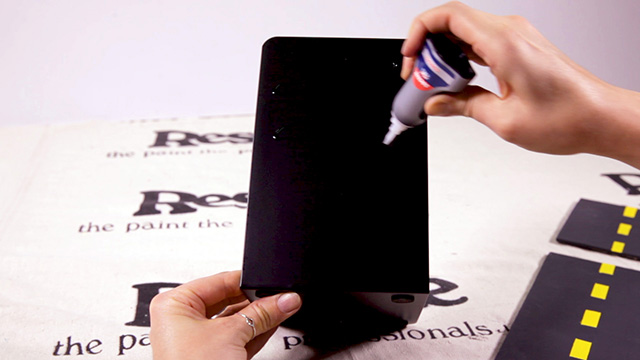
Step 3 Paint plywood shapes using a Resene testpot in the main colour of your choice. We used Resene Shark. For best results, do two coats and allow adequate drying time in between. If desired, you can use a hair dryer to help speed up the drying process.
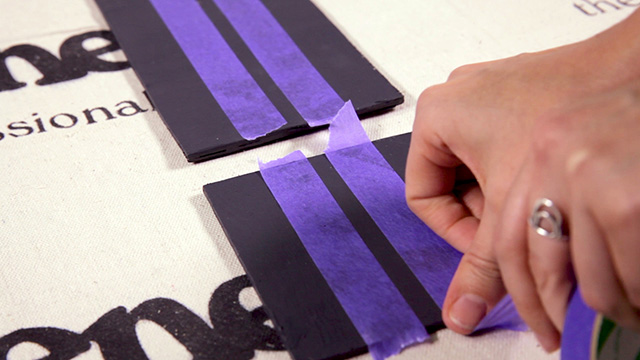
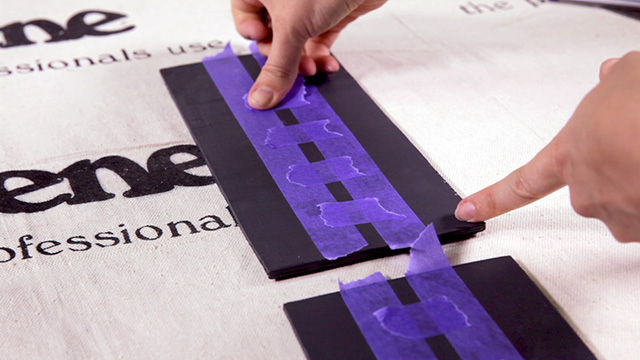
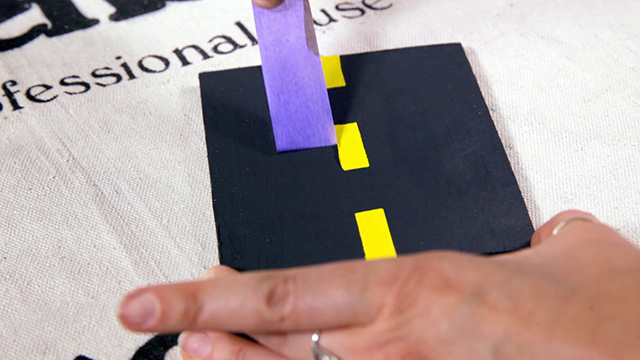
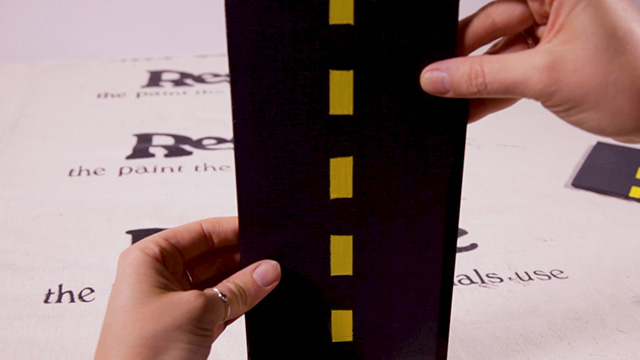
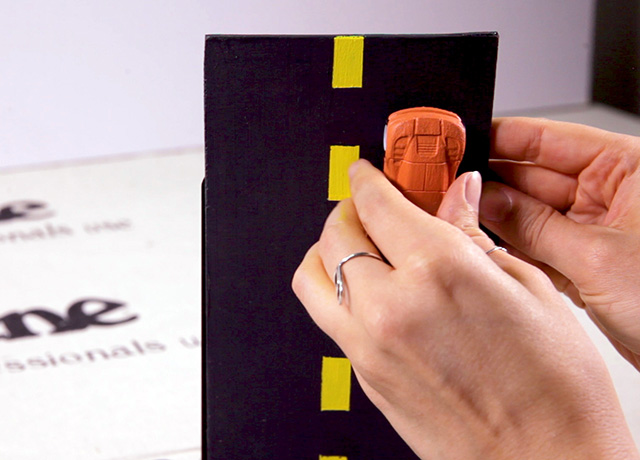
Step 4 Once your plywood shapes are dry, measure to find the centre on the short ends of your shape and then mark 5mm on either side of it. Apply high quality painter’s masking tape at each mark, leaving an open area between that’s 1cm wide. Then, apply small pieces of masking tape perpendicularly along the opening with 2.5cm spaces in between to create the lines on the road. Paint the openings in Resene Broom in 2-3 thick coats, allowing the paint to dry completely in between each coat.

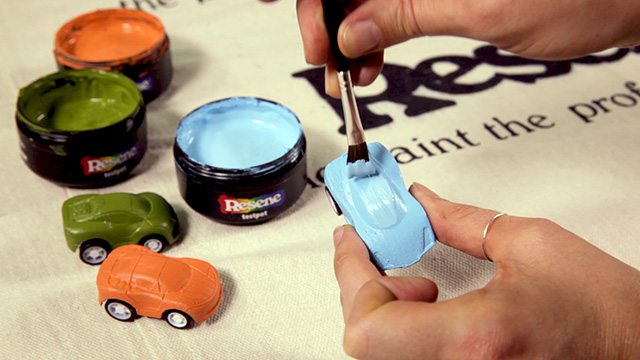
Step 5 While your roads are drying, paint your wooden or diecast vehicles using Resene testpots in colours of your choice. We used two coats each of Resene Sebedee, Resene Untamed and Resene Mystery for our cars. Allow your cars to dry completely.
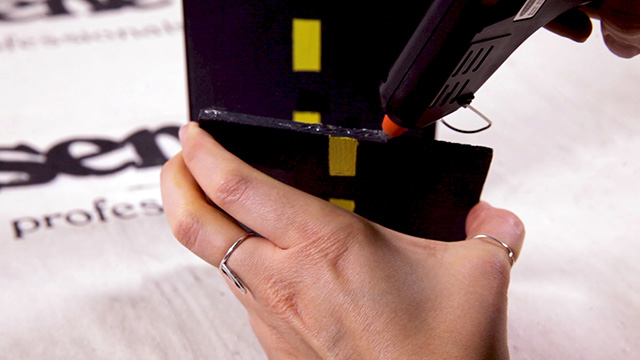
Step 6 After your roads have dried, use quick bond glue to attach your longer road section to the back of your metal bookend. Once it has bonded, use hot glue or quick bond glue to glue the end of the smaller road section perpendicularly so that it creates an 'L' shape. Allow the glue to dry before moving on.
Step 7 Using quick bond or hot glue, attach the wheels of your vehicles on to your roadways so that they appear to be driving up and down your bookends. Let your bookends dry overnight before using them to make sure the glue sets completely.

Kids who love reading as much as they love cars will appreciate these motorway bookends. Roads in Resene Shark and Resene Broom, toy cars in Resene Sebedee, Resene Untamed and Resene Mystery, wall in Resene Highland with road in Resene Shark and Resene Broom, toy chest in Resene Sebedee with lid in Resene Broom, and magnets in Resene Sebedee, Resene Broom, Resene Anise, Resene Japanese Laurel, Resene Java and Resene Bubble White.
projects and styling Laura Lynn Johnston
images Bryce Carleton, Ben Whorwood
videos Ben Whorwood
Published: 05 Mar 2020

