
latest
habitat tv

Say goodbye to the morning scramble for keys, coats and sunglasses and hello to this… see this and more videos
blog

Re-living the 1980s through art
Clint C is an artist whose work instantly sparks recognition and joy. Based in Hamilton,… more
Happy Halloween! Three spooky DIYs for the whole family
22 Oct 2025
With only a few more days until Halloween, it’s time to get creative with some fun craft projects to decorate the house. These DIYs are easy, colourful and fun for the whole family! Pick out your favourite testpot shades from your local Resene ColorShop, follow the steps below, and get ready for the big night!
Haunted harvest
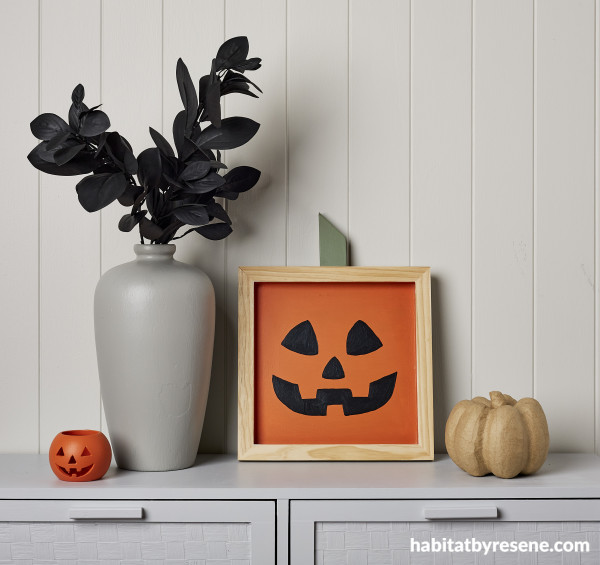
When it comes to Halloween décor sometimes simple is better. This wooden frame pumpkin face is very cute and easy to make. Whether you like more traditional colours of orange, or mono colour of black and white, this design works both ways. This project can be hung on the wall or displayed on a console table near your entrance.
You will need:
- 2x wooden art frame (ours were from Kmart and are 31cm x 31cm)
- Piece of wood for pumpkin stalk (ours was 9cm tall, 4cm wide and 2cm thick)
- Paintbrush
- Fine paintbrush
- Pencil
- Resene testpots in your chosen colours. We used Resene Black, Resene Paddock and Resene Rose Of Sharon, Resene Half Rice Cake
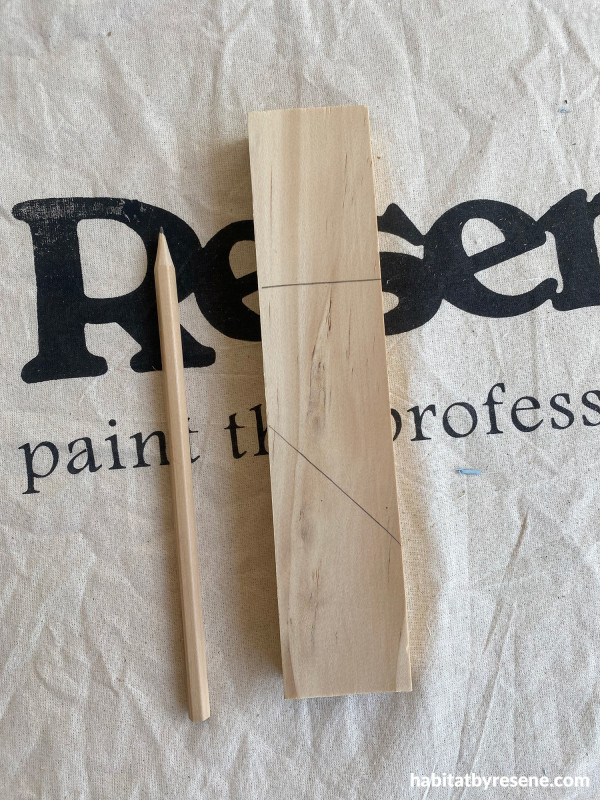
Step 1:Take your piece of wood for your stalks and mark it in pencil so you have an angled stalk piece which is 9cm tall and 4cm wide.
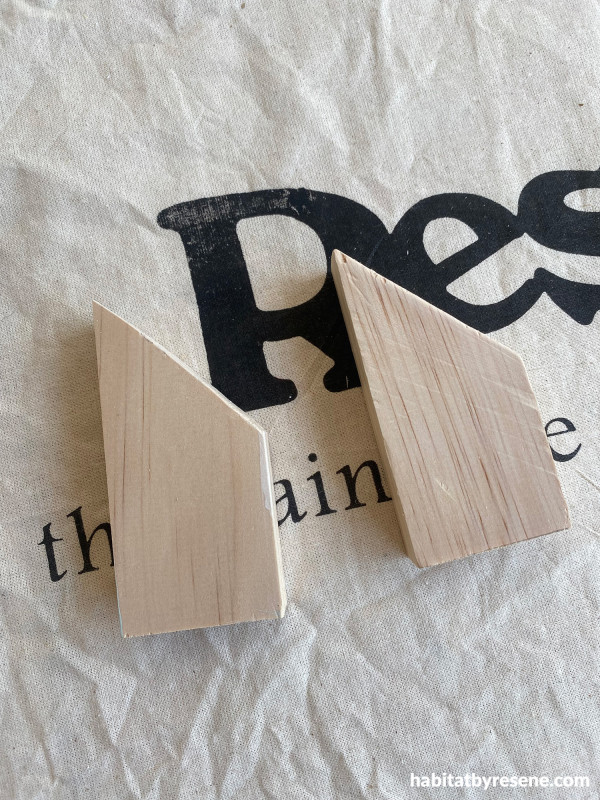
Step 2:Cut the stalk pieces using a jigsaw or drop saw and sand any light edges. Wipe away the dust.
Step 3:Paint the stalk pieces in your chosen colour. We used Resene Paddock for ours.
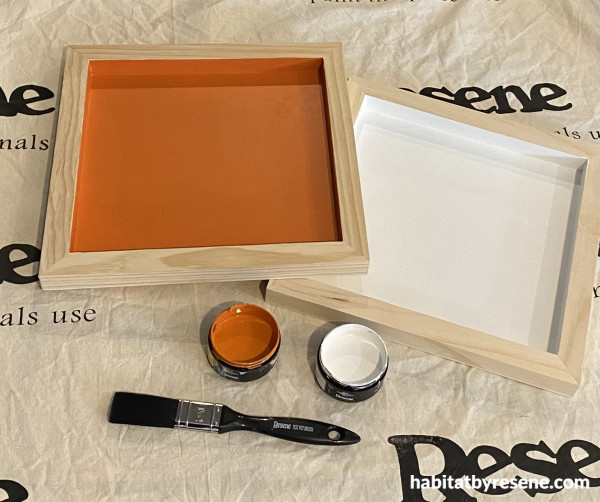
Step 4:Paint the inside of the frames in more of your chosen colours. We used Resene Rose Of Sharon for one and Resene Half Rice Cake for the other.
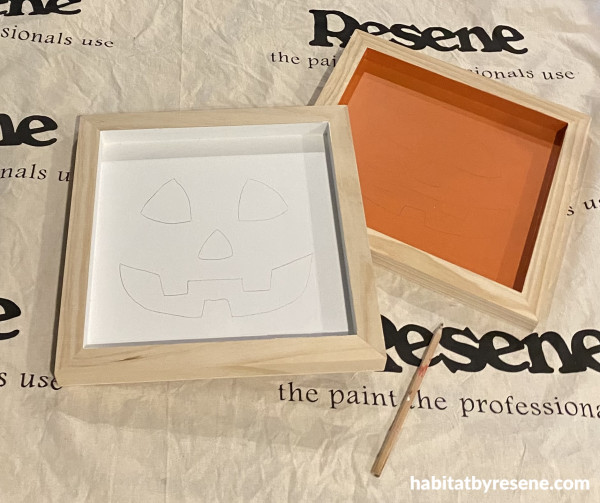
Step 5:Draw the pumpkin faces onto the painted boards using a pencil.
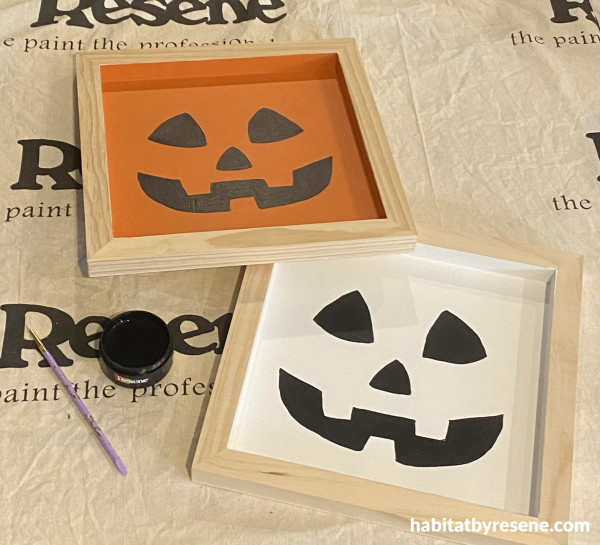
Step 6:Paint the pumpkin faces in your chosen shade. We used Resene Black to make the faces really stand out.

Step 7: Glue the painted stalk pieces onto the top of the frames.

Step 8:Hang your art on the wall or place it on the console table.
Wall painted in Resene Double Merino, console in Resene Double Concrete, vase in Resene Half Friar Grey and pumpkin tea light in Resene Ecstasy.
Candlelight creepers
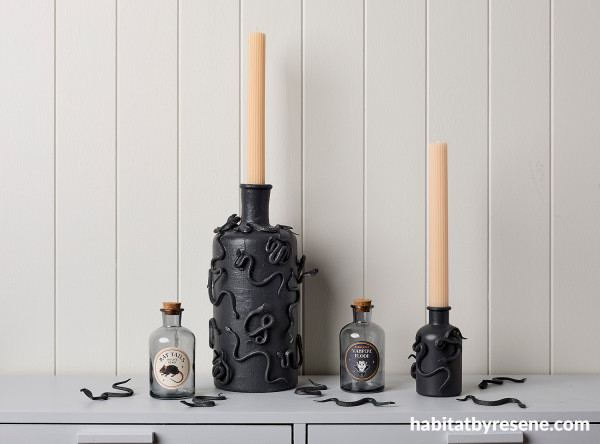
Candles and candlestick holders have long been associated with Halloween decorating but can be pricey to buy. In this project we recycled an old bottle and gave it a spooky new look by adding snakes and painting it to make our own spooky candlestick. We did ours in the classic Halloween black but you could even paint your snakes in different colours to make it more fun and vibrant – which would also pop against the dark shade.
You will need:
- A large bottle
- Candles to fit bottle
- Rubber or plastic snakes (we got ours from a $2 Shop)
- Paintbrush
- Glue
- Resene testpot in your chosen colour. We used Resene Nocturnal
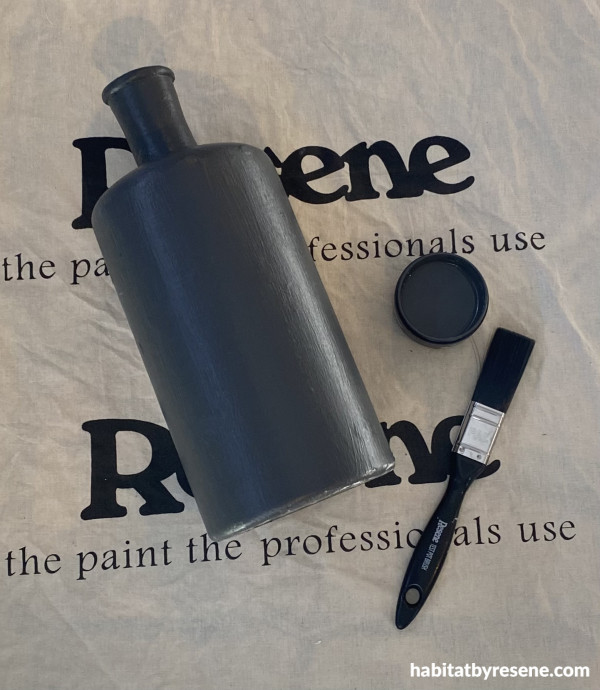
Step 1: Paint your bottle in your chosen Resene colour. We used Resene Nocturnal. Apply two coats.
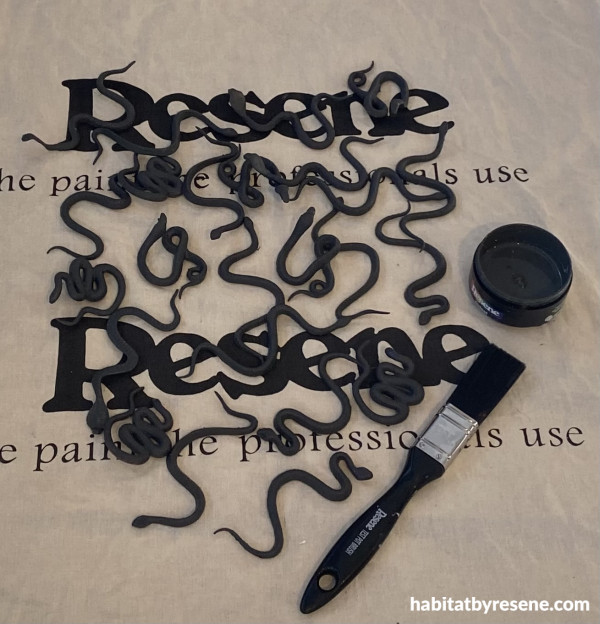
Step 2:Paint your snakes in the same colour as your bottle, or in different colours of your choice.
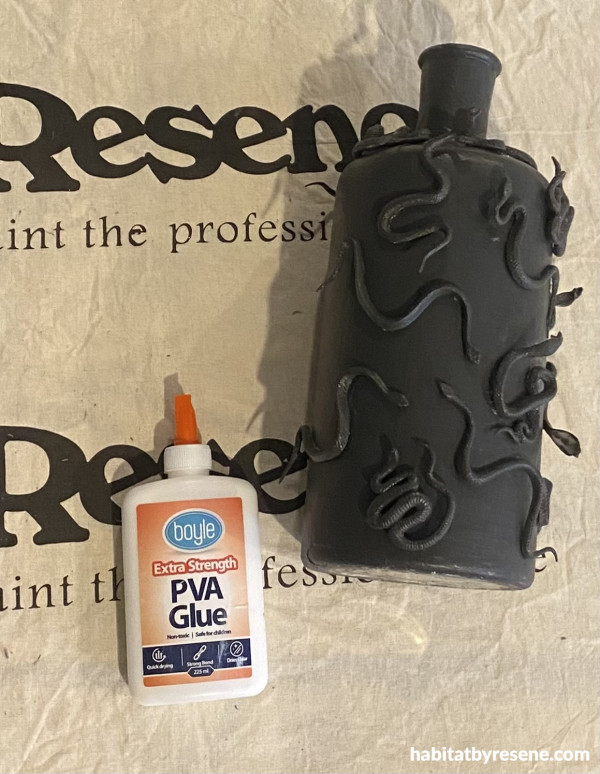
Step 3: Glue the snakes onto the painted bottle.
Step 4: Pop in your candle and place on dining table or entry table.
Wall painted in Resene Double Merino, console in Resene Double Concrete. Candles from Adairs.
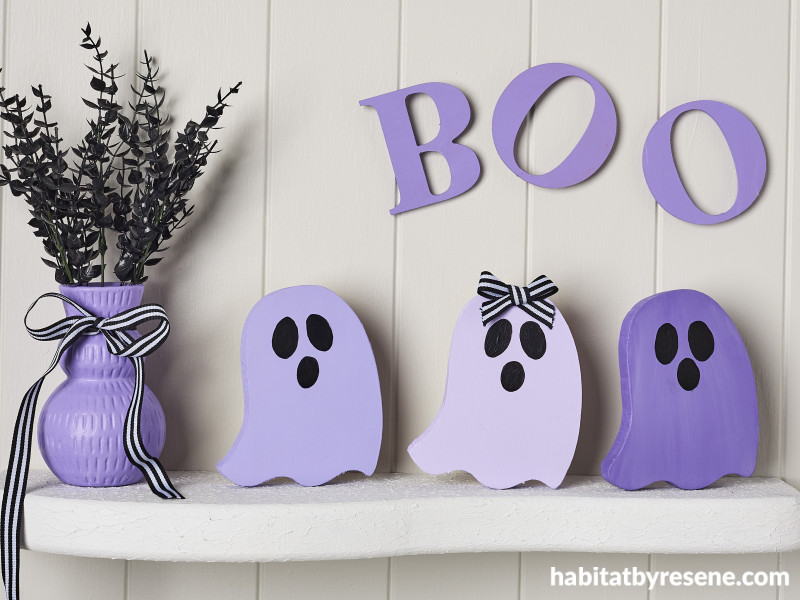
Tiny terrors
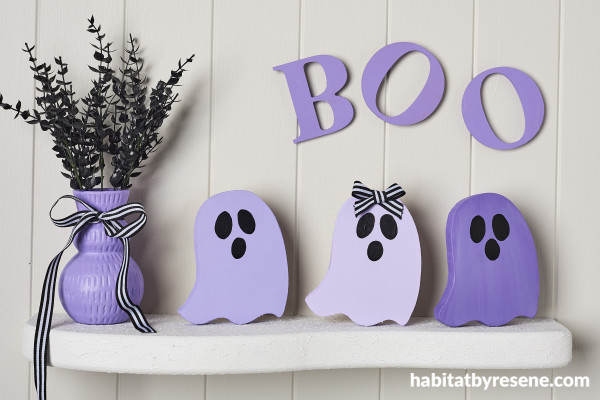
If your kids like to decorate for Halloween then this cute project is for them. This trio of mini ghosts is the perfect addition to a kids bedside table or bookshelf. And if purple is not there favourite colour then head to your local Resene ColorShop and they can pick out whichever little testpot they want.
You will need:
- A piece of wood, 2cm thick, 50cm long and 14cm wide. (This will make 3 ghosts)
- Paintbrush
- Fine paintbrush
- Pencil
- Resene testpots in your chosen colours. We used Resene Black, Resene Studio, Resene Perfume and Resene Unicorn
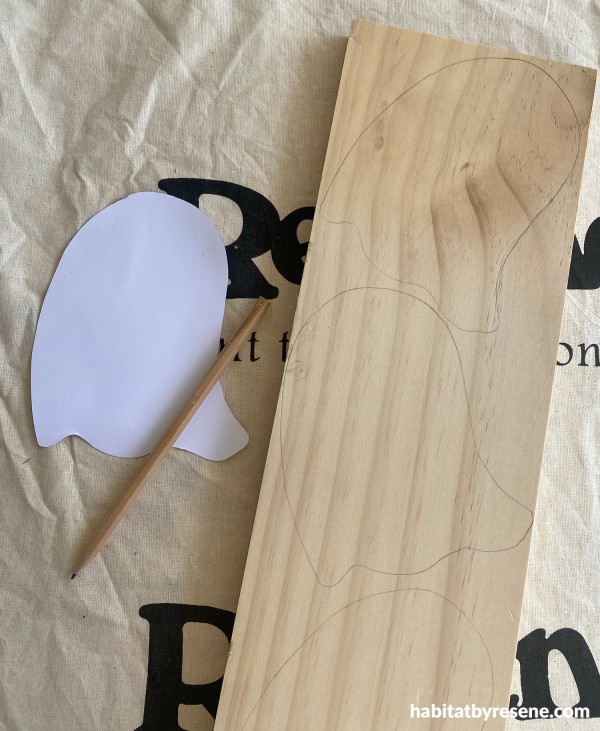
Step 1:Take your piece of wood and draw a ghost shape onto it in pencil. Our finished ghosts are 14.5cm in height and 11.5cm wide.
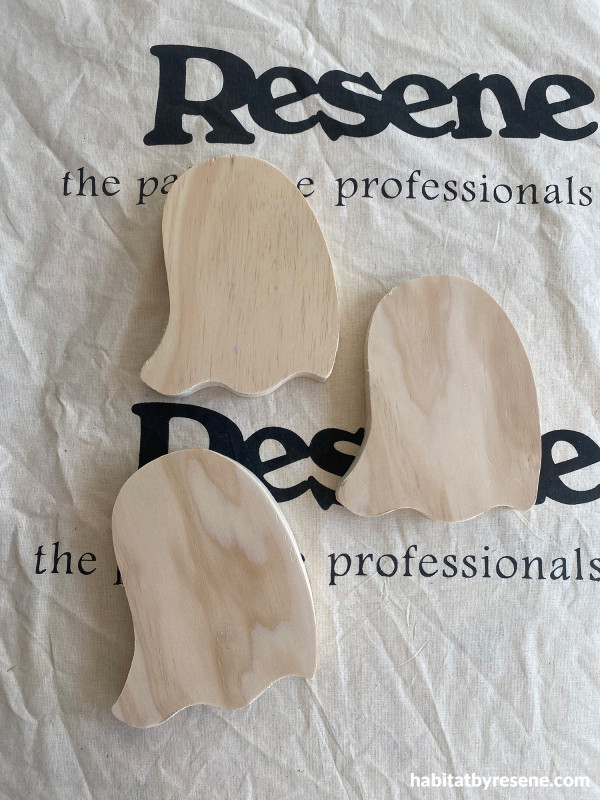
Step 2:Using a jigsaw cut out the ghost shapes and give any rough edges a light sand. Wipe away any dust.
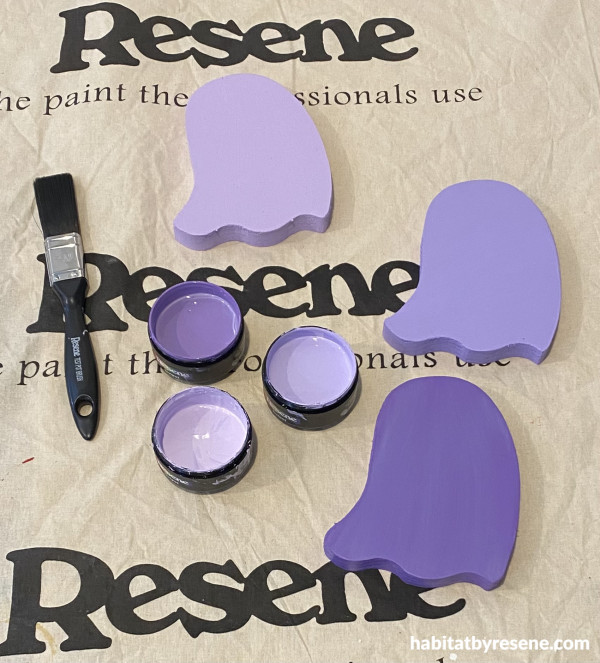
Step 3:Paint your ghosts in your chosen colours. We painted one in Resene Unicorn, one in Resene Perfume and one in Resene Studio.
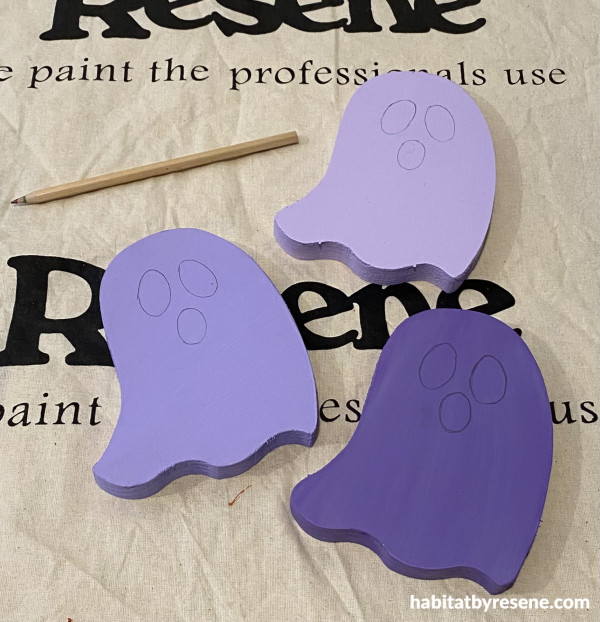
Step 4:Using a pencil draw the ghost faces onto the ghost shapes.
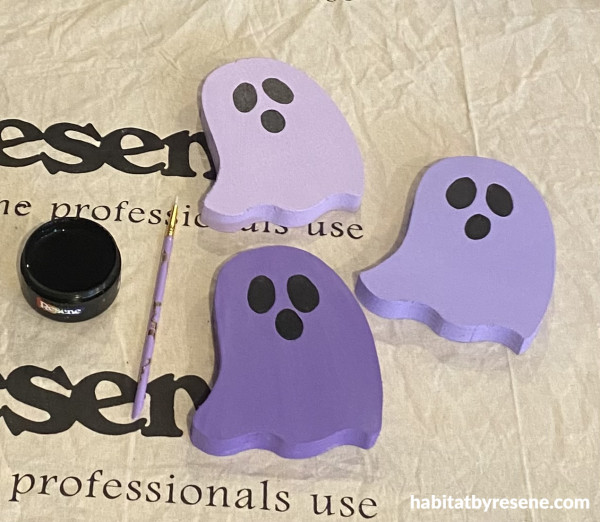
Step 5:Using a fine paintbrush, paint the face details in your chosen colour. We used Resene Black to stand out from the purple.
Step 6: Place on your mini ghosts on a shelf in the kitchen, entry way table, bookshelf or in the kid’s room.
Wall painted in Resene Double Merino, BOO letters in Resene Daisy Bush and vase in Resene Dancing Girl.
projects by Vanessa Nouwens
images by Bryce Carleton
Published: 22 Oct 2025

