
latest
habitat tv

Say goodbye to the morning scramble for keys, coats and sunglasses and hello to this… see this and more videos
blog

Reader roundup: Public murals and powder blues
A Morningside mural, an exterior refresh, and striped walls. Let these projects be your inspiration… more
DIY Love Banner
13 Feb 2019
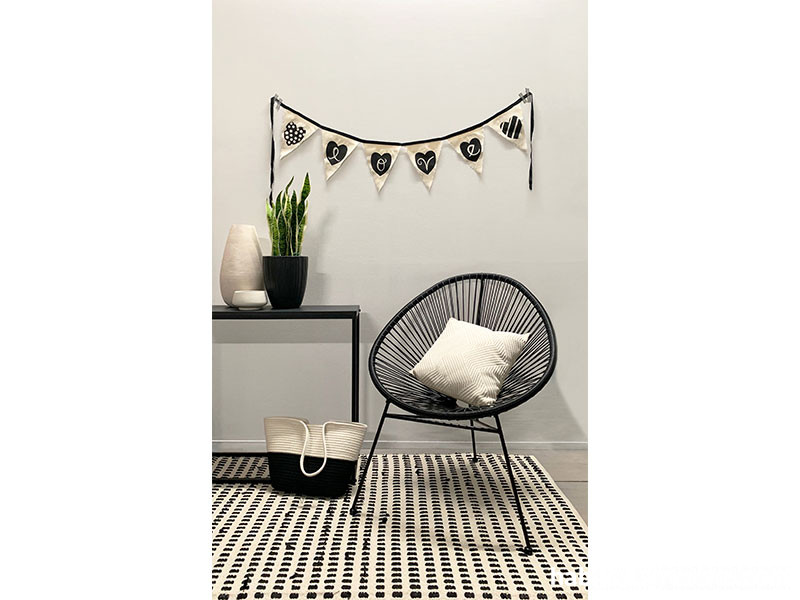
If pink isn’t really your thing, this handmade black and white bunting is quick and easy enough to add a little love to your décor this Valentine’s Day – and cute enough to keep up all year round.
You will need:
- 0.5m heavy cotton canvas fabric (which can be purchased from your local fabric store or fine art supply)
- Scissors
- Scrap paper
- Pencil
- 2.75m black iron-adhesive hemming tape (find it at your local fabric or craft supply store)
- Small flat artist’s brush
- Small round artist’s brush
- Clothes iron
- Ironing board (or a thick towel on top of a sturdy table)
- Resene testpots in Resene Noir and Resene Half Tea
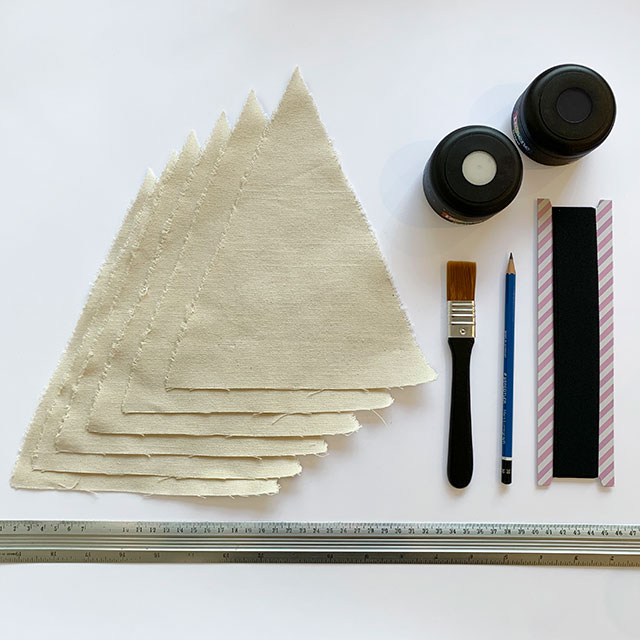
Step 1 Cut cotton canvas fabric into six identical triangles. Ours were 15cm wide on the short side and 26cm on the long sides.
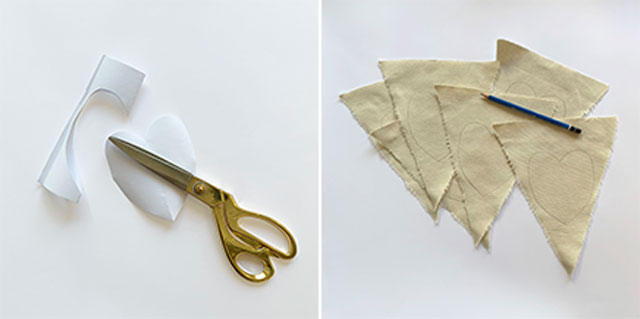
Step 2 Cut an elongated heart-shape by folding a scrap piece of paper in half so that it is symmetrical. With the pencil, use this heart shape as a pattern to carefully trace it on top each fabric triangle.
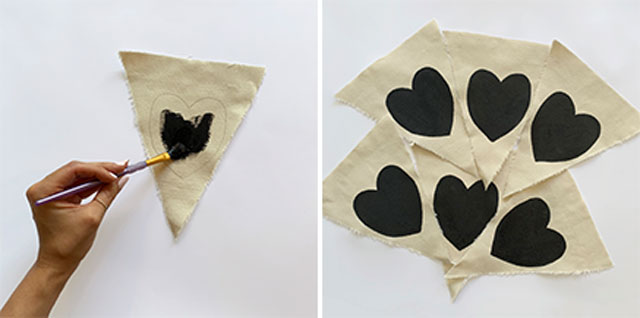
Step 3 Fill in each of the heart shapes with Resene Noir. It doesn’t need to be perfect, but using the small flat artist’s brush will help you get a cleaner edge. Let the paint dry completely. You can use a hairdryer to speed up the drying process.
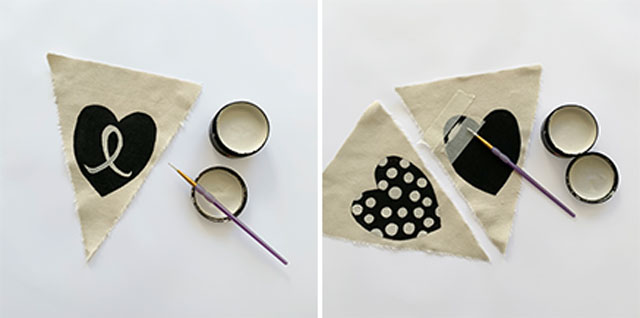
Step 4 Using the small round artist’s brush and the Resene Half Tea paint, write the letters L-O-V-E each on their own hearts. On the other two hearts, paint on whatever pattern you like – we painted polka dots on one of ours and used low-tack masking tape to make diagonal stripes on the other – or keep it simple and leave them solid black.
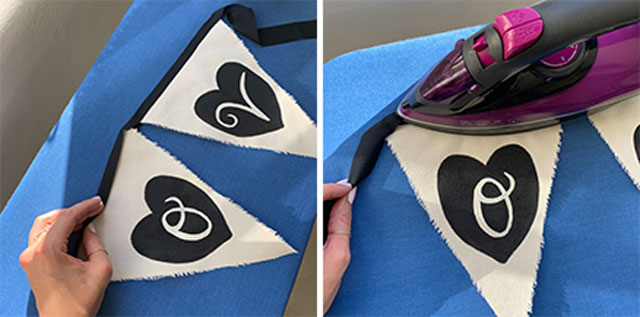
Step 5 Fold the length of iron-adhesive hemming tape in half to find the centre and mark it lightly with a pencil or a piece of chalk. This line will end up between the letters ‘O’ and ‘V’ if you want to keep your banner centred. Line up the top left corner of the V-flag with the centre of the hemming table so that the top side of the triangle gets sandwiched in the fold between the two glue sides. Press the hemming tape gently with a warm iron, just enough for the glue to heat up and melt so that the flag stays stuck in the crease. Do the same with the O-flag, lining the top right corner up with the marked centre. Continue working slowly down the length of the banner until all six flags have been ironed and stuck between the glued crease – be sure to check your spelling before you press each letter to make sure it ends up in the right place!
Step 6 Hang your banner up using washi tape, or use small picture-hanging nails if you’d like it to keep it up for a while.
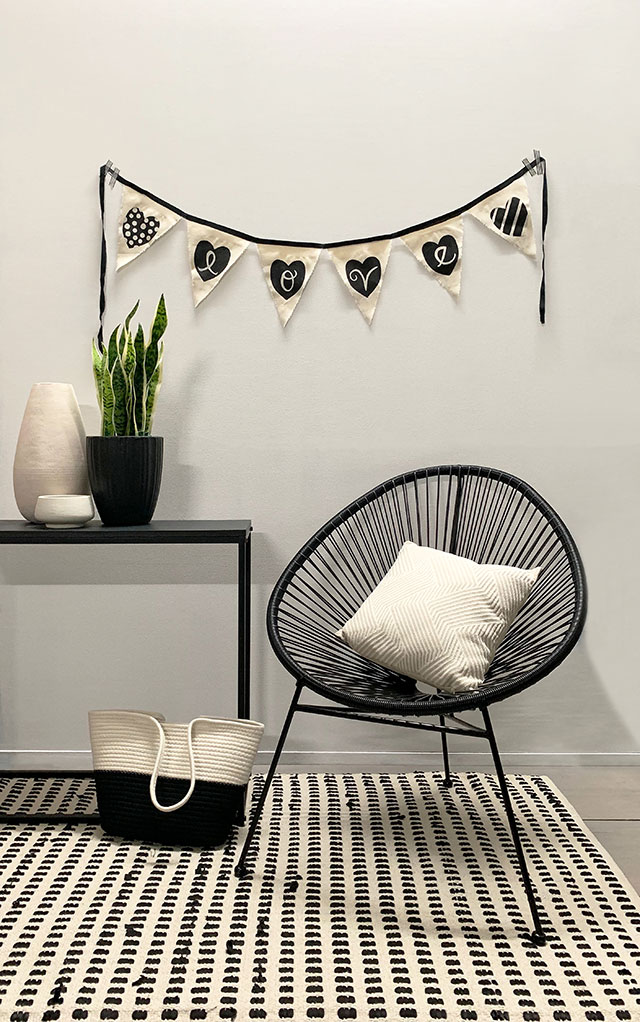
Above: This sophisticated black and white scheme has just enough of a Valentine touch with our DIY Love Banner. The walls have been painted Resene Alabaster, the table and plant pot are in Resene Noir, the tall vase is in Resene Ethereal, the small pot is in Resene Half Tea and the flooring is in Resene Colorwood Mid Greywash. The rug, chair, cushion, table, pots, vase and tote bag were all purchased from Kmart and the striped washi tape is from Warehouse Stationery
styling and images Laura Lynn Johnston
Published: 13 Feb 2019

