
latest
habitat tv

Say goodbye to the morning scramble for keys, coats and sunglasses and hello to this… see this and more videos
blog

Re-living the 1980s through art
Clint C is an artist whose work instantly sparks recognition and joy. Based in Hamilton,… more
Create your own Kiwiana wall hanging
28 May 2021
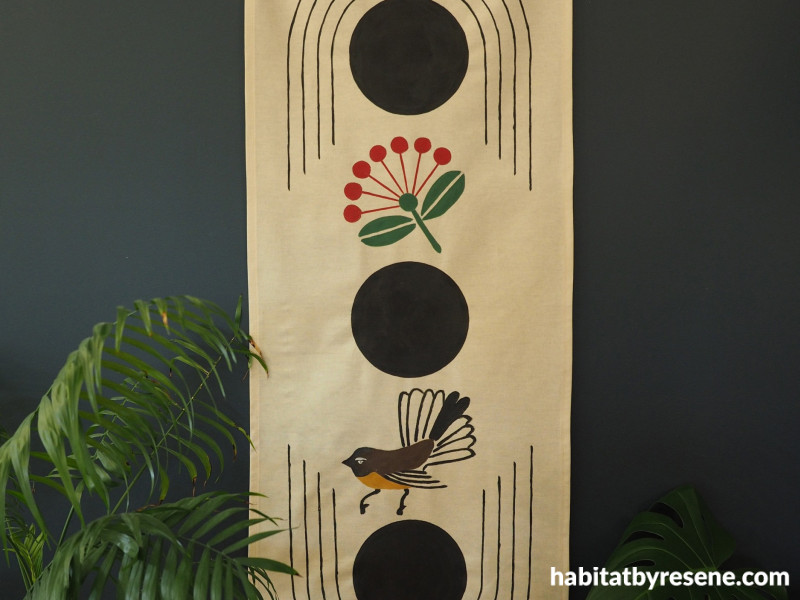
Embrace our unique backyard with this quintessential Kiwiana wall hanging. With vibrant Pohutukawa flowers and a cute fantail, this piece of décor will have crafters all aflutter. Originally inspired by mid-century woodblock prints, this wall hanging has been given a modern twist, perfect for your kitchen or bach.
You will need:
- Plain cotton fabric 112cm x 50cm, or for an outside wall hanging use canvas
- Sewing machine
- Resene testpots in your choice of Resene paint colours – Fleur used Resene Black, Resene Pohutukawa, Resene Rebel, Resene Rusty Nail, Resene Goblin, Resene Truffle
- Small craft brush
- Ruler or measuring tape
- Pencil
- Compass or plate
- Dowel
- String

Step 1: Start by sewing the two long side edges of the fabric over to give it a finished edge - the finished width of Fleur’s wall hanging is 43cm wide. Sew the top edge over to form a loop so that a length of dowel can fit.

Step 2: Use a ruler or measuring tape to find the middle width of the fabric. Make a mark with your pencil. Next, divide the length into three and make three evenly spaced marks. This is where the three black circles will go. Use a compass or a small plate and pencil to make the circles – Fleur’s circles are 16cm in diameter.

Step 3: With a small craft brush, carefully paint each of the three circles - Fleur used Resene Black.

Step 4: Between the top and middle circle, use a pencil to draw a stylised sketch of a Pohutukawa flower.

Step 5: Paint the flower using your choice of red and green – Fleur used Resene Pohutukawa and Resene Goblin.

Step 6: Next, between the middle and the bottom circle, sketch a stylised fantail and paint it with your choice of colours. Fleur used Resene Black, Resene Rebel and Resene Rusty Nail. Use an off white to paint the eye – Fleur used Resene Truffle.

Step 7: To finish, use a compass to create arches radiating out from the circles. Make sure they are evening spaced - Fleur’s are 2cm apart. Carefully paint the arches with a stiff small craft brush – Fleur used Resene Black.

Step 8: Thread a length of dowel through the loop at the top of the material and hang using a length of string.
Project and images Fleur Thorpe
Published: 28 May 2021

