
latest
habitat tv

Say goodbye to the morning scramble for keys, coats and sunglasses and hello to this… see this and more videos
blog

Reader roundup: Public murals and powder blues
A Morningside mural, an exterior refresh, and striped walls. Let these projects be your inspiration… more
How to upcycle a vintage cabinet
27 Aug 2025
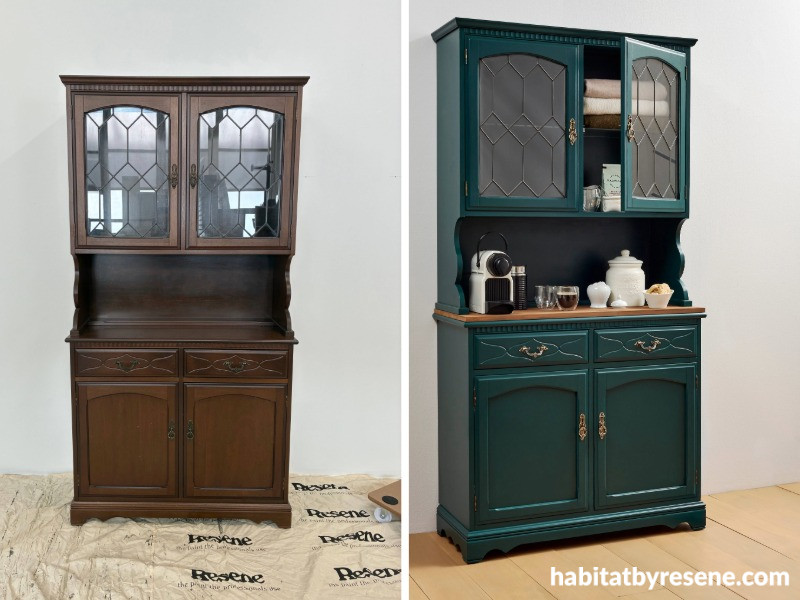
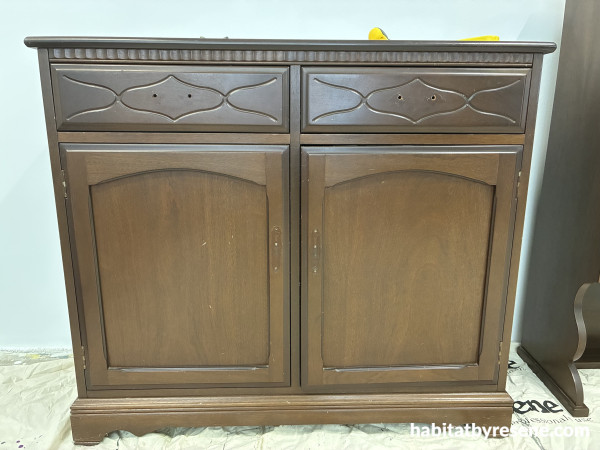
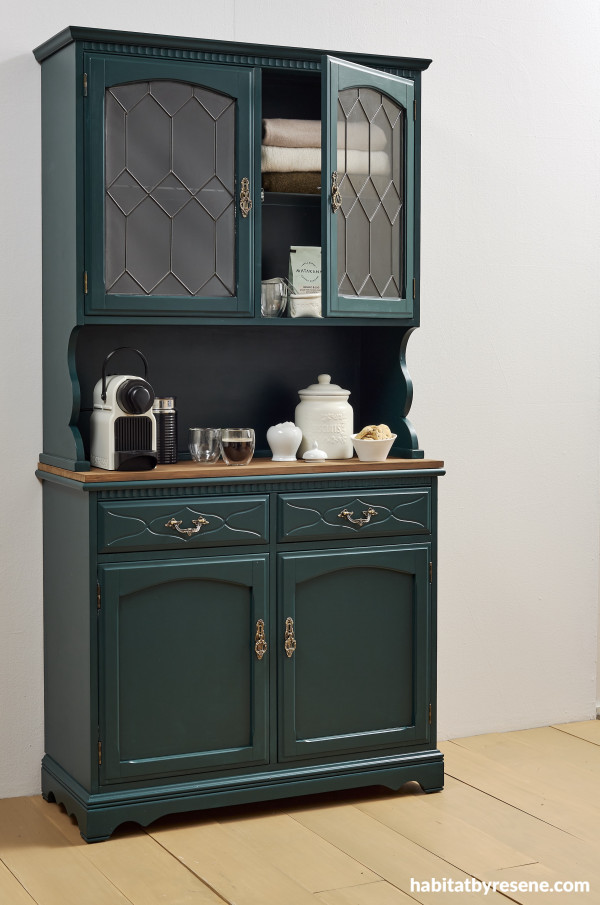
When Sarah Beedell’s grandfather passed away, there was one piece of furniture she knew she couldn’t leave behind - a large glass-fronted cabinet that had sat for years behind his favourite chair, filled with treasured glassware. Rather than see it discarded, Sarah chose to rescue the heirloom and transform it into a stylish bedside coffee unit. With the help of Resene Welcome and Resene Colorwood Matai, the cabinet has been given a new life while keeping the memory of her loved one close.
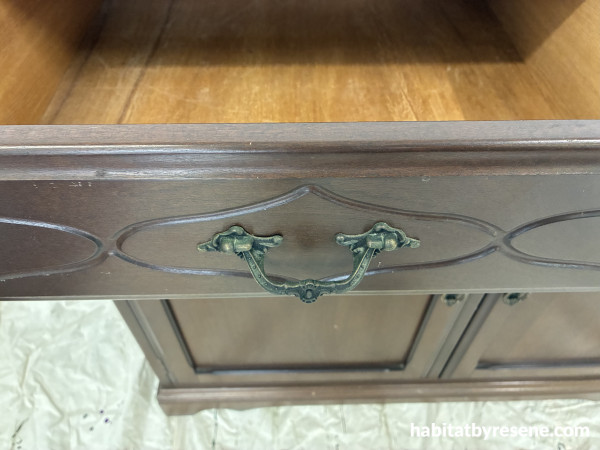
With a contemporary vision in mind, Sarah began the upcycling journey. She was thankful to discover that the piece came apart in two sections, she labelled the hardware and drawers as she took it apart for prep work.
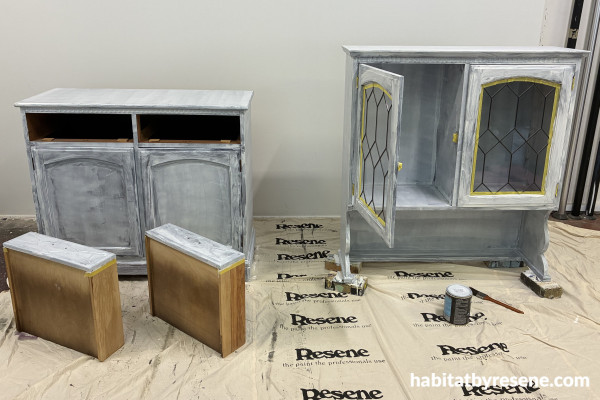
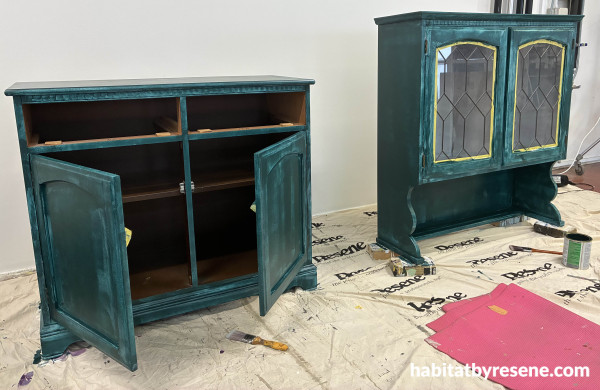
She imagined it in a deep green with a touch of blue and paired it with polished brass handles. Best of all, she discovered she didn’t need to do heavy sanding. “Resene have a great shortcut called Resene Sureseal – it’s designed to go over varnished surfaces, so you don’t need to sand everything right back,” says Sarah. “I just smoothed out a few rough patches.” After taping up the glass and using washi tape on the edges she primed, painted it with three coats of Resene Welcome, then sealed with Resene Aquaclear. “A piece of hardwood was added and stained in Resene Matai to create contrast and a benchtop feel, which made it more practical to use in a bedroom as a coffee station.”
Now fully refreshed, the cabinet will take pride of place in her home. “Opa would be thrilled.”
You will need:
- A piece of furniture to upcycle
- Screwdriver
- Washi tape
- Mini roller and try
- Small paintbrush
- Resene Waterborne Sureseal
- Your chosen Resene colours – we used Resene Welcome and Resene Colorwood Matai
- A pre-cut piece of timber or ply for your tabletop (optional)
- Resene Aquaclear satin
Step 1: Remove any handles or knobs that can be unscrewed.
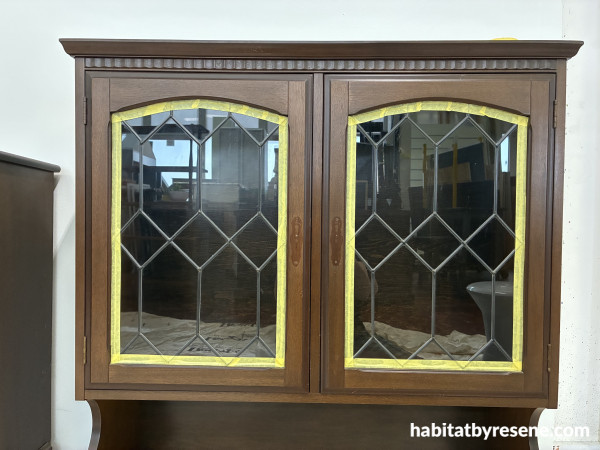
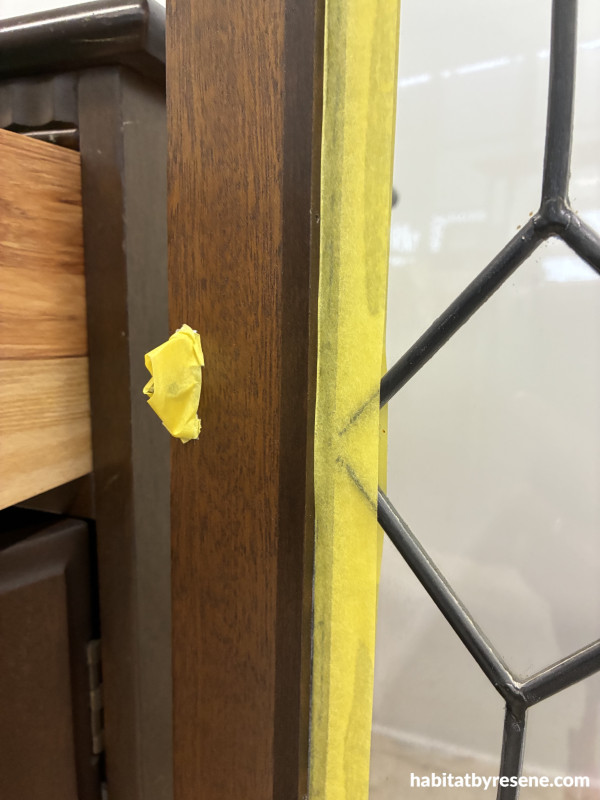
Step 2: Give a good wipe to remove any dust and grime. Tape around the windows and non-removable hinges or hardware.
Step 3: Using a mini roller and small paintbrush, apply one coat of Resene Waterborne Sureseal. Don’t worry if it looks patchy, just ensure all varnished surfaces are coated.
Step 4: Using a mini roller and a small paintbrush, paint with your chosen Resene colour. We used three coats of Resene Lustacryl semi-gloss in Resene Welcome.
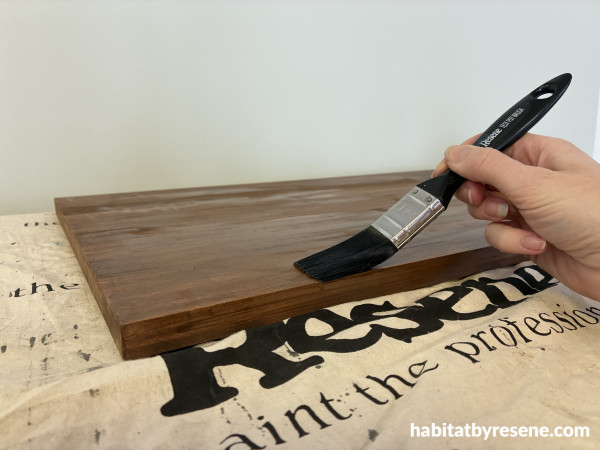
Step 5: Stain your precut piece of timber or ply. We used Resene Colorwood Matai, then sealed with Resene Aquaclear.
Tip: for extra protection, apply Resene Aquaclear to the whole project.
Step 6: Give your handles a good polish to really make the project pop.
Step 7: Remove tape and allow to dry overnight before screwing in your handles and assembling.
Above: Cabinet painted in Resene Welcome, wooden topper in Resene Colorwood Matai, wall in Resene Half Black White, floor in Resene Bask, and biscuit tin and spoon holder in Resene Pearl Lusta. Other items stylist’s own.
project Sarah Beedell
styling Pamela McIntosh
image Bryce Carleton
Published: 27 Aug 2025

