
latest
habitat tv

Say goodbye to the morning scramble for keys, coats and sunglasses and hello to this… see this and more videos
blog

Re-living the 1980s through art
Clint C is an artist whose work instantly sparks recognition and joy. Based in Hamilton,… more
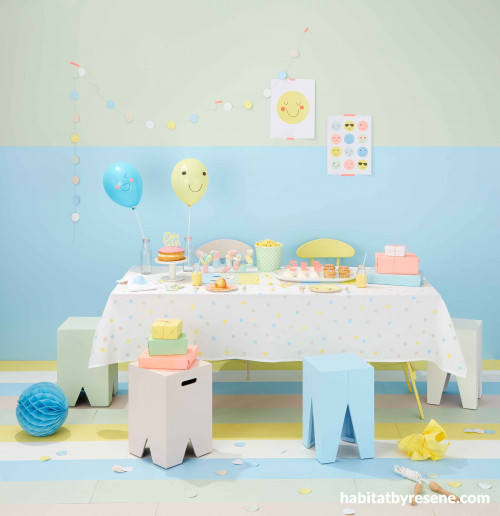
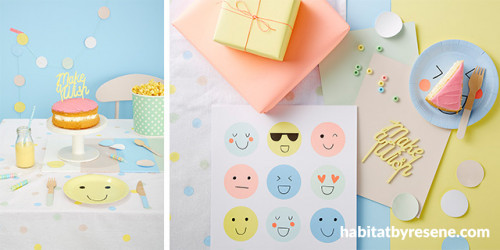
Walls in Resene Splat (bottom) and Resene Kandinsky (top); trestle table legs in Resene Smiles; Pegg stools, from Freedom Furniture, in Resene Smiles, Resene Splat, Resene Ethereal, Resene Alabaster and Resene Kandinsky; chairs in Resene Smiles and Resene Ethereal; floorboards in Resene Smiles, Resene Splat, Resene Ethereal, Resene Alabaster and Resene Kandinsky; table runner in Resene Smiles, Resene Splat, Resene Ethereal, Resene Alabaster and Resene Kandinsky; Make-a-Wish wooden cake topper in Resene Smiles.


Wall in Resene Splat, chair in Resene Ethereal, table cloth and other DIY crafts created with Resene Smiles, Resene Kandinsky, Resene Splat and Resene Ethereal testpots. Pegg stools from Freedom Furniture. Emoji-themed wall art, balloons, napkins, paper plates, loot-bag stickers and temporary tattoos from Meri Meri; Cake topper, pencils, OMG eraser set and lollies from Kmart.


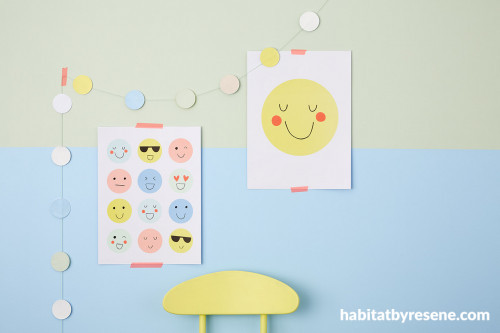
DIY circle garland
This simple garland is cute enough to keep up long after the celebration has ended.
You will need:
- Sheets of heavy white cardstock (240gsm or similar)
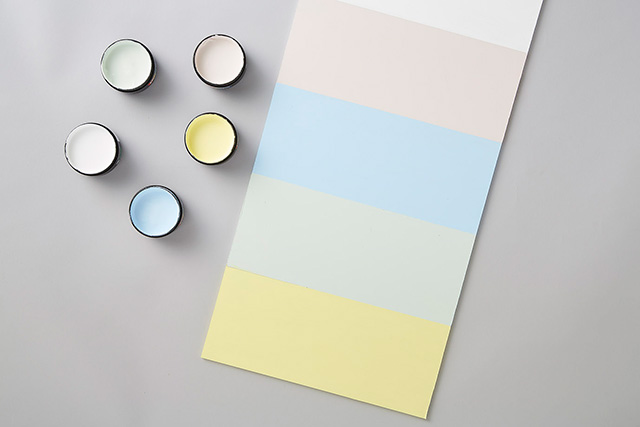
- Your choice of Resene testpots (we used Resene Smiles, Resene Splat, Resene Ethereal, Resene Alabaster and Resene Kandinsky)
- Resene testpot brush
- Twine or thin cord
- Round drinking glass
- Scissors or circle punch
Step 1 Paint one side of heavy cardstock or poster paper in each of the theme colours. Leave to dry for one hour.
Step 2 Trace circles by using a drinking glass as a guide then cut them out with scissors. To speed things up, you can use a large craft punch instead.
Step 3 Measure out the length of twine or cord you’ll need to drape across the area you’ll be decorating (our garland was 3 metres long). Lay the twine flat on a table and place the first circle under the twine. Then, glue another circle on top of the bottom circle so the twine is sandwiched in between them. Repeat the process for the whole garland, leaving a 5cm gap between each circle. Once everything’s dry, it’s ready to hang.
hot tip: Make a garland with a different shape to match your theme using a fancy craft punch. Be sure to punch half of your shapes out on the opposite side of the paper if you choose a design that isn’t symmetrical so that both sides of the garland will be colourful.


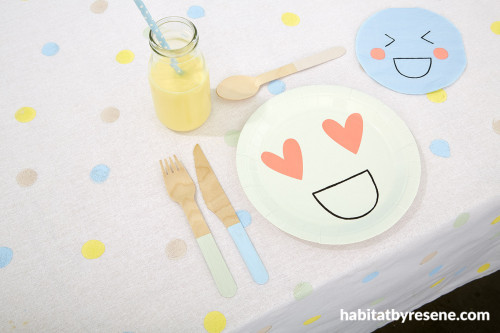
DIY confetti table cloth
Avoid a nightmarish clean-up by painting confetti right onto the tablecloth.
You will need:
- Round sponge brush
- Heavy white table cloth
- Your choice of Resene testpots - we used Resene Smiles, Resene Splat, Resene Ethereal and Resene Kandinsky
- Scrap cardboard, newspaper or a Resene dropcloth
Step 1 Lay out scrap cardboard, newspaper or a dropcloth to protect your painting surface.
Step 2 Using a round sponge brush, create a randomised polka dot pattern all over the table cloth by alternating each of the theme colours. Leave the finished table cloth to dry overnight before using it.

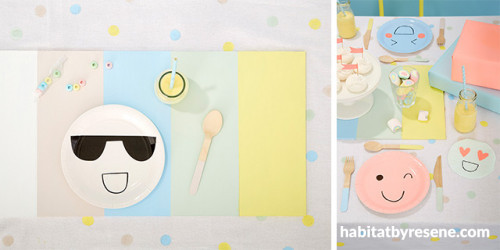
DIY striped table runner
Layering your table with this sturdy runner adds extra colour and helps make cleaning up a breeze. When the party’s over, just brush the crumbs onto the lawn for the birds!
You will need:
- Piece of MDF board (ours was 120cm x 30cm, but you can use a different size to suit your table or make a few and lay them side by side)
- Ruler
- Pencil
- Painters tape
- Resene testpot brush
- Your choice of Resene testpots (we used Resene Smiles, Resene Splat, Resene Ethereal, Resene Alabaster and Resene Kandinsky)

Step 1 Using a ruler and pencil, measure ten stripes, each 12cm wide, down the length of the MDF.
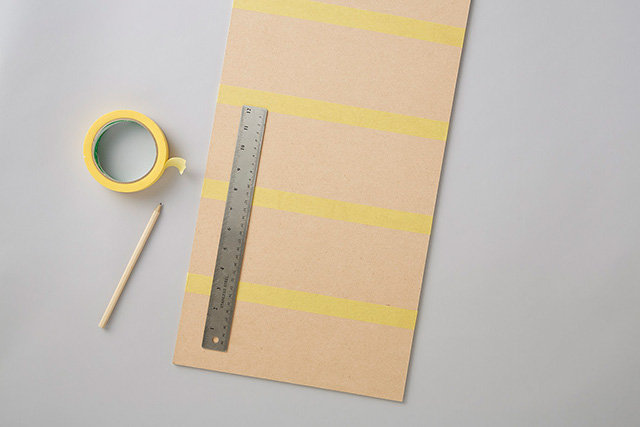
Step 2 Mask the outsides of each of the stripes that you’d like to be the same colour. Paint your first colour then leave the runner to dry for at least one hour.
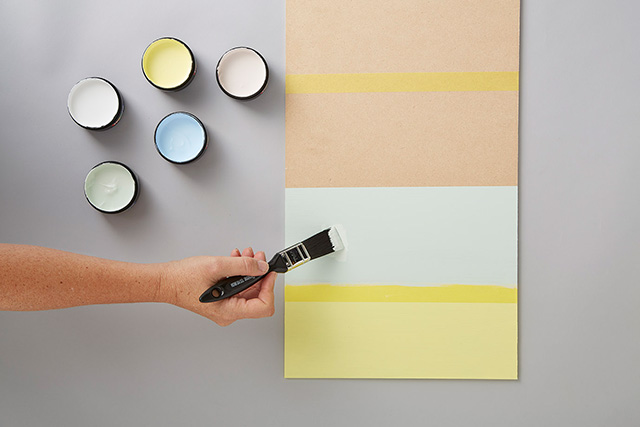
Step 3 Remove the masking and then place a new piece of painters tape against it so that it covers the side of the stripes you just finished painting, allowing the next colour to line up side-by-side with no gap in between. Mask off the other side of the stripes, paint with the next colour, and leave to dry for one hour.
Step 4 Repeat Step 3 for the length of the runner until all the stripes have been painted, leaving time for each to dry as you go. Once everything has dried, you can add it to your table setting and pile on the sweets.
top tips For a little more variety, vary the thickness of the stripes. If you have a steady hand you could freehand paint the stripes with a wider brush.

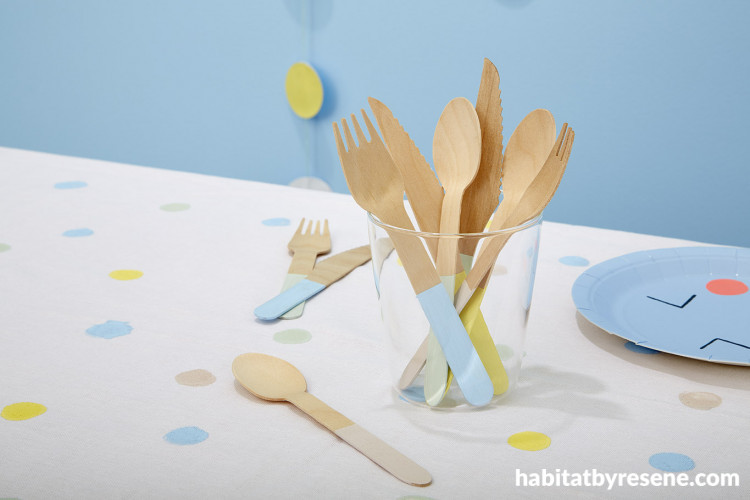
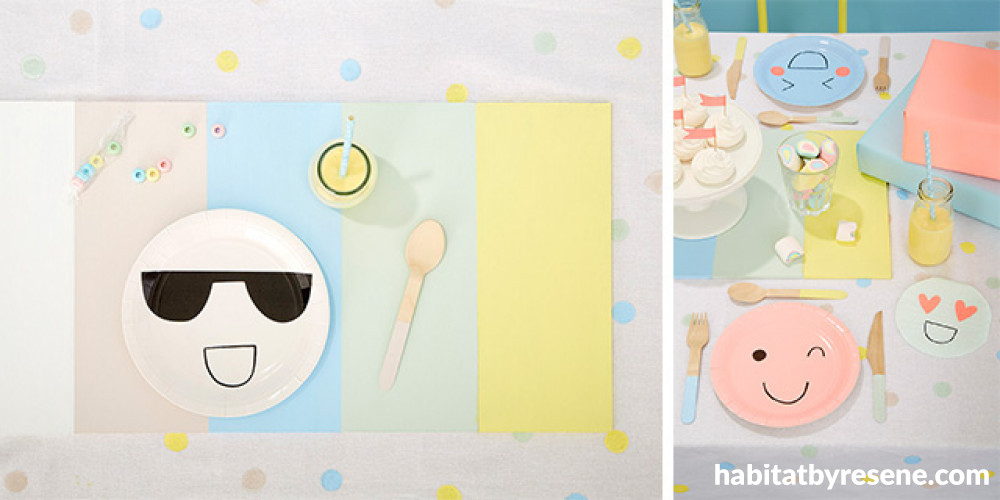
DIY dipped-effect cutlery
Biodegradable wooden or bamboo cutlery only needs a quick coat of paint to make it festive.
You will need:
- Wooden or bamboo cutlery
- Painter’s masking tape
- Your choice of Resene testpots (we used Resene Smiles, Resene Splat, Resene Ethereal, Resene Alabaster and Resene Kandinsky)
Step 1 Measure 5cm from the bottom of the handle and put a piece of masking tape around it.
Step 2 Paint the bottom end of each utensil on both sides and leave to dry upside down in a short drinking glass for one hour. Remove the tape before setting the table.

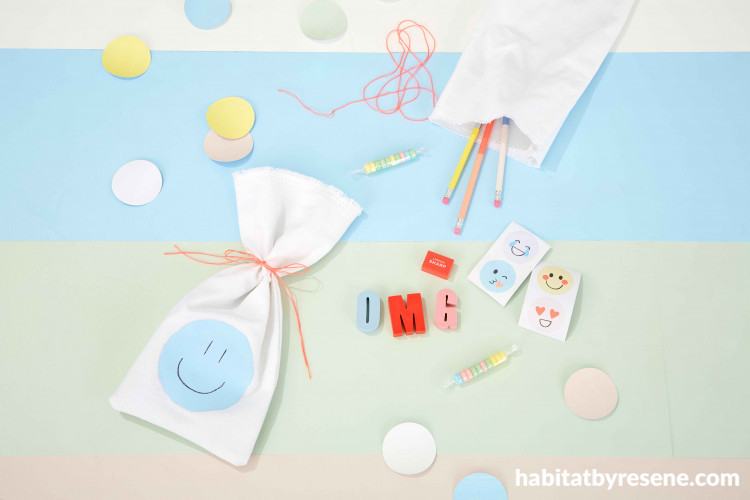
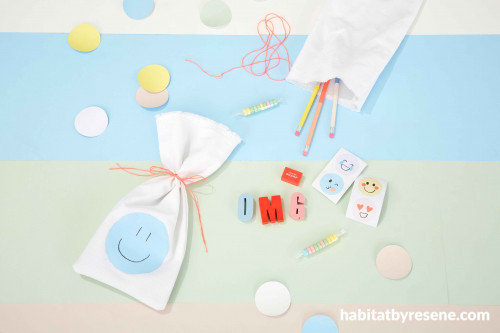
DIY loot bags
If you have a sewing machine, why not skip the disposable plastic bags by whipping up a set of cotton ones that party-goers can reuse again and again to hold onto all their treasures?
You will need:
- Sewing machine
- Mid- to heavy-weight white cotton fabric
- Scissors
- Pencil
- Drinking glass
- Cardboard
- Your choice of Resene testpots - we used Resene Smiles, Resene Splat, Resene Ethereal and Resene Kandinsky
- Resene testpot brush
- Black ballpoint pen
- Ribbon
- Goodies (pencils, sweets, erasers, etc.)
Step 1 For each loot bag, you will need a piece of fabric measuring 36cm x 50cm. Fold the fabric in half with the long ends together then sew the long side and one short side closed, leaving the top open. Turn the bag inside out.
Step 2 Using a drinking glass as a template, trace a circle onto the front of the bag with a pencil. Place a piece of cardboard inside the bag to protect it from the paint bleeding through, then fill in the circle with paint using a small brush. Leave the bags to dry for a couple of hours.
Step 3 Using a black pen, draw an emoji face onto the circle.
Step 4 Fill the loot bag with goodies and cinch it closed with a piece of ribbon.
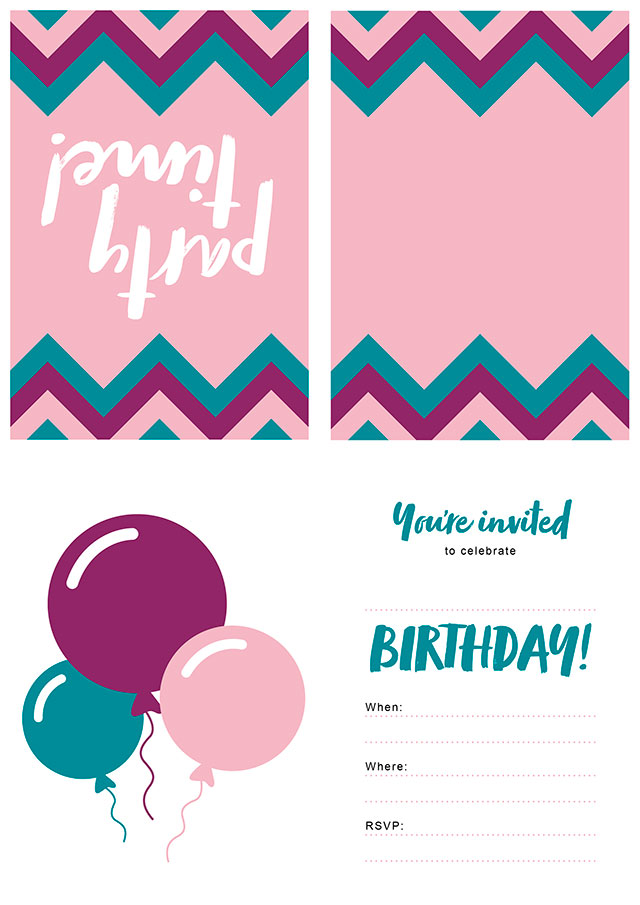
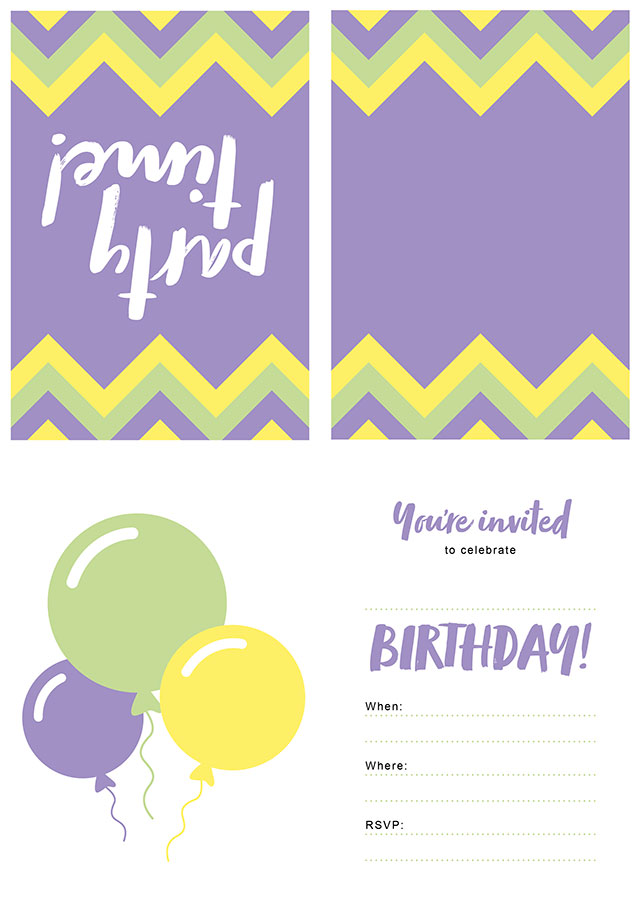
Ready to party? Download one of these free A4-sized invitations.
1. Right-click on the JPEG image and select ‘Save As’.
2. Save the JPEG to your computer desktop.
3. Right-click on the file on your desktop and select ‘Print’.
4. Write in your child’s name and party details.
5. Fold the longer side of paper in half, then fold it in half again so that “party time” ends up on the front of the quarter folded invite with the details in the middle.
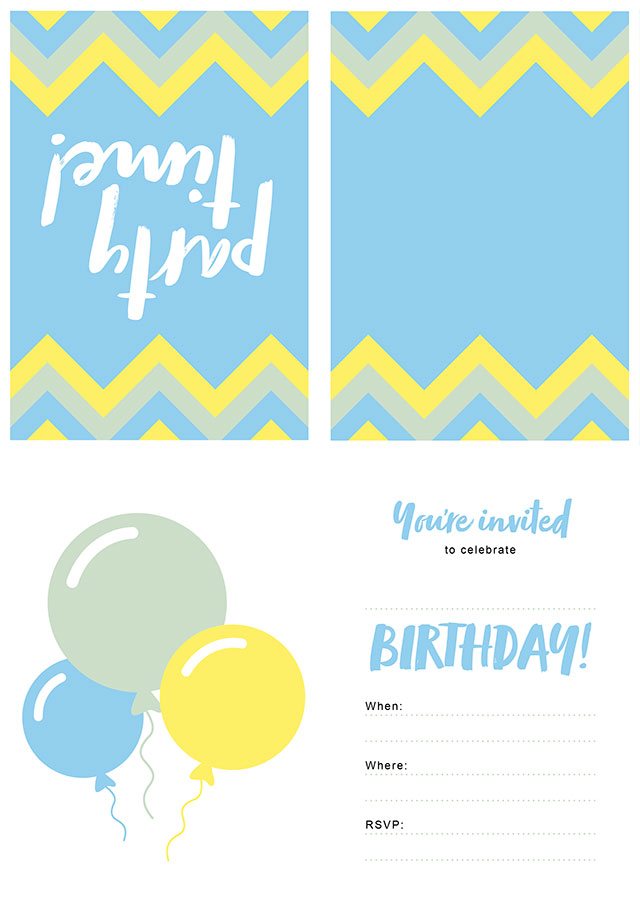
Right-click on the above image then save it before printing it directly from the computer – or, click here to download a PDF version that allows you to type in the party details.
Right-click on the above image then save it before printing it directly from the computer – or, click here to download a PDF version that allows you to type in the party details.
Right-click on the above image then save it before printing it directly from the computer – or, click here to download a PDF version that allows you to type in the party details.

Throw a bonbon-themed birthday bash
Each child looks forward to their birthday celebration all year long, and every parent wants to do what they can to make it memorable. However, throwing a party to commemorate their special day can be both tricky and pricey. The costs of hiring a room and catering, booking activities, and purchasing party favours can really add up quickly. Coordinating it all can be a lot to manage, too – particularly while trying to corral a troop of little ones at the same time.
If you’ve got enough room to spare, why not opt for a party within the comfort and convenience of your own home? The birthday boy or girl will feel more relaxed on their own turf, you’ll know where to find everything you need, and you can save some money – while having a lot of fun – making the decorations yourself.
This cheerful candy-coloured theme, inspired by the ubiquitous rainbow marshmallow lolly, looks good enough to eat. Plus, each of the projects are quick and simple for you and your child to make together using Resene testpots.
Published: 23 May 2019
Do you have a home full of wonderful Resene paint and colour? Send us some snaps by emailing [email protected].
Walls in Resene Splat (bottom) and Resene Kandinsky (top); trestle table legs in Resene Smiles; Pegg stools, from Freedom Furniture, in Resene Smiles, Resene Splat, Resene Ethereal, Resene Alabaster and Resene Kandinsky; chairs in Resene Smiles and Resene Ethereal; floorboards in Resene Smiles, Resene Splat, Resene Ethereal, Resene Alabaster and Resene Kandinsky; table runner in Resene Smiles, Resene Splat, Resene Ethereal, Resene Alabaster and Resene Kandinsky; Make-a-Wish wooden cake topper in Resene Smiles.
Wall in Resene Splat, chair in Resene Ethereal, table cloth and other DIY crafts created with Resene Smiles, Resene Kandinsky, Resene Splat and Resene Ethereal testpots. Pegg stools from Freedom Furniture. Emoji-themed wall art, balloons, napkins, paper plates, loot-bag stickers and temporary tattoos from Meri Meri; Cake topper, pencils, OMG eraser set and lollies from Kmart.
DIY circle garland
This simple garland is cute enough to keep up long after the celebration has ended.
You will need:
- Sheets of heavy white cardstock (240gsm or similar)
- Your choice of Resene testpots (we used Resene Smiles, Resene Splat, Resene Ethereal, Resene Alabaster and Resene Kandinsky)
- Resene testpot brush
- Twine or thin cord
- Round drinking glass
- Scissors or circle punch
Step 1 Paint one side of heavy cardstock or poster paper in each of the theme colours. Leave to dry for one hour.
Step 2 Trace circles by using a drinking glass as a guide then cut them out with scissors. To speed things up, you can use a large craft punch instead.
Step 3 Measure out the length of twine or cord you’ll need to drape across the area you’ll be decorating (our garland was 3 metres long). Lay the twine flat on a table and place the first circle under the twine. Then, glue another circle on top of the bottom circle so the twine is sandwiched in between them. Repeat the process for the whole garland, leaving a 5cm gap between each circle. Once everything’s dry, it’s ready to hang.
hot tip: Make a garland with a different shape to match your theme using a fancy craft punch. Be sure to punch half of your shapes out on the opposite side of the paper if you choose a design that isn’t symmetrical so that both sides of the garland will be colourful.
DIY confetti table cloth
Avoid a nightmarish clean-up by painting confetti right onto the tablecloth.
You will need:
- Round sponge brush
- Heavy white table cloth
- Your choice of Resene testpots - we used Resene Smiles, Resene Splat, Resene Ethereal and Resene Kandinsky
- Scrap cardboard, newspaper or a Resene dropcloth
Step 1 Lay out scrap cardboard, newspaper or a dropcloth to protect your painting surface.
Step 2 Using a round sponge brush, create a randomised polka dot pattern all over the table cloth by alternating each of the theme colours. Leave the finished table cloth to dry overnight before using it.
DIY striped table runner
Layering your table with this sturdy runner adds extra colour and helps make cleaning up a breeze. When the party’s over, just brush the crumbs onto the lawn for the birds!
You will need:
- Piece of MDF board (ours was 120cm x 30cm, but you can use a different size to suit your table or make a few and lay them side by side)
- Ruler
- Pencil
- Painters tape
- Resene testpot brush
- Your choice of Resene testpots (we used Resene Smiles, Resene Splat, Resene Ethereal, Resene Alabaster and Resene Kandinsky)
Step 1 Using a ruler and pencil, measure ten stripes, each 12cm wide, down the length of the MDF.
Step 2 Mask the outsides of each of the stripes that you’d like to be the same colour. Paint your first colour then leave the runner to dry for at least one hour.
Step 3 Remove the masking and then place a new piece of painters tape against it so that it covers the side of the stripes you just finished painting, allowing the next colour to line up side-by-side with no gap in between. Mask off the other side of the stripes, paint with the next colour, and leave to dry for one hour.
Step 4 Repeat Step 3 for the length of the runner until all the stripes have been painted, leaving time for each to dry as you go. Once everything has dried, you can add it to your table setting and pile on the sweets.
top tips For a little more variety, vary the thickness of the stripes. If you have a steady hand you could freehand paint the stripes with a wider brush.

DIY dipped-effect cutlery
Biodegradable wooden or bamboo cutlery only needs a quick coat of paint to make it festive.
You will need:
- Wooden or bamboo cutlery
- Painter’s masking tape
- Your choice of Resene testpots (we used Resene Smiles, Resene Splat, Resene Ethereal, Resene Alabaster and Resene Kandinsky)
Step 1 Measure 5cm from the bottom of the handle and put a piece of masking tape around it.
Step 2 Paint the bottom end of each utensil on both sides and leave to dry upside down in a short drinking glass for one hour. Remove the tape before setting the table.
DIY loot bags
If you have a sewing machine, why not skip the disposable plastic bags by whipping up a set of cotton ones that party-goers can reuse again and again to hold onto all their treasures?
You will need:
- Sewing machine
- Mid- to heavy-weight white cotton fabric
- Scissors
- Pencil
- Drinking glass
- Cardboard
- Your choice of Resene testpots - we used Resene Smiles, Resene Splat, Resene Ethereal and Resene Kandinsky
- Resene testpot brush
- Black ballpoint pen
- Ribbon
- Goodies (pencils, sweets, erasers, etc.)
Step 1 For each loot bag, you will need a piece of fabric measuring 36cm x 50cm. Fold the fabric in half with the long ends together then sew the long side and one short side closed, leaving the top open. Turn the bag inside out.
Step 2 Using a drinking glass as a template, trace a circle onto the front of the bag with a pencil. Place a piece of cardboard inside the bag to protect it from the paint bleeding through, then fill in the circle with paint using a small brush. Leave the bags to dry for a couple of hours.
Step 3 Using a black pen, draw an emoji face onto the circle.
Step 4 Fill the loot bag with goodies and cinch it closed with a piece of ribbon.
Ready to party? Download one of these free A4-sized invitations.
1. Right-click on the JPEG image and select ‘Save As’.
2. Save the JPEG to your computer desktop.
3. Right-click on the file on your desktop and select ‘Print’.
4. Write in your child’s name and party details.
5. Fold the longer side of paper in half, then fold it in half again so that “party time” ends up on the front of the quarter folded invite with the details in the middle.
Right-click on the above image then save it before printing it directly from the computer – or, click here to download a PDF version that allows you to type in the party details.
Right-click on the above image then save it before printing it directly from the computer – or, click here to download a PDF version that allows you to type in the party details.
Right-click on the above image then save it before printing it directly from the computer – or, click here to download a PDF version that allows you to type in the party details.


the look
If you're stuck on what
colour to use or need colour
advice, try out the Resene
Ask a Colour Expert service.
the look
If you're stuck on what
colour to use or need colour
advice, try out the Resene
Ask a Colour Expert service.

