
latest
habitat tv

Say goodbye to the morning scramble for keys, coats and sunglasses and hello to this… see this and more videos
blog

Re-living the 1980s through art
Clint C is an artist whose work instantly sparks recognition and joy. Based in Hamilton,… more
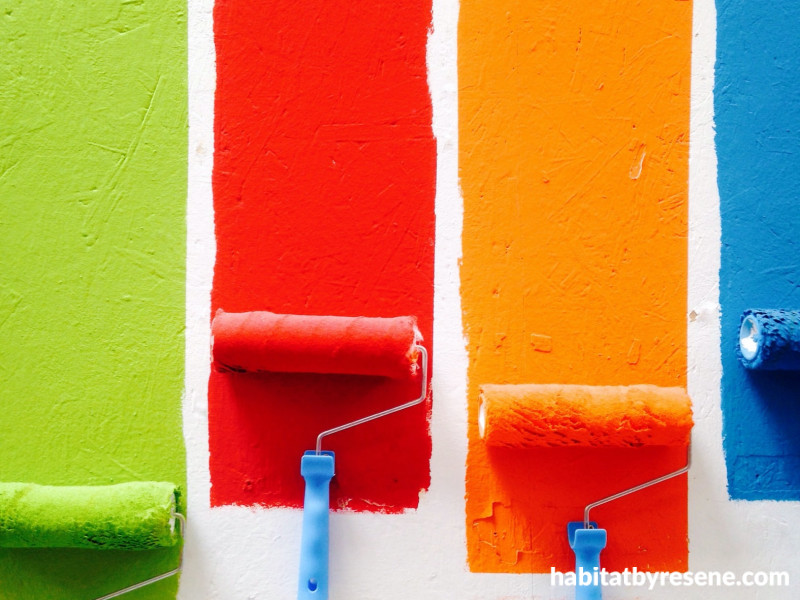
Should I spray or should I roll now?
20 May 2020
So, you’ve chosen your colour palette, picked up your paints from your local Resene ColorShop and are feeling excited for how gorgeous the new colours will look on your walls. But when it comes down to how the actual painting is going to get done, you may find yourself with a few questions on how to go about it. If you’ve decided to go the DIY route, one choice you may have on your hands is whether you should use a roller on your walls or using a spray unit. Like most things in life, there are pros and cons to each.
While spraying is great for surfaces with particularly high texture (such as stucco ceilings or rough plaster walls) and new builds, Jay Sharples of Resene says it takes some experience and skill to achieve a professional finish with a spray unit, while rolling is much easier for a DIY painter.
Rolling may be a slower process, but it typically takes less paint to get the job done. And, the time it takes may actually be similar if areas you want to keep paint-free need to be masked off before spraying. Rolling also gives you more control over where you’re applying the paint. Typically, painters only spray interiors of new builds before many other aspects of the home have been installed rather than during repaints as it can be difficult and especially time consuming to ensure other fixtures and finishes such as floors, rugs, tiles, appliances, furniture, etc. are properly protected. And while spraying is great for getting into all the gaps without having to ‘cut in’ with a brush, rolling requires much less clean up and wastage overall.
“Another pro for rolling your paint is that you don’t have to spend thousands of dollars on a spray unit that you might not use again,” says Jay.
“Spraying is a great option for full-time painters given the right circumstances, such as painting a roof or a new empty house. But for a normal DIY situation, rolling is a sufficient method of application.”
If you decide to go the rolling route, Jay gives this great advice for getting it right:
• Each Resene paint has a recommended roller sleeve to go along with it, and these sleeves have been developed to help you achieve the best possible finish. Ask the staff at your local Resene ColorShop if you need advice on choosing the correct sleeve type and length.
• To start, use a paintbrush to cut-in around all the edges first – but rolling should begin while your cut-in edges are still wet. This will help blend the paint together so that you don’t get a ‘picture-framed’ finish.
• When you start rolling a wall, it is best to use an extension pole. The Macgyver Boss pole (available at Resene ColorShops) is ideal and will help you achieve a more uniformed finish, as it helps to apply the paint with even pressure over large areas.
• Load the roller with paint. Then, in a rough ‘W’ motion, roll a 1m2 area, re-load the roller and repeat until you have a 4m2 area painted.
• At this stage, you need to ‘lay off’ the paint. To do this, start about 30cm above your skirting board at one end of the wall, apply the roller to the wall with light pressure, drop down to the skirting board and then up towards the ceiling in one motion. Move down the wall, overlapping each time by approximately a quarter roller length. This step will help blend the roller lines together and give a uniformed finish.
• When you’re taking a break or overnight, wrap your paint laden roller in clear wrap or a sealed plastic bag – this will help to keep the paint fresh and save you washing up.
When faced with a big project like painting your entire house, it can be tempting to believe that ‘there must be a faster way’. The truth is, the only fast way to paint an entire house is to do it the ‘wrong way’ – not taking the time to do the proper cleaning or preparation like patching holes, not taking the time to mask and protect areas that you don’t want to get any paint on, not priming surfaces that need to be primed, not applying an adequate number of coats, and not letting each coat dry long enough before adding the next one. However, this is all time well spent and putting in the effort, as you’ll end up with a finish that’ll look great for years to come. Plus, you may find it relaxing or meditative when you get stuck into it – or even fun!
For more helpful DIY tips and tricks, there are heaps of great ‘how to’ videos on the Resene website and useful info sheets can be found at your local Resene ColorShop.
Published: 20 May 2020

