
latest
habitat tv

Say goodbye to the morning scramble for keys, coats and sunglasses and hello to this… see this and more videos
blog

Reader roundup: Happy dogs, custom colours and a small Resene fan
We love to share what you have been up to with Resene paints and products!… more

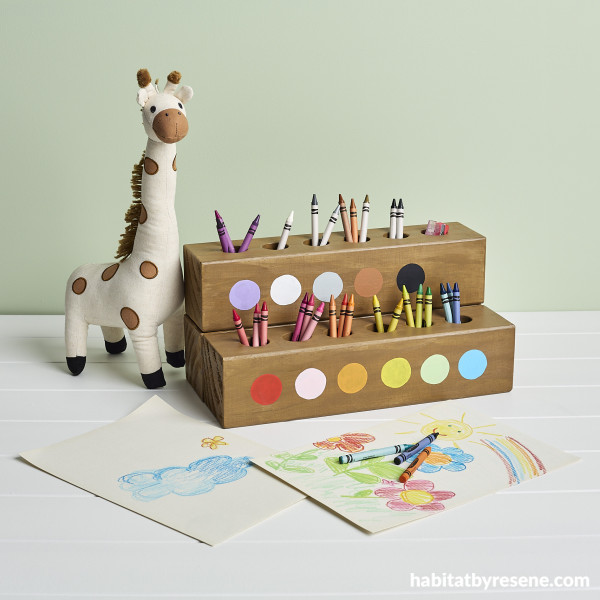
Rainbow creative station
07 Mar 2024
Let the creative juices flow while still keeping things tidy with this simple organiser.
artists will thank you.
You will need:
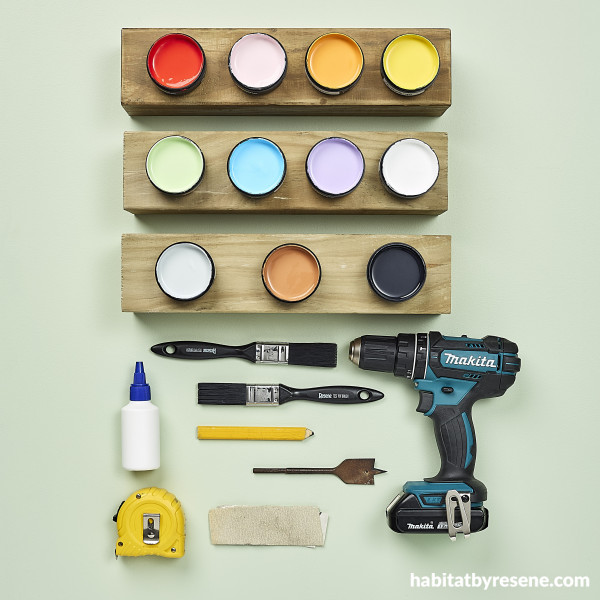
- 3x 90x90mm pieces of timber, cut to 370mm length
- Drill
- Spade drill bit, 30mm
- Sandpaper
- Pencil and ruler
- Resene testpot in Resene Colorwood Bask
- Resene testpots in the colours of your choice for the rainbow. We used Resene Get Reddy, Resene Princess, Resene Hi Jinx, Resene Fizz, Resene Tutti Frutti, Resene Snap, Resene Dancing Girl, Resene Cotton Wool, Resene Gull Grey, Resene Twizel and Resene Jaguar
- Resene testpot brush
- Artist’s brushes
- Wood glue
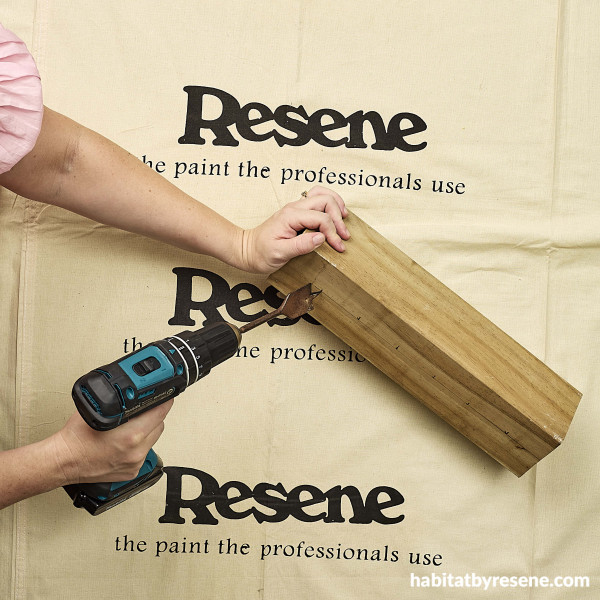
Step one: On two of the wood pieces, measure where the six holes (per piece) should go and mark with pencil. Cut the holes using the spade drill bit down to 50mm deep.
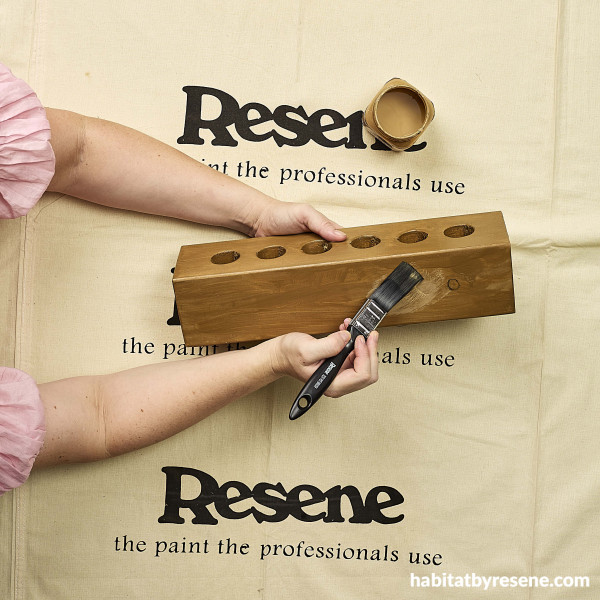
Step two: Sand the wood pieces, including the holes then wipe with a damp cloth. Stain all the wood pieces in Resene Bask. Leave to dry.
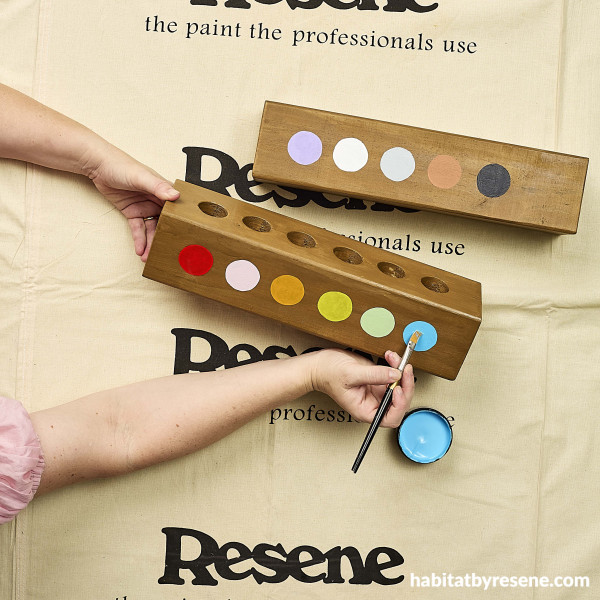
Step three: On one piece with the holes, paint the first six colours of the rainbow in circles on the front side of the piece. We used Resene Get Reddy, Resene Princess, Resene Hi Jinx, Resene Fizz, Resene Tutti Frutti and Resene Snap. On the second piece, repeat with the remaining five colours - we used Resene Dancing Girl, Resene Cotton Wool, Resene Gull Grey, Resene Twizel and Resene Jaguar. We left the last one blank to use to store erasers, pencil sharpeners, etc.
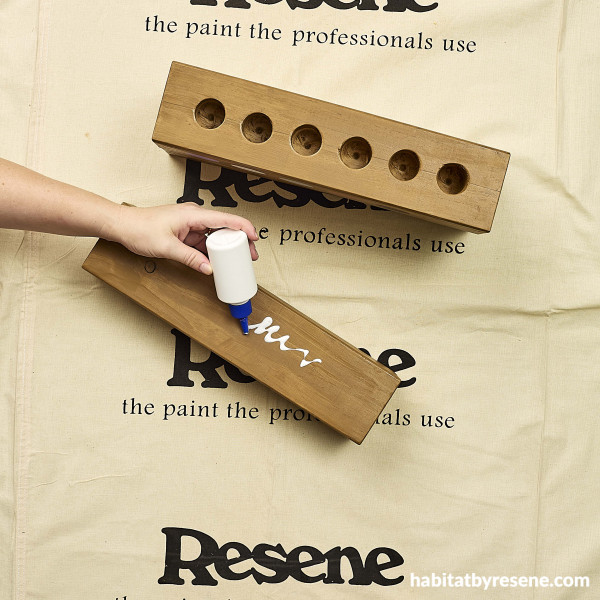
Step four: Once dry, stack the second piece on to the piece without any holes. Glue together using wood glue.
Step five: Glue the first piece on to the front of the wood piece without any holes. Leave to dry according to instructions.
Project Leigh Stockton
Images: Bryce Carleton
Published: 07 Mar 2024
more inspiration

Hues on the move: A DIY rainbow mobile
Get ready to add a vibrant touch to your nursery,… more

Show your support this ANZAC Day with this DIY wreath
Anzac Day is a national day of remembrance in New… more

Sunny side up: Bookends for any weather
Brighten up your bookshelf and organise your books at the… more

A roar-some dish: DIY animal plates
Impress your guests with these DIY animal plates! The Resene… more

Glowing zoofari: Make your own animal themed lamp
Here’s a great DIY to do with the kids over… more


 look book