
latest
habitat tv

Say goodbye to the morning scramble for keys, coats and sunglasses and hello to this… see this and more videos
blog

Reader roundup: Happy dogs, custom colours and a small Resene fan
We love to share what you have been up to with Resene paints and products!… more
Get Growing: make some steps
20 Oct 2016
One of the primary jobs of a landscape designer is to create cohesion. Widening steps, removing barriers and creating continuity using materials, plants, colour selection and objects are all tools, which can be used to build cohesion in the landscape.
Landscape designer Justin Newcombe bought these skills to the garden makeover in the fourth episode of the Get Growing Roadshow.
Natalie and Matt have been in their house a short while and have made the most of the existing outdoor entertaining area - a deck elevated to the level of a set of french doors. Elevated decks can, however, lack privacy from the neighbours. Justin’s solution was to create a new entertaining patio at ground level and connect it to the deck via a set of full-width steps. This gives Natalie and Matt the ability to uncluttered the deck with excellent flow to a new, private entertainment area.
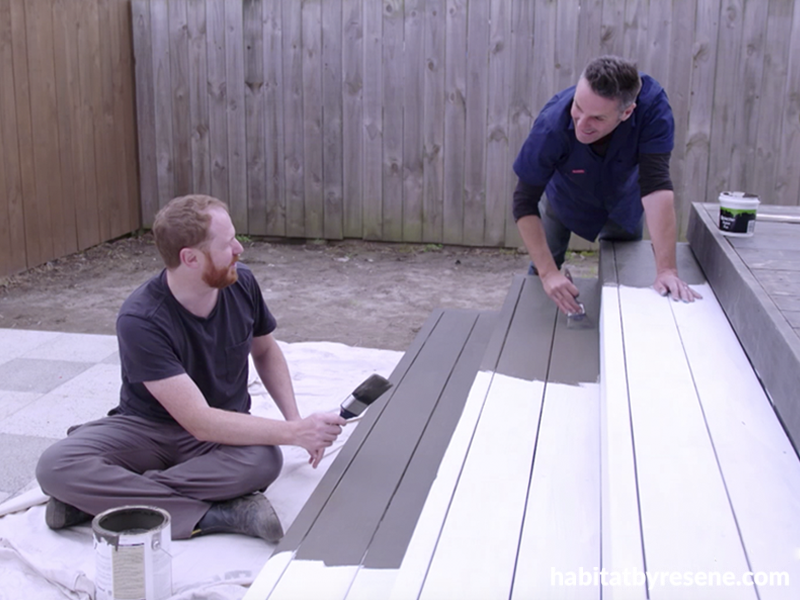
To create a non-slip surface Justin used Resene Non-Skid Deck & Path in Resene lronsand. This product can be tinted to blend in with your other surface colours.
Here’s how to build the steps:
1. Measure the drop from the top of the deck to the patio. Most steps are 150mm high. If your bottom step falls outside this measurement you may want to consider a landing area or adjusting the height of the paved area if it hasn't already been installed. To get the number of steps required divide the overall measurement by 150.
2. Measure the tread area and multiply it by the number of steps. Our tread area is 300mm so our two steps will extend 600mm from the existing deck.
3. Using string lines, profile the outline of the steps then dig six post holes and set in posts on each corner. Because our steps are so wide we are also placing a set of posts halfway along. The posts should be set at the finished paving height.
4. Using 150mm x 50mm H3.2 treated timber, build two rectangles with mitred edges. These form the outline of the steps. The first one will be 600mm wide for the bottom step, the second 300mm wide for the top step.
5. Place and fix the bottom step to the posts then insert a series of joists. The joists should be set the thickness of the decking below the top of the step so the decking can be inserted.
6. Set the joists front to back every 450mm then using 100mm x 50mm H3.2 timber screw a plate in between and at the same height as the joists, to the outside framing timber. This is what the decking will be attached too. Screw in the decking working front to back until it overlaps the 300mm mark where the second step starts.
7. Repeat step 6 for the second step.
8. To give a safe non-slip finish, paint with Resene Quick Dry waterborne primer undercoat then paint with Resene Non-Skid Deck & Path in Resene lronsand. We tinted this to match the deck.
Did you know… that Resene Non-Skid Deck & Path is a textured waterborne finish, designed to provide a comfortable walking surface for all interior and exterior situations where a non-skid finish is desired? Available in a desirable low sheen finish, Resene Non Skid Deck & Path may be tinted to complement existing decor, both inside and out. The finish has a comfortable grit texture to give feet and shoes something to grip onto, reducing the risk of accident.
Published: 20 Oct 2016
more inspiration

Renowned local artist completes educational mural for rural school
Hawkes Bay artist Stan Mans recently completed a new mural… more

Restore, re-tell and remember this ANZAC Day
The NZ Remembrance Army (NZRA) is restoring the graves of… more

Which white is right? Find out in our latest podcast episode!
Our habitat by Resene podcast series, If These Walls Could… more

Little love, grand designs: A wonderful, whimsical wallpaper collection
The Resene Little Love Wallpaper Collection is designed to capture… more

Help decide who will be crowned the Auckland Regional Art Battle Champion 2024
The Auckland city heats saw 70+ incredible artists compete for a… more


 look book